| 115th (North Midland) Field Regiment, RA 315 (North Midland) Medium Regiment, RA 115 (Leicestershire) Field Park Squadron, RE | |
|---|---|
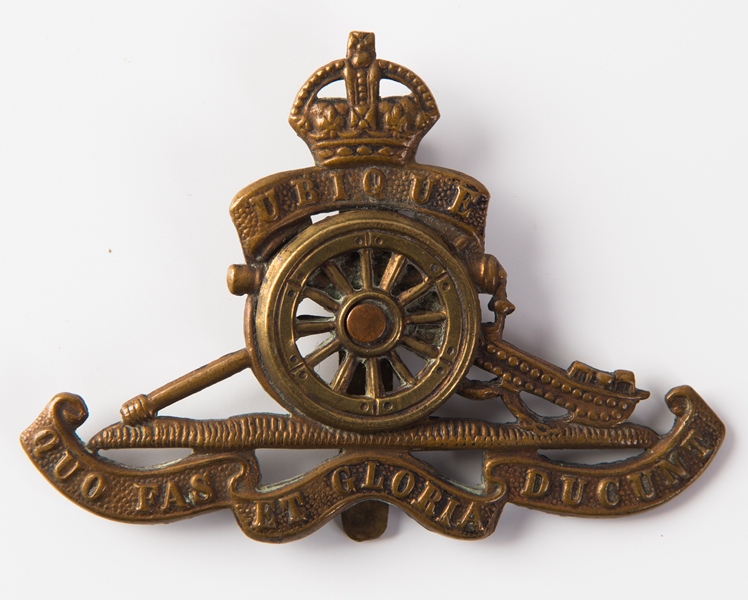 Cap Badge of the Royal Artillery | |
| Active |
1939–1950 1961–1967 |
| Country |
|
| Branch |
|
| Role |
Field Artillery Medium Artillery Field Park Engineers |
| Part of |
British Expeditionary Force 19th Indian Division |
| Engagements |
Battle of France Burma Campaign |
The 115th (North Midland) Field Regiment was a part-time unit of Britain's Royal Artillery (RA), raised as part of the Territorial Army (TA) just before the outbreak of World War II. It served in the Battle of France and the Burma Campaign, and in the postwar TA.
Origin
The TA was doubled in size after the Munich Crisis in 1938, with many existing units forming duplicates of themselves. The 60th (North Midland) Field Regiment, RA, achieved this by separating its 239th (Leicestershire) and 240th (Nottinghamshire RHA) Batteries to form a new 115th Field Regiment, RA. Prior to joining the 60th in 1921 these batteries had been the Leicestershire Royal Horse Artillery and Nottinghamshire Royal Horse Artillery respectively. The new unit established its Regimental Headquarters (RHQ) at Leicester on 5 May 1939 under the command of Lieutenant-Colonel Maurice Simpson, who had previously been the commander of 239 Fd Bty. It took on the role of an Army Field Regiment in Northern Command.[1][2][3][4] (For some reason the new regiment initially took the battery numbers 238 and 240, even though the original 238 had been a Lincolnshire battery based at Grimsby. The logical numbering was only restored by an order of the Adjutant-General's office on 11 August 1941.[5][lower-alpha 1])
The establishment of a field regiment at this time was two batteries each of three troops of four guns, giving a total of 24 guns. These were still World War I 18-pounders re-equipped with pneumatic tyres and towed by motor tractors.[7][8][9]
World War II
Battle of France

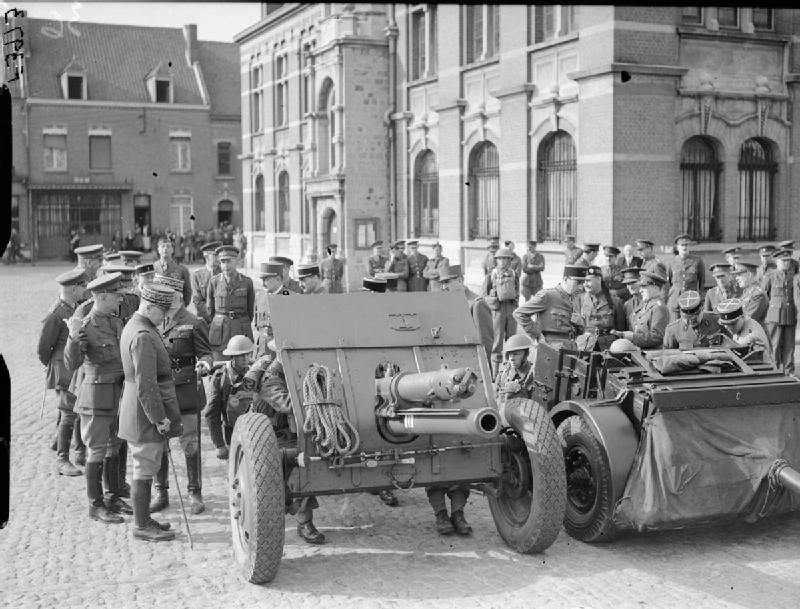
An 18-Pounder being inspected in France, April 1940.
When the TA was mobilised in late August 1939, 115th Army Field Regiment was at its annual training camp at Bridlington; it returned to Leicester to mobilise, 238 Bty at the Brazil Street Garage and 240 Bty at Avenue Road School, shortly afterwards moving to the Leicestershire County Cricket Club ground at Aylestone Road. After six weeks the regiment had grown to a strength of 31 officers and around 620 other ranks (ORs), and on 13 October it moved to Quebec Barracks at Bordon Camp.[5]
On 2 March 1940 the regiment, with its Light Aid Detachment (LAD) of the Royal Army Ordnance Corps (RAOC) and Signal Section of the Royal Corps of Signals, began moving by road to Southampton to embark for France to join the British Expeditionary Force (BEF). The guns and vehicles were loaded into the SS Clan MacAlister, which sailed on 4 March while the advance party of personnel boarded the SS Ben-my-Chree. The rear party went by train to Southampton to embark on the SS Ulster Prince on 8 March, and by 10 March the whole regiment was concentrated in billets at Yvetot. It then moved by stages to Mesnil-Martinsart where it joined the BEF and began intensive training, moving to Bapaume in mid-April.[10] As an army regiment, 115th Fd Rgt was part of the General Headquarters (GHQ) Reserve, attached to 2nd Division in I Corps from 24 April. When the 'Phoney War' ended with the German invasion of the Low Countries on 10 May, the regiment had just moved up to the Belgian frontier and been given an anti-tank (A/T) role, for which it was digging defences.[7][9][10][11][12][13]
The BEF abandoned the frontier defences and followed the pre-arranged Plan D, advancing into Belgium to take up positions along the Dyle. 115th Army Fd Rgt crossed into Belgium on 15 May with 48th (South Midland) Division, the reserve formation for I Corps, via Waterloo and Denderwindeke. By dawn on 18 May it was deployed alongside 18th Fd Rgt of 2nd Division to cover Enghien. However the collapse of the Dutch forces and the German Army's rapid breakthrough in the Ardennes soon threatened the BEF's positions and it began to withdraw to the Escaut. Early on 19 May the regiment crossed back across the Escaut and the guns were dug in near St Maur to support 48th (SM) Division, which had been working on the Escaut defences.[10][14][15]
The German Army Group B began its attacks on this position on 20 May. 115th Army Fd Rgt came under fire from 07.00, one gun position of A Troop quickly receiving a direct hit and suffering casualties, 240th Fd Bty replying in support of 7th and 8th Battalions Royal Warwickshire Regiment of 143 Bde from 11.00. The regiment established a joint Observation Post (OP) with 1st Heavy Regiment in the church steeple of St Maur. The guns of 48th Division and its neighbour, 2nd Division, were heavily engaged, breaking up several attempts to cross the river, though by nightfall the enemy had driven the Royal Warwicks out of Calonne. Enemy firing went on all day, by the end of which B and C Troops had each lost two guns, and F Trp one. During the night the area was taken over by troops of 2nd Division, though 8th Royal Warwicks remained in the line. 2nd Division grouped 115th Army Fd Rgt with its own 10th Fd Rgt.[10]
Next morning the full German attack began as they established small bridgeheads near Calonne. Lieutenant-Colonel Simpson gathered stragglers from the Royal Warwicks and sent them to join a company of 2nd Dorsetshire Regiment, the support battalion positioned next to his D Troop. The regiment received urgent messages from the infantry that all possible fire was needed to suppress the German mortars and machine guns. Despite the church tower coming under fire the OP successfully picked out specific targets: one machine gun position was destroyed by just four rounds, while an enemy OP in a chimney was engaged with Shrapnel shell by D Troop. The bridges between Calonne and Antoing were targeted, and enemy infantry concentrating for an attack were dispersed by shellfire. One infantry unit sent back a message to the gunners, 'Thank God for you', and the Commanding Officer (CO) was congratulated on the regiment's shooting by the CO of the 1st Royal Scots. However, by the end of the day the ammunition position was very bad, many vehicles had been put out of action by enemy fire, and F Troop had lost all its guns. The regiment was ordered to withdraw in the dark to previously-chosen positions in the rear.[10][16]
By now the German forces to the south had reached the coast and the BEF was cut off from the rest of France. On 22 May 2nd Division and 115th Army Fd Rgt were switched to the 'Canal Line' facing southwest. All the regiment's remaining vehicles were packed, many of the men riding on the roofs and trailers. Next day the regiment was established in A/T positions, with 238 Bty (6 serviceable guns) covering the La Bassée Canal and 240 Bty (7 serviceable guns, including 2 borrowed from 238 Bty) defending I Corps HQ at Armentières. On 24 May, 238 Bty was switched to Mont Kemmel, but two guns went missing in the confusion. The four remaining guns were deployed facing north and west to hold off enemy tanks; there were no infantry present, but that day and the next were quiet. The gunners dug their guns in, established motor patrols, manned infantry posts and prepared Molotov cocktails to use against enemy tanks, while the retreating BEF streamed past its positions.[10][17]
By now the decision had been made to evacuate the BEF through Dunkirk (Operation Dynamo) where a bridgehead was being organised, and the 'pocket' began to shrink as units were pulled back to the port. On 28 May RHQ and 238 Bty were ordered to abandon their guns after removing the sights and breech blocks and make their way to Dunkirk. Not being formally part of any formation, the army field regiments largely had to fend for themselves during the retreat. Once within the perimeter the men of 115th Fd Rgt immobilised their vehicles and joined the throngs awaiting evacuation. They were taken off the Dunkirk Mole early on 29 May on various ships that landed at different ports in Southern England, one party even being taken to Cherbourg before crossing safely to England. On arrival in Dover, Lt-Col Simpson volunteered to return to Dunkirk to help organise the evacuation, but permission was refused.[18][19]
Meanwhile, the detached 240 Bty had taken over positions at Armentières from 115th Fd Rgt's parent 60th (NM) Fd Rgt. The town was being bombed and on 26 May the battery pulled back with I Corps HQ, reaching Uxem by the end of 27 May, where it took up A/T positions. On 29 May it was ordered to join 1st Division at Bray-Dunes. It drove through enormous traffic jams, having to leave two guns bogged down by floodwater at the Canal de Bergues. The remaining guns were dug in to defend the Dunkirk perimeter and all personnel not required at the guns were sent to the beach for embarkation. The battery positions were heavily shelled on 31 May. As the pocket shrank, three guns were ordered back to new positions, the other three were destroyed and the crews evacuated. Early on 1 June it was reported that 1st Division had withdrawn past the gun positions towards Dunkirk and the remaining men of 240 Bty were evacuated that morning, reaching Dover at 09.50.[10]
The two missing guns from C Trp, under 2nd Lieutenants E.B. Loveluck and John Caven, had found themselves at Merville bridge, north of Béthune, with 6th King's Own (a GHQ pioneer battalion).[9][10][11] Cavan emplaced his 18-pounder in a garden covering the approach to the village. A column of tanks appeared, with crews dressed in French uniforms. But they were Germans who opened fire on the gun positions, setting fire to the gun tractors. However, the first shot from the 18-pounder in the garden destroyed the leading Panzer. When two more appeared the gunners blew the turret off one and the second crashed into it and caught fire. In the smoke and confusion another two Panzers appeared, but the gun crew set the first of these on fire and achieved a hit on the second. Three men of the 18-pounder crew were wounded in the engagement and one died; Cavan was captured while evacuating them to a Casualty Clearing Station. Meanwhile, Loveluck's gun was in a nearby woodyard, where he organised some of the King's Own to cover the guns. This gun prevented anyone crossing the canal. The Commander, RA, of 2nd Division believed that this section's action with the King's Own had saved the situation.[10][20][21][22] Loveluck and Caven were awarded the Military Cross (MC).[23][24][25]
Home Defence
After evacuation the men were scattered at reception centres all over England and Wales – 240 Battery HQ reached the Anti-Aircraft training camp at Aberporth – but by mid-June most of the regiment and its signal section had concentrated at the Showground Camp at Okehampton in Devon, from which it moved to Leicester and was billetted in the Highfields area. Equipment was very scarce, particularly field guns, so I Corps artillery was to be deployed as lorry-borne infantry to counter possible paratroop attacks, but the corps artillery was abolished shortly afterwards and 115th Fd Rgt was sent to North Cave in East Yorkshire to form an A/T battery and a static beach defence battery in Northern Command. Detachments were then sent to man old static and mobile guns in Eastern Command at London (A Trp at C1 Bty) and at Chatham (B Trp at C2 Bty), Ashford (C Trp at C4 Bty) and the Isle of Sheppey (E and F Trps at C6 Bty) in Kent while the rest of the regiment was reduced to a training cadre of 5 officers and 100 ORs to train reinforcement drafts. In mid-July this group was sent to form two infantry units based at Godinton Park in Kent and Gatwick Aerodrome in Sussex. As the regiment left North Cave the band was presented with new instruments by the CO's mother to replace those lost at Dunkirk.[5][10][26][27]
RHQ with the Signal Section and LAD were established at Godington Park, where C4 and C6 mobile batteries were also based, and the regiment sent a detachment to take over X Static Bty at Whitstable, Pegwell Bay and Kingsdown on the Kent coast. It came under the command of 1st London Division, holding the vital East and South-East corner of England in Eastern Command. The regiment had to exchange some of its BEF veterans with inexperienced men from 148th (Bedfordshire Yeomanry) Fd Rgt, and in September the Signal Section was posted away to 147th (Essex Yeomanry). Meanwhile, RHQ and the cadre moved to Horsmonden and Maidstone and continued training large intakes of recruits and constructing defences. The Battle of Britain was being fought overhead, and some casualties were suffered from bombing. In the beginning of November most of the recruits had completed at least four weeks' training, and large numbers were drafted to form 910, 911, 912 and 913 Home Defence Btys in a new 3rd Defence Rgt RA, others went to 1st and 2nd Defence Rgts, while drafts of 20–30 men went to each of 1st London Division's artillery regiments. 115th Fd Rgt took on two more large intakes of recruits, who were posted to the same regiments after a month.[5][26][28][29]
At the beginning of December, 115th Fd Rgt was able to begin reforming its original batteries and troops as men returned from detachment to the defence batteries. It moved to Seaford, East Sussex, and then to Great Yarmouth in Norfolk on 31 December, where it was attached to the newly-formed Norfolk County Division in II Corps, with the CO acting as Commander RA (CRA) for the division and establishing HQRA for the division at Norwich. The regiment took over from 148th Fd Rgt in beach defences and positions covering Royal Air Force airfields at Horsham St Faith and Swanton Morley. It finally received eight field guns, even though these were US-built French 75mm guns of World War I vintage with four Portee lorries and four 15-hundredweight towing trucks. RHQ was established at Loddon, 238 Bty at Gt Yarmouth and 240 Bty at Gorleston, later at Drayton. RHQ also had 902 Defence Bty and D Bty of 57th (Newfoundland) Heavy Rgt. Once in position, the regiment was ordered by HQRA to 'dig like badgers'.[5][30]
It had been planned for some time that field regiments would adopt an organisation of three eight-gun batteries, but shortages meant that in most units this reorganisation was not completed for many months. In February 1941, 115th Field Regiment organised itself into 238 (239 from August 1941), 240 and 480 Fd Btys, with 75 men drafted from 902 Defence Bty to make up the numbers required. Training continued throughout the spring and summer of 1941 as equipment slowly arrived.[5][8][31][32][33]
In October 1941 the regiment changed from a static role in the Norfolk Division to a mobile one in the Lincolnshire County Division in I Corps: in the event of invasion the batteries were to support the reserve battalion of each brigade in a counter-attack role. RHQ moved to Louth and later to Sleaford, and the batteries attended a practice camp at Redesdale Camp. When the county divisions were disbanded in December, 115th Fd Rgt transferred to the command of 48th (SM) Division, supporting 143 Bde once more. Then on 22 February 1942, 115th Fd Rgt mobilised with its Signal Section and LAD as part of the War Office Reserve, preparatory to proceeding overseas[5][34][35] It sailed for India shortly afterwards, and disembarked at Bombay on 19 May 1942.[33] During 1942 the regiment gained the subtitle 'North Midland' held by its parent unit, 60th (NM) Fd Rgt.[1]
India and Ceylon
On arrival in India the regiment moved to Bangalore and joined 19th Indian Division, but within a month transferred to 20th Indian Division and moved with that formation to Ceylon, where it stayed in garrison for over a year.[33][36][37]
On 27 November 1943 the regiment returned to Bangalore in India, where it soon rejoined 19th Indian Division, which had been assigned to South East Asia Command (SEAC) for the forthcoming Burma Campaign 1944–45. It spent the early part of 1944 in divisional artillery practice shoots and combined operations exercises in preparation for planned amphibious landings (Operations Bullfrog and Culverin). These were scrapped, and 19th Indian Division was made available for the land campaign to reconquer Burma after the Battles of Imphal and Kohima.[33][38][39][40][41]
On 6 June 1944 Lt-Col Simpson left the regiment to go to 50th RA Reserve Regiment (Field), and was succeeded by Lt-Col Ronald Nicholson, who had previously been chief instructor of the Officer Cadet Wing of the School of Artillery at Deolali. Nicholson had experience of jungle fighting in the Arakan Campaign 1942–43, and concentrated on training the regiment for close shooting at ranges of 150 yards (140 m) or so.[39][42]
Burma Campaign


Formation sign of 19th Indian Division.
It was not until 26 September 1944 that the regiment began the move to the Burma frontier, the vehicles and guns driving 2,400 miles (3,900 km) across India, with the remaining personnel going by train. It was concentrated at the Manipur Road by 26 October.[33][39][42] Operation Capital to clear Japanese forces from Northern Burma began in November, and as 19th Indian Division marched towards Indaw it was supplied by air to reduce the reliance on inadequate lines of communication through the malarial jungles. The divisional artillery had to lend its vehicles to help the infantry forward. By mid-December the division's leading brigades had seized Pinlebu and crossed the Chindwin River, followed by the divisional artillery, who had to repair the track (renamed 'Artillery Way') before they could get their guns forward and then cross the river by a single heavy raft. From there Japanese resistance stiffened as the division advanced south towards Shwebo. On 26 December Lt-Col Nicholson reported that 239 Fd Bty had fired the regiment's first rounds in anger since leaving Dunkirk.[42][43][44][45] The regiment then pushed on in support of 98th Indian Infantry Brigade, leapfrogging forward by batteries, constantly in action against Japanese rearguards, but having to conserve ammunition because it all had to be air-dropped. Often the OPs had to climb trees to get any view. On 3 January the CO was leading the OP parties forward when they got in front of the leading infantry and his jeep came under fire. Protected by an improvised armoured windscreen of teak and bricks, Nicholson and Driver Bennett returned fire with Sten guns (which both jammed) and grenades while Nicholson's batman, Gunner Francis Alderson, unhooked the trailer so that the jeep could reverse out of the ambush (for which Gnr Alderson was awarded the Military Medal (MM)). The OPs then called down a fire mission from 240 Field Battery that completely smashed the Japanese position before the infantry arrived.[42][43][46][47][48]

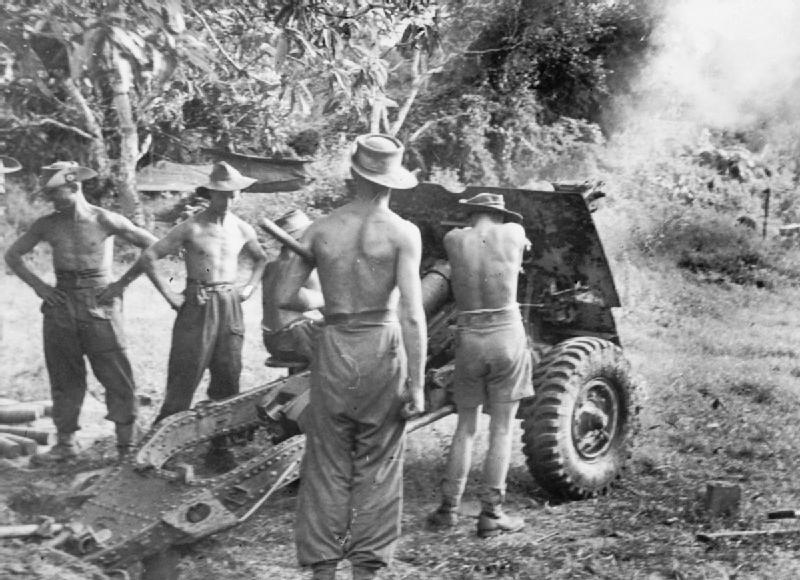
A 25-pounder in action in Burma.
19th Indian Division pushed on to seize the airfields round Shwebo and prepared to cross the Irrawaddy River. 98th Indian Bde, accompanied by 115th Fd Rgt and some anti-tank and light anti-aircraft guns and mortars, established its own bridgehead across the river at Thabeikkyin, with the gunners digging in and arranging booby-traps to defend the gun area perimeter while rafting a few guns across. The brigade then organised a striking force including 240 Fd Bty to destroy the Japanese bridgehead at Kabwet. Although restricted to eight rounds per gun per day, the 25-pounders were used effectively in a direct fire ('bunker-busting') role. The gunners also conducted deep patrols in an attempt to locate enemy gun positions. By the end of January the whole Japanese force was behind the Irrawaddy and its efforts to destroy the British bridgeheads were failing.[33][42][49][50][51]
On 25 February 19th Indian Division broke out of its bridgeheads with the task of advancing to Mandalay. It made rapid progress and by 5 March was deployed along the Chaungmagyi Chaung. Here the commander, Maj-Gen Thomas 'Pete' Rees, formed 'Stiletto Force' to strike across the chaung as soon as the engineers had bridged it; 240 Fd Bty formed part of this force. Stiletto Force made rapid progress, scattering surprised Japanese troops, and by 06.15 on 8 March 240 Fd Bty opened fire on Mandalay Hill. The rest of the regiment followed, fighting a 'spirited' infantry battle as it came into action 4,000 yards (3,700 m) from the city. The artillery reconnaissance parties attacked Japanese rearguards while RHQ engaged them with rifles and 25-pounder airburst shells as they fled. Stiletto Force soon captured the northern slopes of Mandalay Hill, while 98 Bde and 480 Fd Bty cleared Madaya and then moved fast to join Stiletto force. The Japanese on Mandalay Hill fought on until 13 March; the first British officer to reach the summit was Captain D. Hine of 480 Fd Bty. Meanwhile, the rest of the divisional artillery had been bombarding Fort Dufferin, and although the 23 feet (7.0 m) high wall was breached on 9 March the first assault was repulsed, as were repeated attempts over successive days, despite bombardment by guns and aircraft. Eventually, during the night of 19/20 March the surviving members of the garrison broke out into the town, where most were killed or captured, a FOO of 240 Bty being killed in the hand-to-hand fighting. 115th Field Rgt's Tactical HQ captured some abandoned Japanese tanks.[42][52][53][54] Once Mandalay was secured, 19th Indian Division was released to reinforce the British forces fighting round Meiktila.[42][55] Lieutenant-Colonel Nicholson left on 14 April under the 'Python' scheme of home leave for personnel who had been in the theatre for long periods, he was succeeded in command by Maj Denham Foxon, one of the regiment's original officers who had been second-in-command since July 1942.[36][42] Nicholson was awarded an 'immediate' Distinguished Service Order (DSO) for his leadership at the ambush, the Irrawaddy bridgehead and the capture of Mandalay.[56][57]
19th Indian Division began to clear the Toungoo–Mawchi road, but the fighting was tough and it took seven days to capture 1.5 miles (2.4 km) of road. 115th Field Regiment was pulled out for rest from 19 May to 3 June, when it was ordered back to the Mawchi road. It came into action alongside 62nd Indian Infantry Brigade in a very open position on a ridge, with the guns wheel to wheel. The exposed regiment came under enemy shellfire and an ammunition lorry was hit. Battery Sergeant Major Norman Brummell led a party to clear the ammunition, which they did despite being surrounded by bursting charges. Just as they completed the job, BSM Brummell and others were hit by a Japanese shell and were killed. Later, BSM Leonard Hayes dragged a blazing limber full of ammunition away from the tightly-packed gun position of 480 Bty. Both Hayes and (posthumously) Brummell were awarded the MM.[42][58][59][60][61] The regiment was pulled back to Kywebwe on 8 July to take part in the final battle of the attempted Japanese break-out: the regiment's 'FOOs in Air OP aircraft did immense execution, which turned to slaughter'.[42] When the Surrender of Japan occurred on 15 August, 115th (North Midland) Field Regiment was still at Kyebwe. Shortly afterwards 19th Indian Division was amalgamated with another division and disbanded.[62] At the end of September, 115th (NM) Fd Rgt moved down to Rangoon. It was then placed in suspended animation and the men boarded the SS Jan de Witt for home.[1][6][33][42]
Commanding Officers
The following officers commanded 115th (North Midland) Field Regiment:[5][36][39][42]
- Lt-Col M.R. Simpson, OBE, TD from formation to 1 January 1944
- Lt-Col R.A.G. Nicholson, 1 January 1944 to 14 April 1945
- Lt-Col A.D. Foxon, DSO, from 14 April to September 1945
Postwar


.jpg)
BL 5.5-inch Medium Gun as used by postwar medium artillery units.
When the TA was reconstituted in 1947, the regiment was reformed at Leicester as 315 (North Midland) Medium Regiment in 86 (Field) Army Group Royal Artillery.[1][63][64][65][66]
In 1950 it was amalgamated into 350 (South Notts Hussars Yeomanry) Heavy Rgt, RA. That unit in turn amalgamated in 1955 with 528 (West Nottinghamshire) Light Anti-Aircraft Rgt and 577 (The Robin Hoods, Sherwood Foresters) Light Anti-Aircraft/Searchlight Rgt to form 350 (The Robin Hoods, Sherwood Foresters) Light Rgt, RA.[1][63][67][68][69]
When 350 Light Rgt was converted into Royal Engineers (RE) on 1 May 1961, the Leicester elements (R Bty) separated from the Nottinghamshire elements and regained their old number to become 115 (Leicestershire) Field Park Squadron, RE, in 140 Corps Engineer Regiment, RE.[67][69][70][71]
The TA was reduced into the Territorial and Army Volunteer Reserve (TAVR) on 1 April 1967, when 115 Fd Park Sqn was absorbed into The Royal Leicestershire Regiment (Territorials).[70][72]
Footnotes
Notes
- ↑ 1.0 1.1 1.2 1.3 1.4 Litchfield, p. 139.
- ↑ Litchfield, pp. 138, 142, 197.
- ↑ Northern Command 3 September 1939 at Patriot Files.
- ↑ 115 Fd Rgt at RA 1939–45.
- ↑ 5.0 5.1 5.2 5.3 5.4 5.5 5.6 5.7 115 Fd Rgt RA War Diary 1939–41, The National Archives (TNA), Kew, file WO 166/1527.
- ↑ 6.0 6.1 Farndale, Far East, Annex K.
- ↑ 7.0 7.1 Farndale, Years of Defeat, p. 14; Annex A.
- ↑ 8.0 8.1 Sainsbury, pp. 60–1; Appendix 2.
- ↑ 9.0 9.1 9.2 Ellis, Appendix I.
- ↑ 10.0 10.1 10.2 10.3 10.4 10.5 10.6 10.7 10.8 10.9 115 Fd Rgt RA War Diary France 1940, TNA file WO 167/505.
- ↑ 11.0 11.1 Joslen, p. 462.
- ↑ Monthly Army List, May 1939.
- ↑ "BEF GHQ at RA 39–45.". http://www.ra39-45.pwp.blueyonder.co.uk/bef/page2.html.
- ↑ Ellis, pp. 39, 49, 59–60, 70.
- ↑ Farndale, Years of Defeat, pp. 34, 43, 45, Map 9.
- ↑ Farndale, Years of Defeat, pp. 53–4.
- ↑ Ellis, p. 121.
- ↑ Ellis, pp. 171, .
- ↑ Farndale, Years of Defeat, pp. 84–5, Map, 18.
- ↑ Cowper, p. 319.
- ↑ Ellis, p. 175.
- ↑ Farndale, Years of Defeat, p. 59.
- ↑ 2/Lt Caven's MC citation, TNA file WO 373/15/383.
- ↑ 2/Lt Loveluck's MC citation, TNA file WO 373/15/385.
- ↑ London Gazette, 20 August 1940.
- ↑ 26.0 26.1 Collier, Chapter VIII.
- ↑ Farndale, p. 103.
- ↑ Farndale, Years of Defeat, Annexes D & M.
- ↑ Order of Battle of the Field Force in the United Kingdom, Part 3: Royal Artillery, 26 December 1940, TNA files WO 212/4 and WO 33/2365.
- ↑ Order of Battle of the Field Force in the United Kingdom, Part 3: Royal Artillery (Non-Divisional Units), 25 March 1941, TNA files WO 212/5 and WO 33/2323.
- ↑ Farndale, Years of Defeat, p. 99.
- ↑ Farndale, Far East, Annex J.
- ↑ 33.0 33.1 33.2 33.3 33.4 33.5 33.6 Joslen, p. 506.
- ↑ 115 Fd Rgt RA War Diary January–February 1942, TNA file WO 166/7017.
- ↑ Order of Battle of the Field Force in the United Kingdom, Part 3: Royal Artillery (Non-Divisional units), 22 October 1941, with amendments, TNA files WO 212/6 and WO 33/1883.
- ↑ 36.0 36.1 36.2 115 Fd Rgt RA War Diary India & Ceylon May–December 1942, TNA file WO 172/1518.
- ↑ Farndale, Far East, p. 119.
- ↑ 115 Fd Rgt RA War Diary Ceylon & India 1943, TNA file WO 172/2301.
- ↑ 39.0 39.1 39.2 39.3 115 Fd Rgt RA War Diary Ceylon & India 1944, TNA file WO 172/4650.
- ↑ Woodburn Kirby, Vol III, pp. 4–11, 251, 351.
- ↑ Woodburn Kirby, Vol IV, Appendix 18, p. 484.
- ↑ 42.00 42.01 42.02 42.03 42.04 42.05 42.06 42.07 42.08 42.09 42.10 42.11 'War Diary of Lt Colonel R.A.G. Nicholson during his tenure of command of 115 Field Regiment RA 1944–1945', TNA file CAB 106/159.
- ↑ 43.0 43.1 Farndale, Far East', p. 249.
- ↑ Slim, pp. 388–90, 400–1.
- ↑ Woodburn Kirby, Vol IV, pp. 103, 129–30, 158–60.
- ↑ Gnr Alderson's MM citation, TNA file WO 373/36/54.
- ↑ London Gazette, 19 April 1945.
- ↑ Woodburn Kirby, Vol IV, p. 176.
- ↑ Farndale, Far East, p. 252.
- ↑ Slim, pp. 407, 411–5.
- ↑ Woodburn Kirby, Vol IV, pp. 177–9, 185–6.
- ↑ Farndale, Far East, pp. 276–8.
- ↑ Slim, pp. 467–9.
- ↑ Woodburn Kirby, Vol IV, pp. 258–60, 288–92, 299–301.
- ↑ Woodburn Kirby, pp. 316, 361, 383.
- ↑ Lt-Col Nicholson's DSO citation, TNA file WO 373/41/3.
- ↑ London Gazette, 20 September 1945.
- ↑ Farndale, Far East, p. 305.
- ↑ BSM Brummel's MM citation, TNA file WO 373/41/96.
- ↑ BSM Hayes' MM citation, TNA file WO 373/41/218.
- ↑ Woodburn Kirby, pp. 387–9.
- ↑ Woodburn Kirby, Vol V, Appendix 29, p. 530.
- ↑ 63.0 63.1 289–322 Rgts RA at British Army 1945 on.
- ↑ Farndale, Years of Defeat, Annex M.
- ↑ Litchfield, Appendix 5.
- ↑ Watson, TA 1947.
- ↑ 67.0 67.1 Litchfield, pp. 199–200.
- ↑ "South Notts Hussars at Regiments.org.". http://www.regiments.org/regiments/uk/volmil-england/vcav/nottsSo.htm.
- ↑ 69.0 69.1 "Robin Hood Battalion at Regiments.org.". http://regiments.org/regiments/uk/volmil-england/vinf-mi/drnt-7.htm.
- ↑ 70.0 70.1 100–225 Sqns RE at British Army 1945 on.
- ↑ 118–432 Rgts RE at British Army 1945 on.
- ↑ "5 Bn Royal Leicesters at Regiments.org.". http://www.regiments.org/regiments/uk/volmil-england/vinf-ea/le-5.htm.
References
- Col Julia Cowper, The King's Own: The Story of a Royal Regiment, Volume III: 1914–1950, Aldershot: Gale & Polden, 1957.
- Gen Sir Martin Farndale, History of the Royal Regiment of Artillery: The Years of Defeat: Europe and North Africa, 1939–1941, Woolwich: Royal Artillery Institution, 1988/London: Brasseys, 1996, ISBN 1-85753-080-2.
- Gen Sir Martin Farndale, History of the Royal Regiment of Artillery: The Far East Theatre 1939–1946, London: Brasseys, 2002, ISBN 1-85753-302-X.
- Norman E.H. Litchfield, The Territorial Artillery 1908–1988 (Their Lineage, Uniforms and Badges), Nottingham: Sherwood Press, 1992, ISBN 0-9508205-2-0.
- Lt-Col J.D. Sainsbury, The Hertfordshire Yeomanry Regiments, Royal Artillery, Part 1: The Field Regiments 1920-1946, Welwyn: Hertfordshire Yeomanry and Artillery Trust/Hart Books, 1999, ISBN 0-948527-05-6.
- Field Marshal Sir William Slim, Defeat into Victory, London: Cassell, 1956.
- Maj-Gen S. Woodburn Kirby, History of the Second World War, United Kingdom Military Series: The War Against Japan Vol III, The Decisive Battles, London: HM Stationery Office, 1961/Uckfield: Naval & Military, 2004, ISBN 1-845740-62-9.
- Maj-Gen S. Woodburn Kirby, History of the Second World War, United Kingdom Military Series: The War Against Japan Vol IV, The Reconquest of Burma, London: HM Stationery Office, 1955/Uckfield: Naval & Military, 2004, ISBN 1-845740-63-7.
- Maj-Gen S. Woodburn Kirby, History of the Second World War, United Kingdom Military Series: The War Against Japan Vol V, The Surrender of Japan', London: HM Stationery Office, 1969/Uckfield: Naval & Military, 2004, ISBN 1-845740-64-5.
External Sources
The original article can be found at 115th (North Midland) Field Regiment, Royal Artillery and the edit history here.