| 87th Heavy Anti-Aircraft Regiment, RA 487th (Durham) Heavy Anti-Aircraft Regiment, RA | |
|---|---|
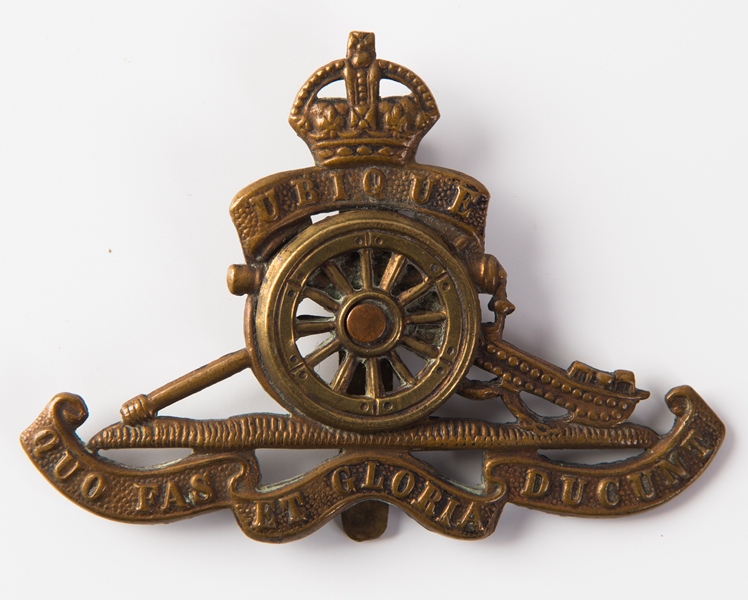 Cap Badge of the Royal Artillery (pre-1953) | |
| Active | May 1939–10 March 1955 |
| Country |
|
| Branch |
|
| Role | Air defence |
| Size | Regiment |
| Part of |
Anti-Aircraft Command Middle East Forces Eighth Army X Corps |
| Garrison/HQ | Hebburn-on-Tyne |
| Engagements |
Battle of Britain The Blitz North Africa Operation Avalanche Italy |
87th Heavy Anti-Aircraft Regiment, Royal Artillery, was an air defence unit of Britain's Territorial Army (TA) raised at Hebburn-on-Tyne in County Durham during the period of international tension leading up to the outbreak of World War II. It served during the Battle of Britain and Blitz and then in the North African and Italian campaigns, distinguishing itself in the landings at Salerno. It continued in the postwar TA until amalgamated in 1955.
Origin[]
The Territorial Army was rapidly expanded following the Munich Crisis, particularly the Anti-Aircraft (AA) branch of the Royal Artillery (RA). 87th Anti-Aircraft Regiment, RA was one new unit raised in the Spring of 1939, with Regimental Headquarters (RHQ), 278th, 279th and 280th AA Btys at Hebburn-on-Tyne, under the command of Brevet Colonel R. Atkinson, OBE, MC, TD.[1] Atkinson had been commanding officer (CO) of 74th (Northumbrian) Field Regiment[2] and he brought with him a cadre of experienced TA gunners from his old regiment[lower-alpha 1] for one of the new batteries.[3][4][5]
Initially, the new regiment formed part of 30th (Northumbrian) Anti-Aircraft Brigade. By the outbreak of World War II this was in AA Command's 7th AA Division, which was being formed to defend North East England.[6][7]
World War II[]


Formation sign of 7th AA Division.
Mobilisation[]
In June 1939, as the international situation worsened, a partial mobilisation of AA Command's TA units was begun in a process known as 'couverture', whereby each unit did a month's tour of duty in rotation to man selected AA gun and searchlight positions. On 24 August, ahead of the declaration of war, AA Command was fully mobilised at its war stations.[8]
30 AA Brigade's units deployed to defend their home areas of Tyneside and Teesside, but they were critically short of equipment, and there were no heavy AA (HAA) guns at all in 7th AA Division.[9] Luckily, the months of Phoney War following mobilisation allowed AA Command to address its equipment shortages. Gun Defence Areas (GDAs) with 3-inch or 3.7-inch HAA guns were established around Teesside (including Middlesbrough and Billingham) and Tyneside (including Newcastle) before the Battle of Britain began.[10][11]
In the summer of 1940, all RA units equipped with the older 3-inch or newer 3.7-inch guns were designated as Heavy AA (HAA) regiments to distinguish them from the new Light AA (LAA) regiments appearing in the order of battle.[12]
Battle of Britain and Blitz[]


Mobile 3.7-inch HAA gun preserved at Imperial War Museum Duxford.
Tyneside, Teesside and Wearside were important strategic targets because of their high concentrations of heavy industry and ports. During the early part of the Battle of Britain, German day and night air raids and mine laying began along the East Coast of England, intensifying through June 1940. Thereafter the Luftwaffe concentrated on Royal Air Force (RAF) sites in the South of England, with occasional raids on the North East, such as the period 12–15 August.[13]
On 15 August, in the belief that the defences of NE England had been denuded, Luftflotte 5 attacked across the North Sea from Norway. Some 65 Heinkel He 111 bombers of Kampfgeschwader 26 escorted by 35 Messerschmitt Bf 110 Zerstörer fighters of Zerstörergeschwader 76 were picked up on radar and ambushed by fighters of No. 13 Group RAF before they reached the coast. Those bombers that succeeded in breaking through were engaged by the guns of the Tees and Tyne GDAs. Bombs were widely scattered and only at Sunderland was any major damage inflicted. KG 26 lost 8 bombers and 7 fighters for no loss to the RAF, in 'one of the most successful air actions of the war'.[14][15]
Thereafter, the bulk of the fighting in the Battle of Britain and the subsequent night Blitz was further south and the mobile AA guns were moved to where they were most needed. By the time the Blitz ended in May 1941, 87th HAA Rgt had transferred to 31 (North Midland) AA Bde in 10th AA Division defending the towns of West Yorkshire, though it remained under the operational control of 7 AA Division.[16]
Middle East[]
The regiment left AA Command in June 1941 and joined the War Office Reserve, preparatory to going overseas. It embarked in July [16][17] to join Middle East Forces and by the end of the year was serving in Persia and Iraq Force (Paiforce). Here General Henry Maitland Wilson was trying to build up the AA resources of Tenth Army to meet a possible German advance on the vital oilfields via the Caucasus. The tasks undertaken were the defence of the Basra base area, RAF Habbaniya, Baghdad, Mosul and the oil installations at Kirkuk. Each of these GDAs received one HAA battery. Transport for the AA units was particularly short, because some ships carrying vehicles from the UK had been sunk by enemy action.[18]
The AA build-up for Tenth Army was rather haphazard, as units were periodically withdrawn for tasks in the Middle East and the Western Desert Campaign. 87th HAA Regiment was withdrawn to Egypt in March 1942, and by June it was serving with 20 AA Bde under Ninth Army in Palestine and Syria.[18][19]
North Africa[]

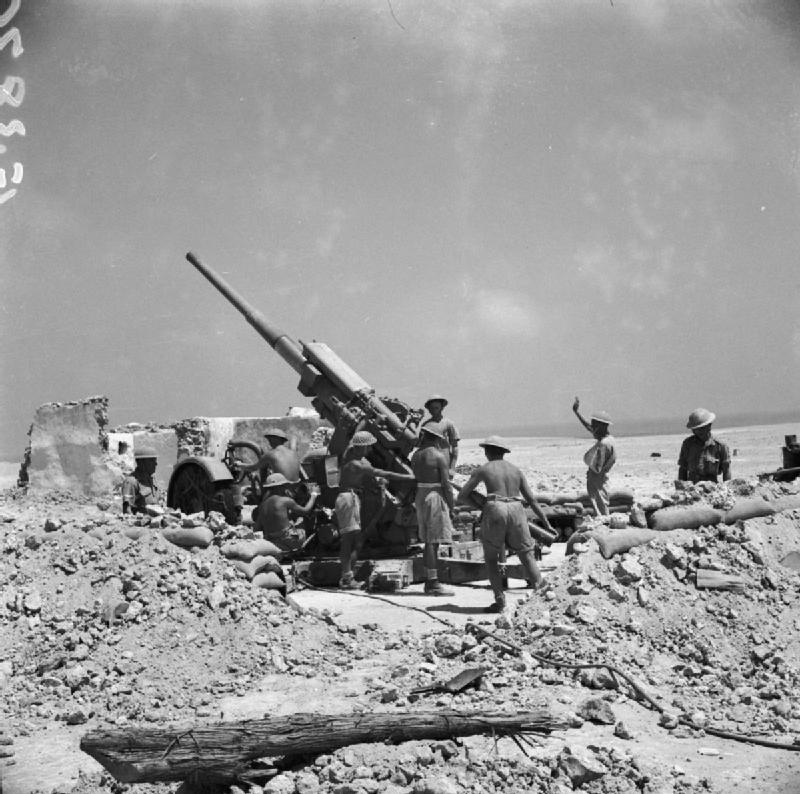
A 3.7-inch HAA gun in the Western Desert/
The regiment next joined 17 AA Bde, which was held in reserve in Egypt in order to move into Libya after Eighth Army's attack at the Second Battle of Alamein.[20] Once the breakthrough had occurred, 17 AA Bde and 87th HAA Rgt (equipped with 24 x 3.7-inch HAA guns) followed up, relieving 2 AA Bde in defence of the recaptured port of Tobruk and the associated airfields. They remained here defending Eighth Army's lines of communication as the campaign moved west into Tunisia.[21][22]
Italy[]
87th HAA Regiment was not involved in the subsequent Allied invasion of Sicily, but it was given a leading role in Operation Avalanche, the Allied landings at Salerno on mainland Italy on 9 September 1943. It sailed from Tunisia as part of 12 AA Bde under the command of Brigadier Mortimer Wheeler. The British X Corps had the task of capturing Salerno port and Montecorvino Airfield, then turning north to capture Naples; 12 AA Bde was to begin landing in the first wave to provide AA cover for the beaches and objectives. For this the brigade organised a number of beach groups, each containing one HAA and one LAA battery; 87th HAA and 13th LAA Rgts provided two of these beach groups:[23][24]
- No 3 Beach Group: 279/87 HAA Bty; 122/13 LAA Bty
- No 5 Beach Group: 280/87 HAA Bty; 37/13 LAA Bty
Mindful of problems reported after the Sicily landings, Wheeler ordered his HAA units to take all their Gun-Laying (GL) radar sets with them and to pay particular attention to waterproofing the guns and radars. All the essential equipment was transported on Landing Craft Tank (LCTs) while some of the personnel travelled on Landing Craft Infantry (LCIs). The 'Avalanche' convoys were located by the Luftwaffe and attacked from the air during their approach to the beaches. There was no surprise, and with good observation the German shore defences opened heavy fire on the landing craft, causing casualties and delays in unloading. All the AA beach groups landed successfully, however, with the first LAA guns reported in action within 20 minutes, and HAA guns 4–6 hours later.[25][26]


A 3.7-inch AA gun in action in the field artillery role in Italy 1943.
The first major hitch occurred when Montecorvino Airfield was not captured in the first rush, but two small landing grounds for Allied fighters were prepared by 12 September (D+3). Over succeeding days reinforcements, including the follow-up elements of 12 AA Bde, continued to pour onto the overcrowded beaches, while heavy fighting was continuing only 5–6 km away. It was impossible to implement the second stage of the planned AA deployment, but those batteries already in position were heavily engaged in warding off multiple air attacks delivered with little warning. The AA Operations Room received inadequate reports from RAF and Royal Navy radar, and had to rely on the batteries' own GL radar plots. 12 AA Brigade's HQ radar instructor controlled AA concentrations covering the inland approaches, and a ring of concentrations over the bay was prepared against torpedo-dropping aircraft. When a German armoured counter-thrust broke through 56th (London) Infantry Division's front, 12 AA Bde was called upon to help out, and all three batteries of 87th HAA Rgt were tasked to join in with ground fire directed by the division's Observation Post (OP) parties. The battle for the Salerno beachhead went on for a week before the Germans began to withdrew slowly to a position north of the Volturno river.[27][28]
According to the regimental history, 'the regiments of 12th AA Brigade were, by now, raring to go on the long-planned move to Naples. Brigadier Wheeler, indeed, prepared a scheme to break out with a column of AA troops along the coast to Pompeii', but it was vetoed by X Corps.[29] On 26 September 12 AA Bde was relieved at Salerno by a US AA Artillery brigade and left for Naples, partly by road and partly by sea, and established HQ in Naples on 1 October. The vulnerable area included the airfields at Pomigliano and Capodichino, for which the four HAA and four LAA batteries available were inadequate. While at Naples the brigade only experienced one serious raid, or 20+ aircraft, of which four were shot down by guns and fighters. The defence of Naples was only intended to be a temporary task for the brigade and lasted three weeks, when it moved forward to rejoin X Corps along the Volturno. Here, as well as providing AA cover for routes, bridges, landing grounds and field gun positions, it also took on ground firing tasks with 2nd Army Group Royal Artillery and 7th Armoured Division.[30]
12 AA Brigade then had a comparatively stable period of deployment from October until the end of the year, based on Capua, Cancello and Grazzanise, its batteries frequently in the forward area engaging corps' targets with ground fire. In January 1944 the brigade moved forward to cover the preparations for crossing the Garigliano, while 87th HAA Rgt crossed Italy to reinforce 62 AA Bde defending the ports of Bari and Brindisi. In March, 62 AA Bde HQ was relieved by 8 AA Bde, and 87th HAA Rgt came under its command, deployed with one battery at Brindisi and two protecting airfields.[31]
By now the Normandy Landings had first call on resources and the British forces in Italy were suffering an acute manpower shortage. In June 1944 the Chiefs of Staff decided that the number of AA regiments in Italy must be reduced and their fit personnel converted to other roles, particularly infantry. 87th HAA Regiment was one of those selected: it was withdrawn from the front by July and converted in the autumn, when the regiment passed into suspended animation.[3][32][33]
Postwar[]
AA Command's formation sign.
When the TA was reconstituted in 1947 the regiment was reformed at Hebburn-on-Tyne as 487 (Durham) HAA Regiment, as part of 83 AA Bde based at Newcastle.[3][34][35][36][37][38] AA Command was disbanded on 10 March 1955 and 487 HAA Regiment was amalgamated with 274 Regiment, RA (the former 74th Field Regiment, from which the 87th's original cadre had been derived.[3][34]
Footnotes[]
- ↑ Probably from 293 (1 Durham) Field Battery based at Ellison Street, Hebburn-on-Tyne.
Notes[]
- ↑ Monthly Army List May 1939
- ↑ Monthly Army List January 1939
- ↑ 3.0 3.1 3.2 3.3 Litchfield, pp. 53–4.
- ↑ Monthly Army List, May 1939.
- ↑ 87 HAA Rgt at RA 39–45.
- ↑ AA Command 3 September 1939 at Patriot Files.
- ↑ Routledge, Table LX, p. 378.
- ↑ Routledge, pp. 65–6, 371.
- ↑ Routledge, p. 372; Table LVIII, p. 376; Table LIX, p. 377.
- ↑ Routledge, p. 373.
- ↑ Basil Collier, Appendix XXII.
- ↑ Litchfield.
- ↑ Routledge, Table LXII, pp. 379–80.
- ↑ Basil Collier pp. 191–4, Map 16.
- ↑ Richard Collier, Eagle Day, pp. 86–8.
- ↑ 16.0 16.1 Order of Battle of Non-Field Force Units in the United Kingdom, Part 27: AA Command, 12 May 1941, The National Archives (TNA), Kew, file WO 212/79.
- ↑ Order of Battle of the Field Force in the United Kingdom, Part 3: Royal Artillery (Non-Divisional Units), 25 March 1941, with amendments, TNA files WO 212/5 and WO 33/2323.
- ↑ 18.0 18.1 Routledge, pp. 198–200.
- ↑ Joslen, p. 487.
- ↑ Routledge, Table XXIII, p. 161.
- ↑ Joslen, p. 486.
- ↑ Routledge, pp. 157–8; Table XXIV, p. 162; Table XXV, p. 164.
- ↑ Molony, p. 259
- ↑ Routledge, pp. 270–1.
- ↑ Molony, pp. 273–5.
- ↑ Routledge, p. 271.
- ↑ Molony, pp. 289–90, 296.
- ↑ Routledge, pp. 271–3.
- ↑ Routledge, pp. 273–4.
- ↑ Routledge, pp. 274, 283.
- ↑ Routledge, p. 283–5, 289; Table XLVII, p. 296.
- ↑ Molony, pp. 421–3.
- ↑ Routledge, pp. 278, 291, Table XLIV, p. 293.
- ↑ 34.0 34.1 474–519 Rgts RA at British Army 1945 onwards.
- ↑ Litchfield, Appendix 5.
- ↑ Routledge, Table LXXIV, p. 441.
- ↑ Watson, TA 1947.
- ↑ 67–106 AA Bdes at British Army 1945 onwards.
References[]
- Basil Collier, History of the Second World War, United Kingdom Military Series: The Defence of the United Kingdom, London: HM Stationery Office, 1957.
- Richard Collier, Eagle Day: The Battle of Britain, August 6–September 15, 1940, London: Hodder & Stoughton, 1966/Pan Books, 1968, ISBN 0-330-02105-2.
- Lt-Col H.F. Joslen, Orders of Battle, United Kingdom and Colonial Formations and Units in the Second World War, 1939–1945, London: HM Stationery Office, 1960/Uckfield: Naval & Military Press, 2003, ISBN 1-843424-74-6.
- Norman E.H. Litchfield, The Territorial Artillery 1908–1988 (Their Lineage, Uniforms and Badges), Nottingham: Sherwood Press, 1992, ISBN 0-9508205-2-0.
- Brig C.J.C. Molony,History of the Second World War, United Kingdom Military Series: The Mediterranean and Middle East, Vol V: The Campaign in Sicily 1943 and the Campaign in Italy 3rd September 1943 to 31st March 1944, London: HM Stationery Office, 1973/Uckfield, Naval & Military Press, 2004, ISBN 1-845740-69-6.
- Brig N.W. Routledge, History of the Royal Regiment of Artillery: Anti-Aircraft Artillery 1914–55, London: Royal Artillery Institution/Brassey's, 1994, ISBN 1-85753-099-3
External sources[]
- British Army units from 1945 on
- Orders of Battle at Patriot Files
- Royal Artillery 1939–1945
- Graham Watson, The Territorial Army 1947
The original article can be found at 87th Heavy Anti-Aircraft Regiment, Royal Artillery and the edit history here.