| 2nd Surrey Rifle Volunteer Corps 4th Battalion, Queen's Regiment 63rd (Queen's) Searchlight Regiment 127th (Queen's) Light Anti-Aircraft Regiment 598 (4th Bn Queen's) Light Anti-Aircraft Regiment | |
|---|---|
| Active | 1859–1961 |
| Country |
|
| Branch |
|
| Role |
Infantry Air Defence |
| Garrison/HQ | Croydon |
| Engagements | |
The 4th Battalion, Queen's Royal Regiment (West Surrey) (4th Queen's) was a volunteer unit of the British Army from 1859 to 1961. Beginning from small independent units recruited in the South London suburbs, it was attached to the Queen's Royal Regiment (West Surrey) and served in the Second Boer War, World War I and Third Anglo-Afghan War. Before World War II it was converted into a Royal Artillery searchlight regiment that served in the Battle of Britain and The Blitz. Later it became a light anti-aircraft gun unit serving on blockships in the Mulberry harbour during the Normandy invasion, and then defended the port of Antwerp in the closing stages of the war. Postwar it continued in the air defence role before rejoining the Queen's Regiment as infantry.
Origins[]
An invasion scare in 1859 led to the emergence of the Volunteer Movement, and Rifle Volunteer Corps (RVCs) began to be organised throughout Great Britain.[1][2] The 2nd Surrey RVC was formed at Croydon (then in Surrey) on 16 June 1859 under the command of James Hunter Campbell, formerly of the Bengal Artillery.[3][4][5][6] The headquarters (HQ) was in the Old Barracks, Mitcham Road, Croydon.[7][8] A second company was added in March 1860. The unit was included in the 2nd Surrey Administrative Battalion (later 6th Battalion East Surrey Regiment) from September 1860, but by March 1867 it had recruited sufficient additional personnel from the Crystal Palace, Norwood and Caterham areas to reach a strength of six companies and become an independent battalion in its own right. Its uniform was Rifle green with red facings. An affiliated Cadet Corps was formed at Whitgift School in 1874.[3][5][6][9][10]
Under the scheme of 'localisation' introduced by the Cardwell Reforms in 1873,[11][12] the Surrey RVCs, together with the Surrey Militia were grouped into two 'sub-districts' alongside the Regular regiments in the county. The 2nd Surrey RVC was assigned to Sub-District No. 48 with the 2nd Foot (The Queen's Royal Regiment). While the sub-districts were referred to as 'brigades', they were purely administrative organisations and the Volunteers were excluded from the 'mobilisation' part of the Cardwell system, though they carried out joint manoeuvres, and the Surrey RVCs were assigned a role in the garrison of Sheerness Dockyard.[9][13]
_Cap_Badge.jpg)
Cap badge of the Queen's
Under the Childers Reforms, the unit became the 1st Volunteer Battalion (VB) of the Queen's Royal Regiment (West Surrey) ('The Queen's') in 1883.[3][5][9][14]
The Stanhope Memorandum of December 1888 proposed a more comprehensive mobilisation scheme for Volunteer units, which would assemble in their own brigades at key points in time of war. In peacetime these brigades provided a structure for collective training.[15][16] Under this scheme the Volunteer Battalions of the Surrey regiments formed the Surrey Brigade, the assembly point for which was at Caterham Barracks, the Brigade of Guards' depot conveniently situated for the London Defence Positions along the North Downs.[9]
2nd Boer War[]
Members of the 1st VB served in the Volunteer Company sent to augment the Regulars of the Queen's in South Africa during the Second Boer War. This was the first time the Volunteers had fought alongside the Regulars, gaining the battalion its first Battle honour: South Africa 1900–1902. The company was commanded by Captain De La Mare of 1st VB and joined the 2nd Battalion on 12 April 1900. During May and June the battalion fought in the Biggarsberg and Drakensberg mountains, including a brisk action to capture Alleman's Nek.[3][17]
By 1900 the 1st VB had 10 companies, reducing to nine in 1903 (seven at Croydon and one each at Crystal Palace and Caterham).[3][5][9][18] In the reorganisation after the end of the war in 1902, separate East and West Surrey Brigades were formed, under command of the respective regimental districts.[9]
Territorial Force[]
When the Volunteers were subsumed into the new Territorial Force (TF) under the Haldane Reforms of 1908,[19][20] the battalion became the 4th Battalion, Queen's Royal Regiment (West Surrey), forming part of the Surrey Brigade in the Home Counties Division.[3][21][22][23][24]
World War I[]
Mobilisation[]
On the outbreak of war, TF units were invited to volunteer for Overseas Service. On 15 August 1914, the War Office issued instructions to separate those men who had signed up for Home Service only, and form these into reserve units. On 31 August, the formation of a reserve or 2nd Line unit was authorised for each 1st Line unit where 60 per cent or more of the men had volunteered for Overseas Service. The titles of these 2nd Line units would be the same as the original, but distinguished by a '2/' prefix. In this way duplicate battalions, brigades and divisions were created, mirroring those TF formations being sent overseas.[25]
On mobilisation, the majority of the men of the Home Counties Division accepted liability for overseas service and it was sent to India to relieve Regular troops. The Home Service-only men, together with the recruits who were flooding in, remained at the depots to form 2nd-Line battalions. Thus when the 1/4th Queen's sailed for India on 30 October, the 2/4th Bn was forming at Croydon. Subsequently, 3/4th and 4/4th Battalions were formed in June and July 1915.[6][22][23][24]
1/4th Battalion[]
India[]
The Home Counties Division disembarked at Bombay 1–3 December 1914. It was then split up and the battalions were distributed to stations all over India. The 1/4th Queen's served briefly in 9th (Secunderabad) Division, then in January 1915 transferred to the 8th (Lucknow) Division, moving to Allahabad under that division in April. In January 1916 it transferred again to Nowshera, Srinagar, in the 1st (Peshawar) Division on the North West Frontier,. The division was frequently mobilised for active service (which was enough to gain the battalion the battle honour North West Frontier 1916–1917). In March 1917 it moved to 3rd (Lahore) Divisional Area, which became 16th Indian Division in May that year. The battalion remained with that formation until the end of the war, but like all the Home Counties Division units it sent drafts of officers and men to reinforce other fronts, and men from 1/4th Bn saw action in Mesopotamia.[6][22][23][24][26][27][28]
2/4th Battalion[]
The 2/4th Battalion was attached to 200th (2/1st Surrey) Brigade in 67th (2nd Home Counties) Division, but on 24 April 1915 it was brought up to a full strength composite battalion with men from 2/5th Queen's and was transferred to 160th (Welsh Border) Brigade in 53rd (Welsh) Division at Cambridge.[6][23][29][30][31] In May the division moved to Bedford to continue its training, and on 2 July was reported fit for service in the Mediterranean. The battalion entrained for Devonport Dockyard on 17 July and embarked on the Ulysses the same night. It disembarked in Alexandria on 28 July and moved to Port Said.[30][32]
Gallipoli[]
The 53rd Division was destined as reinforcements for the Gallipoli Campaign. After sailing for Lemnos it landed on C Beach at Suvla Bay on the night of 8/9 August. The 2/4th Queen's went straight into action to assist 31st Brigade of 10th (Irish) Division on the north-west slope of Chocolate Hill. Having taken a few casualties crossing the open ground to the south of Salt Lake, the battalion arrived at 07.40. The Commanding Officer (CO), Lt-Col Watney, was then ordered round to the northern side to dig in and support 33rd Brigade of 11th (Northern) Division, which was hard-pressed on Scimitar Hill. Lacking maps, Watney was pointed in the direction of Scimitar Hill and simply told not to 'go off into the blue'. The battalion moved off round the northern spur of the hill and the east to join up with 6th Bn Royal Dublin Fusiliers. It reached the top of Scimitar Hill, but was driven off by shellfire, some of it from British artillery firing short. The battalion regained the crest and held it until driven off by the scrubland catching fire. It then concentrated in old Turkish trenches and consolidated a line facing Scimitar Hill. In its first action the 990-strong battalion had suffered casualties amounting of 8 officers and 250 other ranks killed, wounded and missing.[6][30][32][33][34]
2/4th Queen's was relieved on the night of 12 August and rejoined the rest of its brigade at the beach. On 18 August two companies went forward to the front line to support with rifle fire an attack by 29th Division (the Battle of Scimitar Hill), the two other companies being employed on trench construction. From then on the battalion endured spells in the front line alternating with digging positions in the rear. The battalion drove off a small attack on its position on 18 September. By the end of September it was reduced by battle casualties and sickness to about half of its pre-landing strength. On 21 October it was so weakened that it formed a composite battalion with 1/4th Bn Royal Sussex Regiment. Severe weather brought further casualties in November, despite the arrival of a draft of 100 men from home. The battalion was evacuated to Mudros aboard the El Kahirah on 13 December, with a strength of 14 officers and 224 other ranks, having suffered losses of 29 officers and 680 other ranks killed, wounded, missing, or sick.[32]
Palestine[]
From Mudros the 53rd Division was shipped to Alexandria, and began a long period of rest and recuperation guarding the Nile Valley in Egypt. When the Turks attacked the Suez Canal defences in August 1916, leading to the Battle of Romani, only part of 53rd Division was actually engaged, but the 4th Queen's was later awarded the battle honours Rumani and Egypt 1915–1916.[6][28][30][35]
The British opened the Sinai and Palestine Campaign in March 1917 when the Egyptian Expeditionary Force (EEF) advanced towards Gaza, with 53rd Division in the Desert Column. The 1st Battle of Gaza began at 03.30 on 26 March, when 160th Brigade started to cross Wadi Ghuzzee. Shortly afterwards, fog began to roll in from the sea, slowing the advance, but the attack began shortly after 11.45. By 13.30 the brigade had captured 'The Labyrinth', a maze of entrenched gardens, and by 18.30 the whole position had been secured. But events had not gone so well elsewhere, and the 53rd Division was ordered to pull back. By 27 March it was back on its starting position behind Wadi Ghuzzee.[36][37]
A second attempt to take Gaza began on 17 April, and the 53rd Division attacked in the second phase on 19 April. The objective for 160th Brigade was Samson Ridge, which was achieved slowly, the top eventually being taken at the point of the bayonet. However, the attack elsewhere failed, and the troops dug in at the end of the day.[38][39]
There followed a pause of several months while the EEF was reorganised. The 3rd Battle of Gaza involved outflanking the Gaza–Beersheba line, after which 53rd Division was sent on 3 November to take the heights of Tell Khuweilfe. 160th Brigade moved up a slight valley on the right, but found the enemy in strength, and holding the water supplies. The attack was renewed unsuccessfully the following day. The division kept up the pressure on 6 November, and eventually the Turks were forced to evacuate the position after being outflanked elsewhere.[40][41]
By early December the EEF was working round Jerusalem. 2/4th Queen's, ordered to capture the hills at Beit Jala on 8 December, advanced under accurate shellfire, but found the position unoccupied. The city fell the following day.[6][42]
On 21 December, 160th Brigade carried out a minor operation near Jericho. At 05.00 three companies of 2/4th Queens captured a Turkish post, and the Turks fell back to 'White Hill'. A company of 2/4th Queen's, together with one of 2/10th Middlesex Regiment, took this position after fierce close fighting with bombs, bayonets, and clubbed rifles.[43] On 27 December the Turks made a strong counter-attack towards Jerusalem; although 2/4th Queen's withdrew from White Hill, its machine guns prevented the Turks from holding it in force, and it was reoccupied during the night.[44]
During the subsequent operations in the Judean Hills, 53rd Division was ordered to capture Tell 'Asur on 8 March 1918. This led to further heavy fighting, with 160th Brigade forcing its way steadily forward over broken ground on 11 March to reach the hills beyond.[45]
French command[]
However, the success of the German Spring Offensive on the Western Front demanded urgent reinforcements from Palestine for the British Expeditionary Force (BEF).[46] 2/4th Queen's left 53rd Division on 31 May 1918, sailed from Alexandria on 15 June and after landing at Taranto it proceeded by rail to Proven in Flanders, arriving on 30 June and joining 101st Brigade in 34th Division.[6][30][47][48]
34th Division had been virtually destroyed in the Spring battles, and was being reconstituted with battalions from Palestine. As soon as this was complete it was to be sent to reinforce the French sector of the front. When the Germans launched the last effort of their Spring Offensive on 15 July (the Second Battle of the Marne), the division was diverted and by the evening of 18 July was concentrated round Senlis. The infantry were then moved up by lorry and by 03.00 on 23 July had completed the relief of a French division in the front line.[47][49]
The 34th Division immediately joined in the French counter-attack (the Battle of the Soissonnais and the Ourcq) on 23 July. However, due to communication problems, 101st Brigade was late setting off (08.00) and lost its creeping barrage. The leading battalion was stopped in its tracks, and 2/4th Queen's trying to come up alongside was forced back. The brigade was back on its start-line, having suffered heavy casualties, by 09.30.[47][50]
By 29 July the division had shifted position to attack again and capture Beugneux Ridge. 2/4th Queen's attacked on a two-company front in the first line of 101st Brigade. Starting at 04.10 the battalion pushed forward through a German defensive barrage that included Tear gas, and had progressed over a mile by 06.00, when a halt was made. But when the follow-up battalions passed through to continue the attack, the morning fog had lifted and they were stopped.[51] The attack was renewed on 1 August, 2/4th Queen's once again in the lead, though now weak in numbers and obliged to put in three companies to complete the first line. Nevertheless, the attack launched in fog and smoke at 04.49 had achieved its objectives by 06.00. After the battle, the division entrained to return to the British front.[52]
Hundred Days Offensive[]
34th Division attacked on the first day of the Fifth Battle of Ypres on 28 September. The attack consisted of pushing forward strong patrols protected by barrages. In the evening, 101st Brigade pushed up the Wytschaete Ridge to within 10 yards of German positions. Next morning 101st Brigade advanced at 05.30, encountering little opposition, swept through Wytschaete, reached Oosttaverne by 08.40, and was at the Ypres–Comines Canal by 13.00.[53]
The division was then in reserve until the Battle of Courtrai. On 16 October, 101st Brigade entered the line alongside the rest of the division. It cleared Wevelghem, but was unable to cross the River Lys until after dark, when it used small rafts. There was no sign of the enemy in front, and progress was easy on 18 and 19 October, until German defences were encountered at Ruddervoorde. The brigade was relieved on 24 October, and was not in the front line during the division's actions at Ooteghem (25 October) and Tiegham (31 October).[54]
The division was withdrawn into reserve on 1 November, and was still refitting and training when the Armistice with Germany came into force on 11 November.[47][55]
3/4th Battalion[]
The 3/4th Battalion was formed at Windsor in June 1915 and replaced 2/4th Bn in 200th (2/1st Surrey) Bde in 67th (2nd Home Counties) Division. Training was hampered by the lack of modern arms and equipment: at first there were only .256-in Japanese Ariska rifles, until these were replaced with obsolete Mk I Lee-Enfield rifles in November 1915. By then, 67th Division had taken its place as part of Second Army, Central Force, in home defence, with 200th Bde quartered around Reigate and Redhill, Surrey. A year later it was in Kent, with 200th Bde around Westbere and Gore Street. Twice the division was ordered to prepare for service in Ireland and in April 1917 to prepare to join the BEF in France. However, none of these moves came off, and in the end 3/4th Queen's left the division and went to France independently.[23][29]
Western Front[]
The battalion disembarked at Le Havre on 1 June 1917. It was first attached to the 1st South African Brigade in 9th (Scottish) Division until 23 July, then with 12th (Eastern) Division, finally joining 62nd Brigade in 21st Division on 9 August.[29][56][57]
21st Division was engaged in the Battle of Polygon Wood on 29 September, but the inexperienced 3/4th Queen's did not make its first attack until the Battle of Broodseinde on 4 October. Despite the general success of the limited attack the battalion lost nearly half its strength.[6][57][58] The division was then sent in as reinforcements to try to stem the devastating series of German counter-attacks that ended the Battle of Cambrai on 2–3 December 1917.[57]
Disbandment[]
By now the BEF was suffering a critical manpower shortage, and on 11 February 1918 3/4th Queen's was disbanded. A large draft was sent to reinforce 7th Queen's serving in 18th (Eastern) Division while the transport went to 8th Division. The residue of the battalion went to 20th Entrenching Bn, which carried out railway construction but was sucked into the fighting during the German Spring Offensive.[6][57][59][60]
4/4th Battalion[]
Unusually, the 4th Queen's formed a 4th-Line battalion (4/4th). This was raised at Croydon in July 1915, and became the 4th (Reserve) Bn in July 1916. On 1 September 1916 it absorbed the 5th (Reserve) Bn.[23]


,_in_Croydon_Minster.jpg)
The King's and Regimental Colours of the 4th Queen's in Croydon Minster.
19th Battalion[]
In 1915, when the 2nd Line of the TF was being readied for overseas service, the men who had signed up only for Home Service were separated and formed into provisional battalions. 69th Provisional Battalion (The Queen's) was formed on 19 June 1915 at Tunbridge Wells by amalgamating the Home Service men of the 3/4th and 2/5th Queen's. After working on coast defences the battalion moved to Lowestoft in July to join 5th Provisional Brigade. The Military Service Act 1916 swept away the Home/Foreign service distinction, and all TF soldiers became liable for overseas service, if medically fit. The provisional battalions thus became anomalous, and on 1 January 1917 they became numbered battalions of their parent units: the 69th became 19th Queen's. Their role was physical conditioning to render men fit for drafting overseas, while carrying out Home Defence duties. 5th Provisional Brigade became 225th Mixed Brigade, and remained on coast defence until the Armistice.[23][61][62][63]


,_in_Croydon_Minster.jpg)
Plaque accompanying the Colours in Croydon Minster.
1st Volunteer Battalion[]
Croydon also raised a 'town guard' battalion of part-time volunteers in August 1914, known as the Croydon Riflemen. It was affiliated to the Volunteer Training Corps (VTC) on 20 February 1915 and became the 1/1st Battalion (Croydon) Surrey Volunteer Training Corps on 8 March. The Volunteers practised on miniature rifle ranges and drilled twice-weekly, some at the Mitcham Road Barracks of 4th Queen's. From 1915 to 1917 the unit constructed some of the trenches of the Outer London Defences at Caterham. In 1917 the battalion was given responsibility for guarding part of the London, Brighton and South Coast Railway and in 1918 it manned anti-aircraft searchlight stations in Croydon during air raids. In May 1916 the VTCs were brought under the County Territorial Associations, and the unit became the 1st Battalion, Surrey Volunteer Regiment, then on 1 March 1918 the 1st (Croydon) and 12th (Norbury) Surrey Bns merged to become 1st Volunteer Battalion, The Queen's (Royal West Surrey Regiment), virtually recreating the pre-1908 title and role of the 4th Queen's. The unit was stood down by 31 October 1919.[64]
3rd Afghan War[]
Having served in India throughout World War I without seeing serious service, the 1/4th Queen's (now just 4th Queen's) was involved in the Third Anglo-Afghan War, serving in the Peshawar area in May 1919 when the city was surrounded by a cordon of British and Indian troops to prevent a pro-Afghan rising.[26][65][66] The battalion received the Afghanistan 1919 battle honour.[67]
Interwar years[]
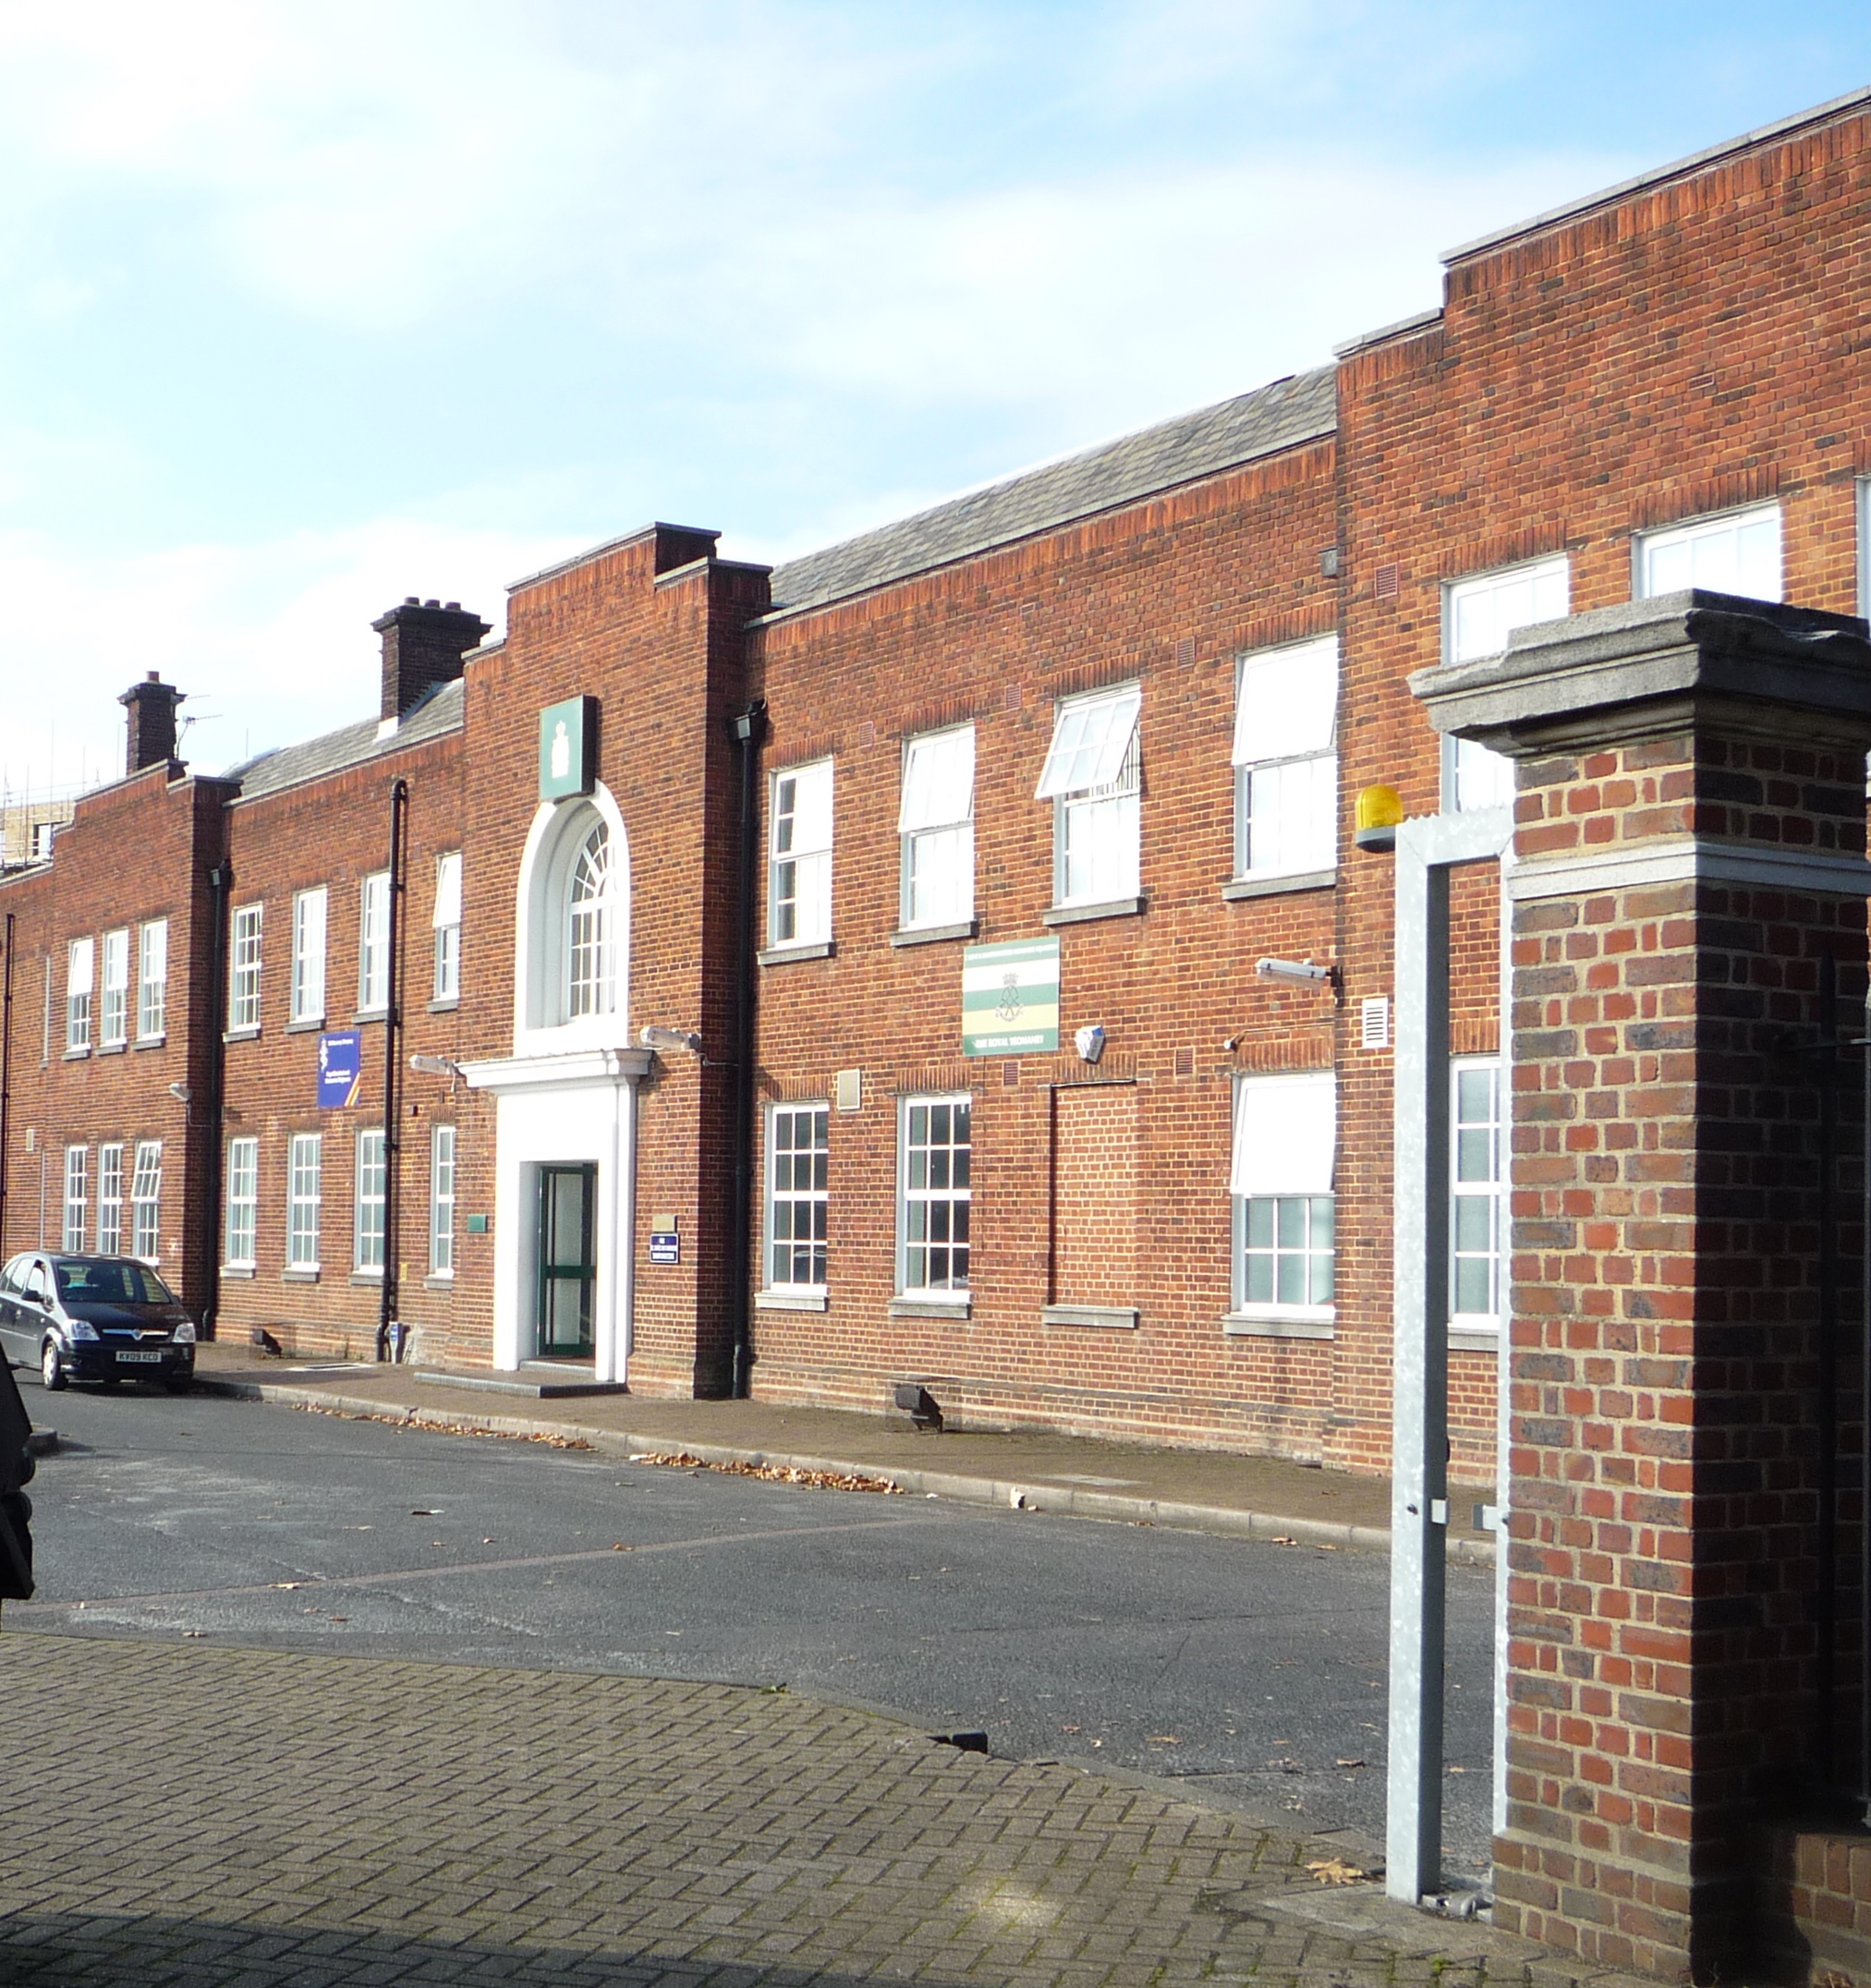

Mitcham Road Barracks, as rebuilt in the 1930s.
The 4th Queen's was reconstituted at Mitcham Road Barracks on 7 February 1920 in the renamed Territorial Army (TA), once more forming part of 131st (Surrey) Brigade in 44th (Home Counties) Division.[68][69]
During the 1930s the increasing need for anti-aircraft (AA) defence, particularly for London, was addressed by converting a number of TA infantry battalions into AA units. In 1938 the 4th Queen's was converted to the searchlight (S/L) role, adopting the subsidiary title of 63rd Searchlight Regiment, and numbering its companies 438–440. It formed part of 47 AA Brigade in 5 AA Division.[26][70][71][72][73]
World War II[]
63rd (Queen's) Searchlight Regiment[]
Mobilisation[]

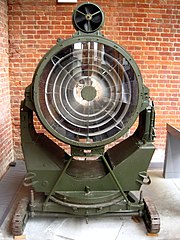
90 cm 'Projector Anti-Aircraft', displayed at Fort Nelson, Portsmouth
The TA's AA units were mobilised on 23 September 1938 during the Munich Crisis, with units manning their emergency positions within 24 hours, even though many did not yet have their full complement of men or equipment. The emergency lasted three weeks, and they were stood down on 13 October.[74] In February 1939 the existing AA defences came under the control of a new Anti-Aircraft Command. In June a partial mobilisation of TA units was begun in a process known as 'couverture', whereby each AA unit did a month's tour of duty in rotation to man selected AA and searchlight positions. On 24 August, ahead of the declaration of war, AA Command was fully mobilised at its war stations.[75]
47 AA Brigade's role was to provide S/L coverage of Hampshire, supporting the AA guns of the Southampton Gun Defence Area.[71][76][77][78] By the Spring of 1940, 63 S/L Rgt HQ was at Bentley, Hampshire. In April 1940 the newly formed 474 S/L Bty arrived from the West of England and was attached to 63rd S/L Rgt. This battery took over the S/L layout in the Kings Worthy area controlled by RAF Tangmere, with Battery HQ at Winton Lodge, later at Worthy Park. Some of the new 150 cm S/Ls were delivered in April 1940 to supplement the older 90 cm lights.[79]
Battle of Britain[]

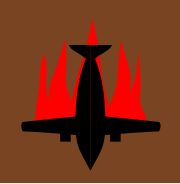
Formation sign of 5 AA Division.
From the beginning of June there were almost nightly alerts as the Battle of Britain got under way, and on the night of 18/19 June several Luftwaffe bombers were picked up by searchlights of 63rd Rgt and destroyed by AA guns and night fighters.[79]
On 3 July 1940, 3rd (Ulster) S/L Rgt, just returned from the Dunkirk evacuation, took over control of 474 S/L Bty and the Kings Worthy layout.[79] Later, another newly formed battery, 524 S/L Bty, was assigned to 63rd S/L Rgt.[80]
In August 1940 all the converted searchlight units were transferred to the Royal Artillery (RA) and their companies were redesignated 'batteries'. The 4th Queen's became 63rd (Queen's) Searchlight Regiment, but was awarded the privilege of retaining its Queen's regimental cap badge and buttons.[26][72][76][81][82]
Southampton was attacked by daylight on 13 August[83] and several times in September.[84] However, the night bombing Bitz, starting in September, saw the S/L units fully engaged, with three big raids on Southampton in November and more in December and January 1941.[85][86][87]
The S/L layouts had initially been based on a spacing of 3500 yards (3200 m), but due to equipment shortages this had been extended to 6000 yards (5500 m) by September 1940. In November this was changed to clusters of three lights to improve illumination, but this meant that the clusters had to be spaced 10,400 yards (9500 m) apart. The cluster system was an attempt to improve the chances of picking up enemy bombers and keeping them illuminated for engagement by AA guns or night fighters. Eventually, one light in each cluster was to be equipped with Searchlight Control (SLC) radar and act as 'master light', but the radar equipment was still in short supply.[88][89]
Mid-War[]


150 cm Searchlight equipped with SLC radar.
The Blitz is considered to have ended in mid-May 1941, though periodic raids continued, such that against Southampton in July.[90] By October 1941 the availability of SLC radar was sufficient to allow AA Command's S/L sites to be 'declustered' into single-light sites spaced at 10,400-yard intervals in 'Indicator Belts' in the approaches to the GDAs, and 'Killer Belts' at 6000-yard spacing to cooperate with the RAF's night-fighters.[91]
In the autumn of 1941 the regiment transferred to 38 Light AA Bde, which provided the S/Ls for 1 AA Division in the London Inner Artillery Zone (IAZ).[92]
127th (Queen's) Light Anti-Aircraft Regiment[]
However, AA Command had a critical shortage of Light AA gun (LAA) units, and had begun a process of converting some S/L units to the role.[93] 63rd (Queen's) was one of the regiments chosen for conversion. The manpower requirements for LAA regiments were smaller, so 438 S/L Bty transferred to 28th (Essex) S/L Rgt in January 1942.[92] Then in February the regiment became 127th (Queen's) Light Anti-Aircraft Regiment with the three remaining batteries being reorganised into 416, 420, 439 and 440 LAA Btys.[71][72][76][81][92][94]
Initially, the new regiment returned to 38 LAA Bde after training, though 440 LAA Bty was attached to 49 AA Bde in 1 AA Division. However, in July 127th LAA Rgt transferred to 64 AA Bde in 8 AA Division, which was having to deal with a wave of 'hit-and-run' attacks by Luftwaffe Fighter-bombers on coastal targets in South West England.[92][95][96][97]
In early December 1942 the regiment transferred from 64 AA Bde to 67 AA Bde in 3 AA Group, which had taken over 8 AA Division's responsibilities.[97][98]
It moved again to 51 LAA Bde in 6 AA Group in Scotland in April 1943, with 420 LAA Bty remaining directly attached to 3 AA Group for a few weeks before rejoining. However, soon afterwards the regiment mobilised on a three-battery establishment for overseas service (420 Bty remaining with 51 AA Bde, transferring to 85 LAA Rgt) and joined 21st Army Group preparing for the planned Allied invasion of Europe (Operation Overlord). The regiment was designated as a Base & Port Defences unit.[98][99][100]
Normandy[]
127th LAA Regiment's role in the Normandy landings was to defend the artificial Mulberry harbour under 76 AA Bde. The regiment manned a 40 mm Bofors gun on each of 34 'Phoenix' caissons, four more on three 'Corncob' blockships, and 16 on the Mulberry HQ ship, HMS Despatch, which had been converted into an AA cruiser. The regiment also had 62 LAA Bty of 20th LAA Rgt under command for the operation.[101]
The first caissons and blockships sailed on D-Day itself, and 76 AA Bde reported that seven Phoenixes and three Corncobs manned by 127 LAA Rgt had been successfully sunk in place on 11 June. By 16 June, 17 LAA guns on Phoenixes and four on Corncobs were ready for action. In the early stages the only casualty was one Phoenix that overturned, tipping its crew into the water. Luftwaffe day and night attacks over the beachhead were common, but not particularly effective. Assembly of the artificial harbour at Arromanches progressed over the succeeding days, but a severe storm on the night of 20/21 June caused serious damage: most of the gun crews were taken off by boat, but one Phoenix under tow capsized with 12 men of 127th LAA Rgt (four of whom were rescued), several other guns were damaged and half the ammunition was washed overboard. Afterwards, 76 AA Bde reduced the manning to 10 guns on Phoenixes, together with the four on the Corncobs and 16 on Despatch. Regimental HQ was established ashore at Manvieux, coming under the operational control of 125th LAA Rgt.[102][103][104]
As the land campaign progressed, 127th LAA Rgt continued to protect the vital Mulberry, latterly with HMS Adventure replacing Despatch. By the end of August, once 21st Army Group had broken out of the Normandy bridgehead, 105 AA Bde arrived to take over command of some of the AA units in the bridgehead, including 127th LAA Rgt.[103][105]
Antwerp[]
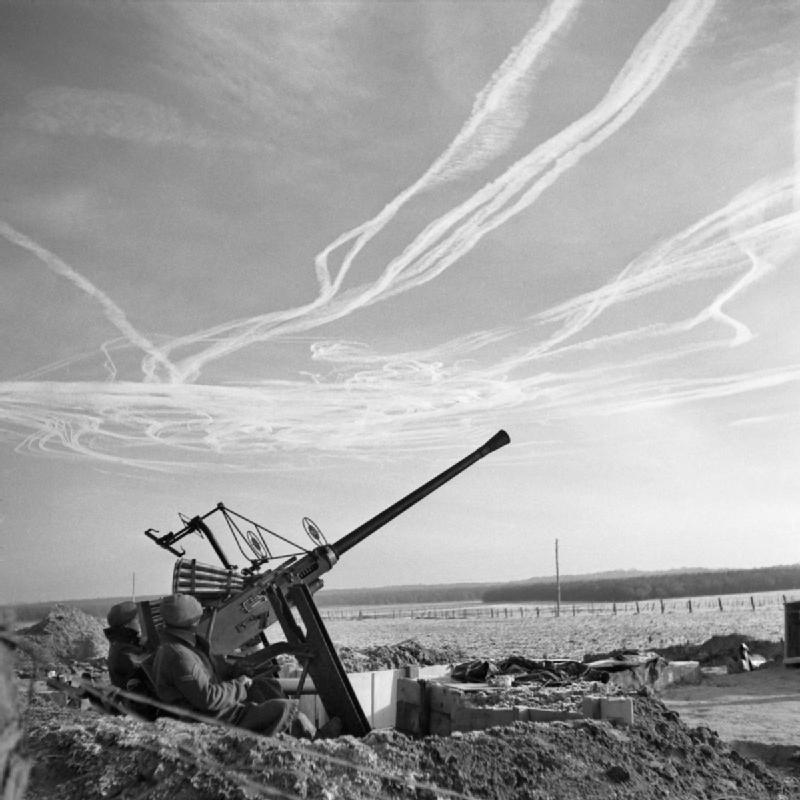

Bofors gun and crew in NW Europe, winter 1944–45.
105 AA Brigade and 127th LAA Rgt were withdrawn from the Normandy Base Area between 5 and 14 October, and moved up to reinforce the AA defences of Antwerp. This port was vital for 21st Army Group's supplies, and the defences had to cover both the harbour and its approaches up the Scheldt Estuary. 127th LAA Regiment was assigned to the 'Scheldt South' AA layout under 105 AA Bde. One of the principal LAA roles, in conjunction with searchlights, was to deal with mine-laying aircraft. Antwerp itself was heavily bombarded by V-1 flying bombs but there was little air activity over the estuary.[106]
The regiment remained in the North West Europe theatre until VE Day, still in the 'South Scheldt' layout, under the command of 75 AA Bde.[71][94][107][108][109] 127th (Queen's) LAA Rgt was placed in suspended animation during 1946.[72]
Postwar[]
When the TA was reconstituted in 1947, the regiment was reformed at Croydon as 598 (Queen's) Light Anti-Aircraft Regiment. The full subsidiary title (4th Bn The Queen's Regiment) was added a couple of years later, when the regiment adopted a supplementary shoulder title of 'QUEEN'S' in white on a red backing worn below the RA shoulder title. 598 LAA Regiment formed part of 106 AA Brigade (TA), based at Kingston upon Thames. When AA Command was disbanded in 1955, 598 LAA Regiment merged with two other Surrey units, 565 (Surrey) LAA/SL Regiment at Kingston, and 566 (City of London Rifles) LAA Regiment, at Sutton, to form a new 565th Light Anti-Aircraft Regiment at Sutton in 30 AA Bde with the following organisation:[68][72][110][111]
- P (City of London Rifles) Bty
- Q (4th Queen's) Bty
- R (Surrey) Bty
- S (City of London Rifles) Bty
In 1961 a further reorganisation saw 565 Regiment converted back to infantry and merged with 5th and 6th Queen's to form 3rd (V) Battalion in the new The Queen's Royal Surrey Regiment with C Company based at Croydon.[26][68][72][111]
Honorary Colonels[]
The following served as Honorary Colonel of the unit:[9]
- William Monson, 1st Viscount Oxenbridge, appointed 18 March 1882
- Sir Frederick Edridge, appointed 7 April 1906
- Colonel Henry Cubitt, 2nd Baron Ashcombe, CB, TD, appointed 12 July 1922
- J.M. Newnham, OBE, appointed 19 October 1927 (former CO of the 1st Surrey VB of the VTC).
Battle Honours[]
The 4th Queen's was awarded the following Battle honours:[9][28]
- Second Boer War: South Africa 1900–1902
- World War I: North West Frontier 1916–1917, Suvla, Landing at Suvla, Scimitar Hill, Gallipoli 1915, Rumani, Egypt 1915–1916, Marne 1918, Soissonais, Ourgq, Gaza, El Musha, Jerusalem, Jericho, Tell Asur, Palestine 1917–1918, Ypres 1917, Broodseinde, Passchendaele 1917, Cambrai, France and Flanders 1914–1918.
The Royal Artillery does not carry battle honours, so none were awarded to the battalion for service during World War II
Memorials[]
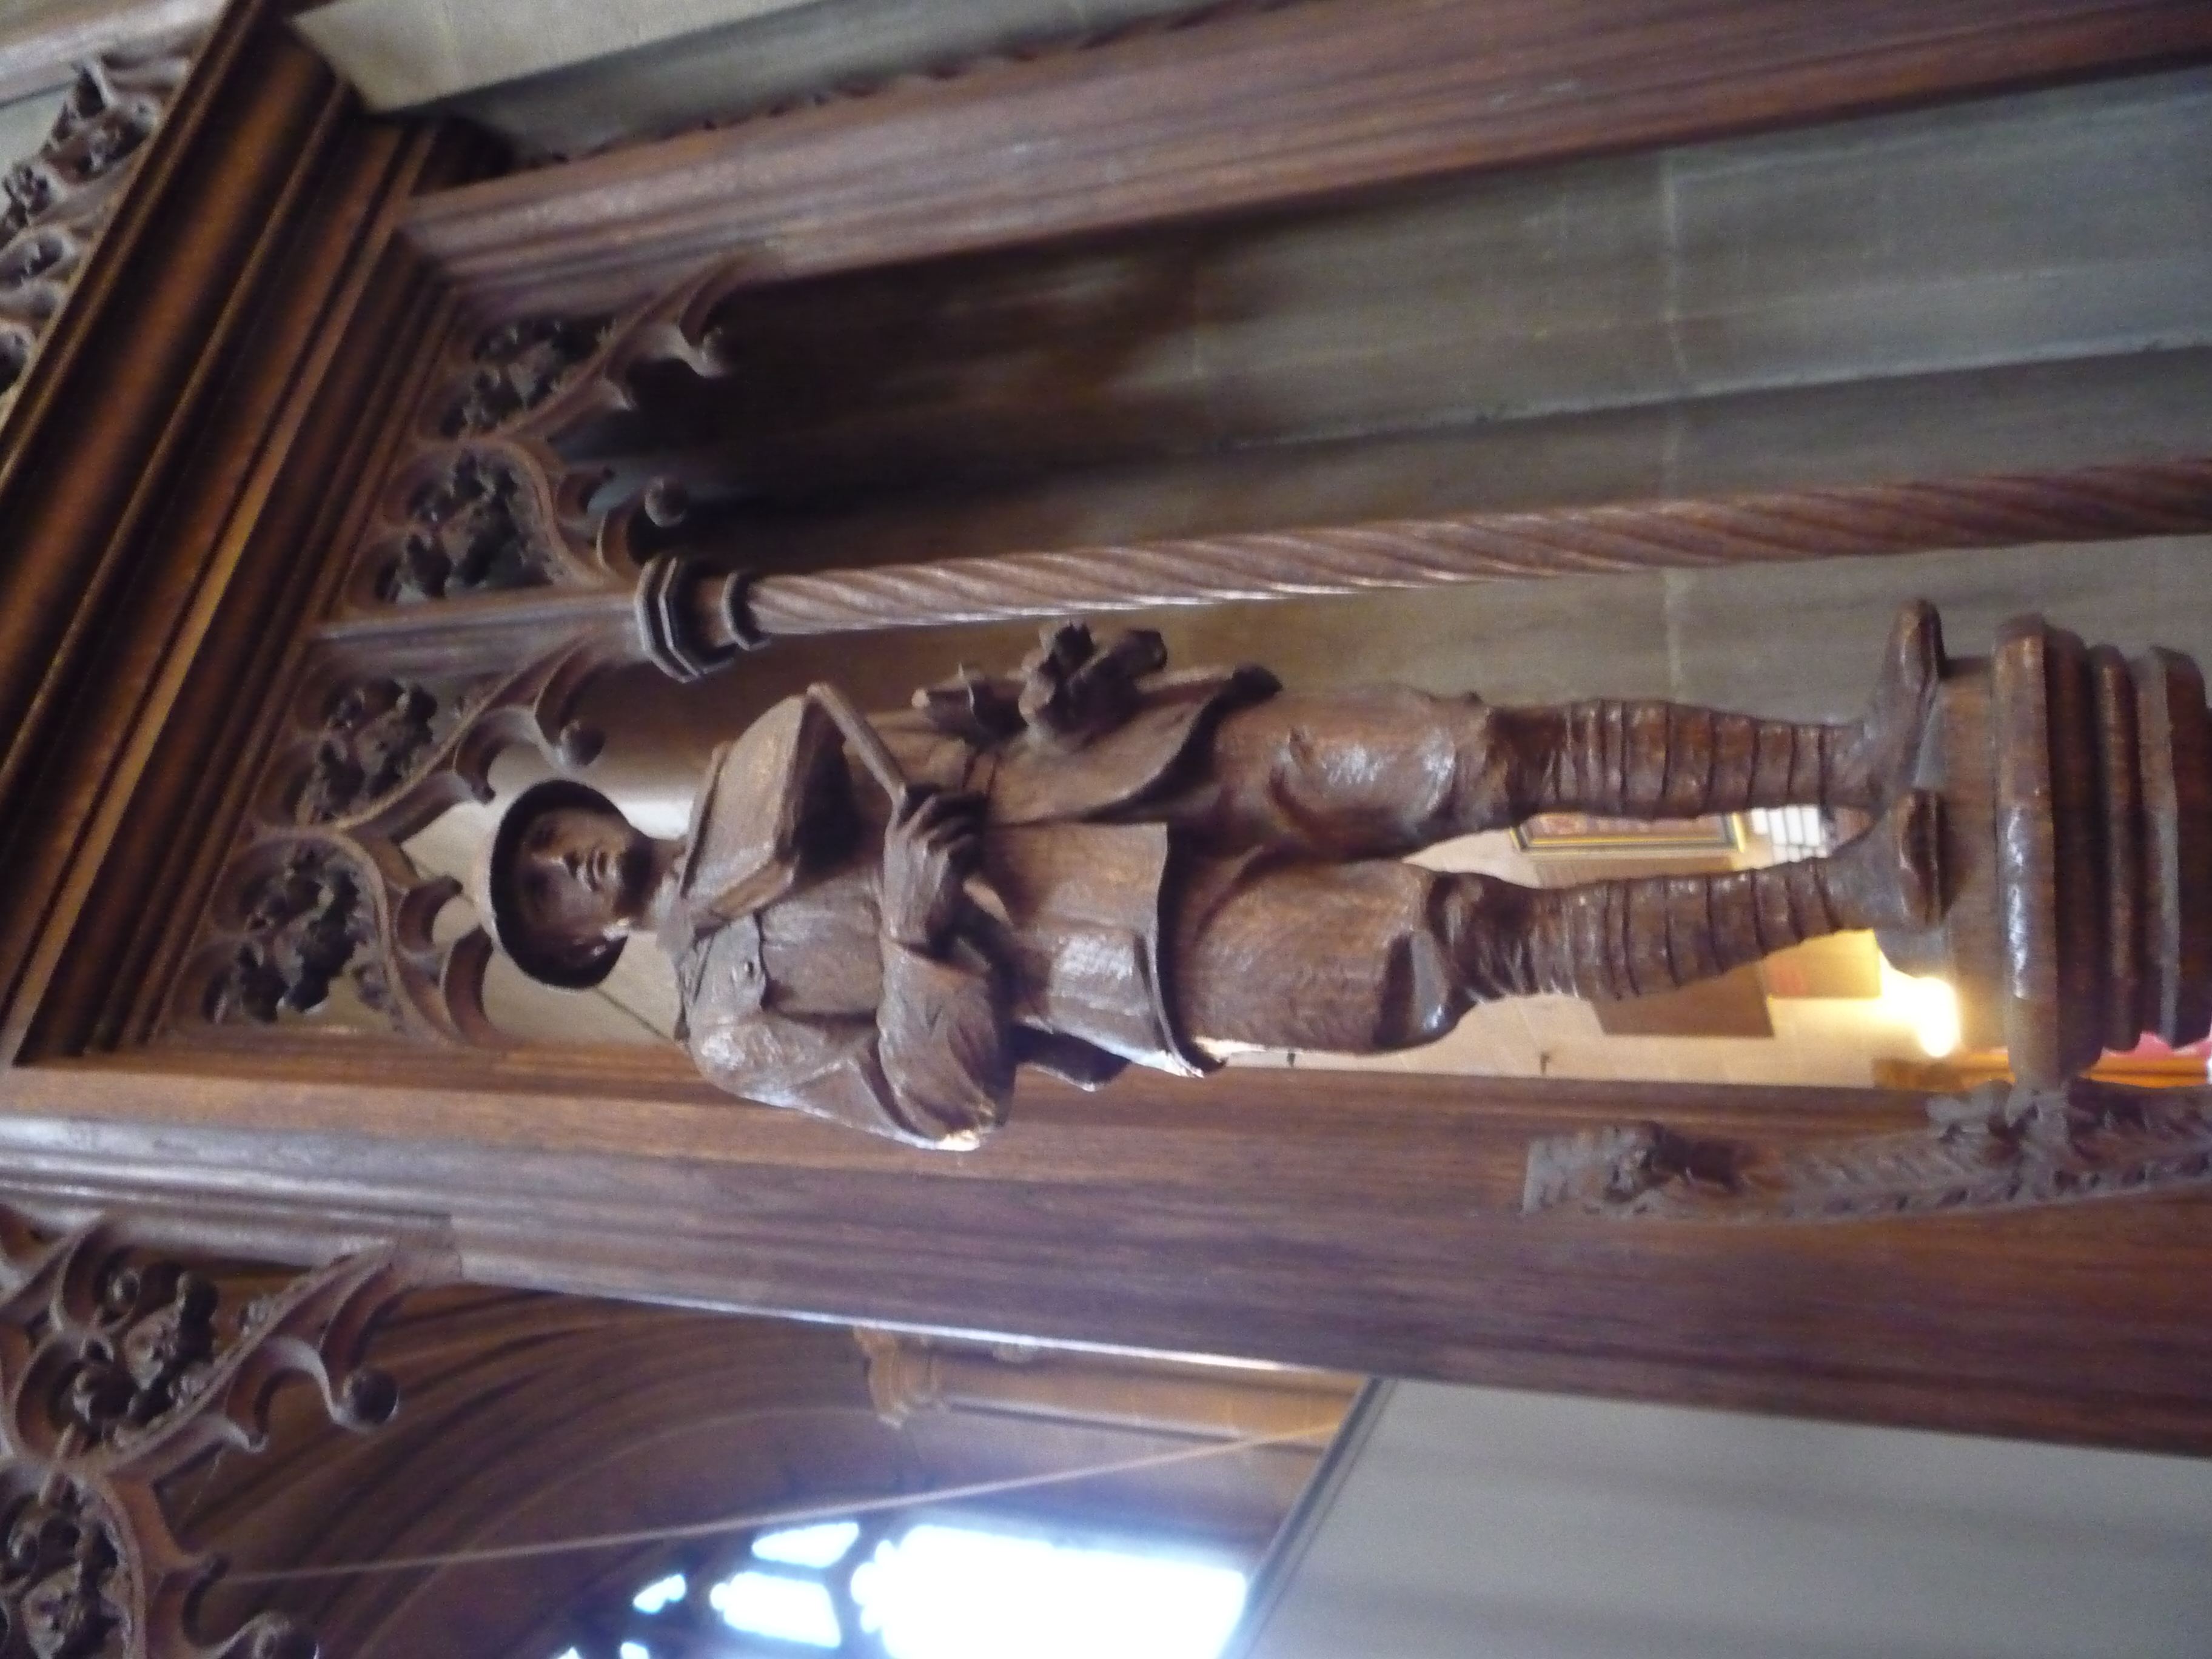

,_in_Croydon_Minster.jpg)
Wooden figure of a World War I infantry officer on the memorial screen in Croydon Minster.
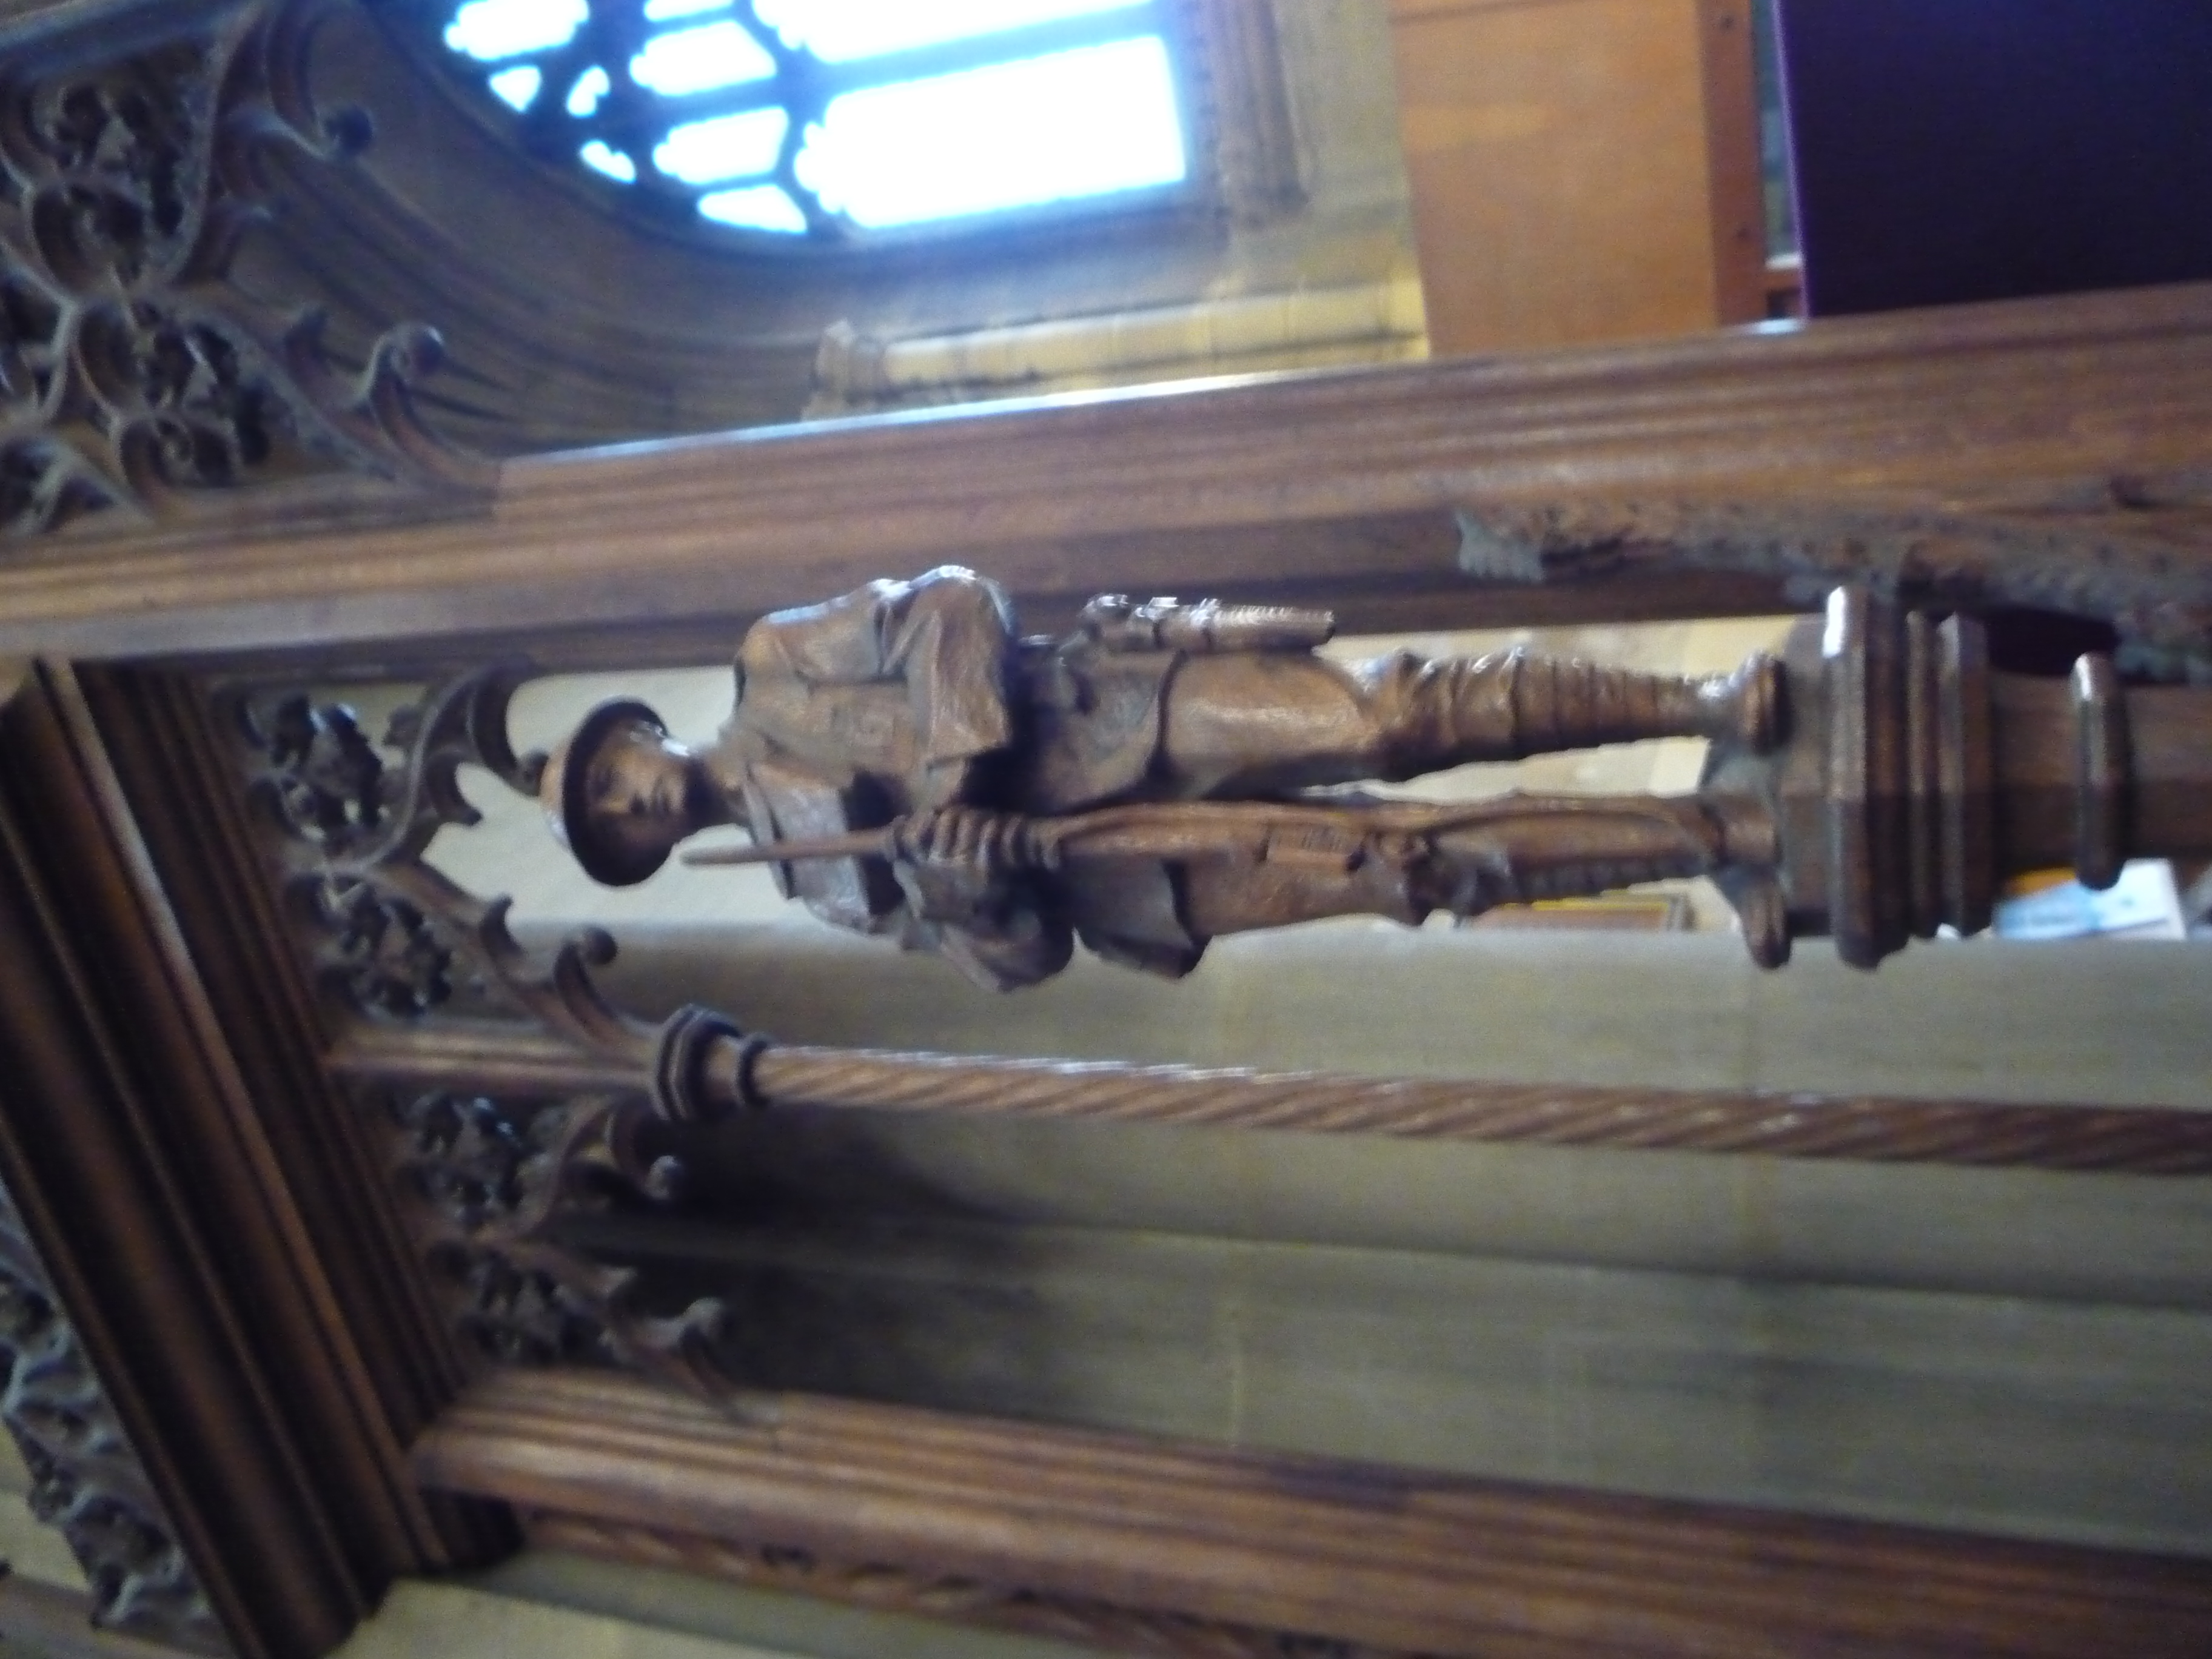

,_in_Croydon_Minster.jpg)
Wooden figure of a World War I infantryman on the memorial screen in Croydon Minster.
A pair of brass plaques in the entrance to Croydon Town Hall list the names of 103 residents of the town who served in the Second Boer War with 1st VB The Queen's. A wooden panel was set up in the foyer of the town hall in 1953, which gives a potted history of the battalion including its changes of title, battle honours, and service during World War II.[28]
A war memorial to 4th Queens in the form of a carved oak screen was erected in 1922 in Croydon Parish Church (Croydon Minster since 2011),[26][112] and the King's Colours of the 2/4th and 3/4th Bns were laid up there during the dedication on 22 November 1922.[26][113] The old Regimental colours of the 4th Queen's were also laid up in the church on 5 April 1964.[26][114]
Notes[]
- ↑ Beckett.
- ↑ Spiers, pp. 163–8.
- ↑ 3.0 3.1 3.2 3.3 3.4 3.5 Westlake, p. 228.
- ↑ Beckett, Appendix VII.
- ↑ 5.0 5.1 5.2 5.3 Volunteers at Queens Royal Surreys
- ↑ 6.00 6.01 6.02 6.03 6.04 6.05 6.06 6.07 6.08 6.09 6.10 Haswell, pp. 122–4.
- ↑ Croydon at Drill Hall Project.
- ↑ Croydon at Stepping Forward London.
- ↑ 9.0 9.1 9.2 9.3 9.4 9.5 9.6 9.7 Army List, various dates.
- ↑ Cadets at Queens Royal Surreys
- ↑ Beckett, pp. 129–32.
- ↑ Spiers pp. 177–200.
- ↑ Training Depots, 1873–1881 at Regiments.org.
- ↑ Beckett, pp. 133–34.
- ↑ Beckett, pp. 135, 185–6.
- ↑ Dunlop, pp. 60–1.
- ↑ Haswell, p. 118.
- ↑ Leslie.
- ↑ Dunlop, Chapter 14.
- ↑ Spiers, Chapter 10.
- ↑ London Gazette 20 March 1908.
- ↑ 22.0 22.1 22.2 Becke, Pt 2a, pp. 49–54.
- ↑ 23.0 23.1 23.2 23.3 23.4 23.5 23.6 Queen's at Long, Long Trail
- ↑ 24.0 24.1 24.2 Queen's at Regimental Warpath
- ↑ Becke, Pt 2b, p. 6.
- ↑ 26.0 26.1 26.2 26.3 26.4 26.5 26.6 26.7 The Queen's Shrine, Croydon Parish Church, at Queen's Royal Surreys
- ↑ Perry, pp. 35–8, 55–8, 99–110, 137–40.
- ↑ 28.0 28.1 28.2 28.3 IWM War Memorials Register ref 862.
- ↑ 29.0 29.1 29.2 Becke, Pt 2b, pp. 75–82.
- ↑ 30.0 30.1 30.2 30.3 30.4 Becke, Pt 2a, pp. 117–23.
- ↑ Aspinall-Oglander, p. 286.
- ↑ 32.0 32.1 32.2 Westlake, Gallipoli, pp. 12–3.
- ↑ Aspinall-Oglander, pp. 291–2.
- ↑ North, pp. 171–1.
- ↑ MacMunn & Falls, p. 156.
- ↑ MacMunn & Falls, pp. 279–.315
- ↑ Bullock, pp. 44–5.
- ↑ MacMunn & Falls, pp. 334–49.
- ↑ Bullock, pp. 46–7.
- ↑ Bullock, pp. 75–6.
- ↑ Falls, pp. 84–105, 125.
- ↑ Falls, p. 251.
- ↑ Falls, p. 277.
- ↑ Falls, pp. 281–2.
- ↑ Falls, pp. 314–321.
- ↑ Falls, pp. 411–13.
- ↑ 47.0 47.1 47.2 47.3 Becke, Pt 3b, pp. 41–50.
- ↑ Edmonds, Appendix A.
- ↑ Edmonds, pp. 169, 235, 258–9.
- ↑ Edmonds, p. 265–6.
- ↑ Edmonds, p. 282–5.
- ↑ Edmonds, pp. 294–6.
- ↑ Edmonds & Maxwell-Hyslop, pp. 70–1, 79–80.
- ↑ Edmonds & Maxwell-Hyslop, pp. 285–90, 438.
- ↑ Edmonds & Maxwell-Hyslop, p. 546.
- ↑ Becke, Pt 3a, pp. 27–33.
- ↑ 57.0 57.1 57.2 57.3 Becke, Pt 3a, pp. 103–9.
- ↑ Wolff, pp. 207–8.
- ↑ Entrenching battalions at Long, Long Trail.
- ↑ Entrenching Battalions, The National Archives (TNA), Kew, file WO 95/5494J.
- ↑ 69th Provisional Battalion (The Queen's) War Diary, TNA file WO 95/5458.
- ↑ David Porter's work on Provisional Brigades at Great War Forum.
- ↑ Unallotted Brigades at Regimental warpath.
- ↑ Moore & Sayers, pp. 102–15.
- ↑ Robson, pp. 48–50 and Appendix 2.
- ↑ Heathcote, pp. 179–80.
- ↑ Queen's at Regiments.org
- ↑ 68.0 68.1 68.2 4th Bn Queen's at Regiments.org
- ↑ Titles and Designations.
- ↑ AA Command 3 September 1939 at Patriot Files
- ↑ 71.0 71.1 71.2 71.3 5 AA Division 1939 at British Military History
- ↑ 72.0 72.1 72.2 72.3 72.4 72.5 Litchfield, p. 226.
- ↑ Routledge, Table LX, p. 378.
- ↑ Routledge, pp. 62–3.
- ↑ Routledge, pp. 65–6, 371.
- ↑ 76.0 76.1 76.2 63 S/L Rgt at RA 39–45
- ↑ Routledge, Table LXV, p. 396.
- ↑ Farndale, Annex D.
- ↑ 79.0 79.1 79.2 474 S/L Bty War Diary 1940–41, TNA file WO166/3322.
- ↑ Order of Battle of Non-Field Force Units in the United Kingdom, Part 27: AA Command, 12 May 1941, with amendments, TNA file WO 212/79.
- ↑ 81.0 81.1 Farndale, Annex M.
- ↑ Routledge, p. 78.
- ↑ Collier, Chapter XII.
- ↑ Collier, Chapter 15.
- ↑ Collier, Chapter XVII.
- ↑ Collier, Appendix XXIV.
- ↑ Collier, Appendix XXX.
- ↑ Routledge, pp. 388-9, 393.
- ↑ Pile's despatch.
- ↑ Collier, Chapter XIX.
- ↑ Routledge, pp. 399–401.
- ↑ 92.0 92.1 92.2 92.3 Order of Battle of Non-Field Force Units in the United Kingdom, Part 27: AA Command, 2 December 1941, with amendments, TNA file WO 212/80.
- ↑ Routledge, p. 400.
- ↑ 94.0 94.1 127 LAA Rgt at RA 39–45
- ↑ Order of Battle of Non-Field Force Units in the United Kingdom, Part 27: AA Command, 14 May 1942, with amendments, TNA file WO 212/81.
- ↑ Routledge, pp. 401–4.
- ↑ 97.0 97.1 Order of Battle of Non-Field Force Units in the United Kingdom, Part 27: AA Command, 1 October 1942, with amendments, TNA file WO 212/82.
- ↑ 98.0 98.1 Order of Battle of Non-Field Force Units in the United Kingdom, Part 27: AA Command, 13 March 1943, with amendments, TNA file WO 212/83.
- ↑ Order of Battle of AA Command, 1 August 1943, TNA file WO 212/84.
- ↑ Order of Battle of the Forces in the United Kingdom, Part 2: 21 Army Group, 24 July 1943, with amendments, TNA file WO 212/238.
- ↑ Routledge, pp. 305, 311; Table XLIX, p. 319.
- ↑ Ellis, Vol 1, p. 263.
- ↑ 103.0 103.1 76 AA Bde War Diary, 1944, TNA file WO 171/1084.
- ↑ Routledge, pp. 311–2.
- ↑ Routledge, p. 315; Table LI, p. 328.
- ↑ Routledge, Table LII, pp. 330–1; pp. 333-5; Table LIII, p. 342.
- ↑ Joslen, p. 463.
- ↑ Ellis, Vol II, Appendix IV, p. 370.
- ↑ Routledge, Table LVII, p. 366.
- ↑ 592–638 Regiments at British Army units 1945 on
- ↑ 111.0 111.1 564–591 Regiments at British Army 1945 on
- ↑ IWM War Memorials Register ref 827.
- ↑ IWM War Memorials Register ref 835.
- ↑ Croydon Minster.
References[]
- Brig C.F. Aspinall-Oglander, History of the Great War: Military Operations Gallipoli, Vol II, May 1915 to the Evacuation, London: Heinemann, 1932/Imperial War Museum & Battery Press, 1992, ISBN 0-89839-175-X.
- Maj A.F. Becke,History of the Great War: Order of Battle of Divisions, Part 2a: The Territorial Force Mounted Divisions and the 1st-Line Territorial Force Divisions (42–56), London: HM Stationery Office, 1935/Uckfield: Naval & Military Press, 2007, ISBN 1-847347-39-8.
- Maj A.F. Becke,History of the Great War: Order of Battle of Divisions, Part 2b: The 2nd-Line Territorial Force Divisions (57th–69th), with the Home-Service Divisions (71st–73rd) and 74th and 75th Divisions, London: HM Stationery Office, 1937/Uckfield: Naval & Military Press, 2007, ISBN 1-847347-39-8.
- Maj A.F. Becke,History of the Great War: Order of Battle of Divisions, Part 3a: New Army Divisions (9–26), London: HM Stationery Office, 1938/Uckfield: Naval & Military Press, 2007, ISBN 1-847347-41-X.
- Maj A.F. Becke,History of the Great War: Order of Battle of Divisions, Part 3b: New Army Divisions (30–41) and 63rd (R.N.) Division, London: HM Stationery Office, 1939/Uckfield: Naval & Military Press, 2007, ISBN 1-847347-41-X.
- Ian F.W. Beckett, Riflemen Form: A study of the Rifle Volunteer Movement 1859–1908, Aldershot: Ogilby Trusts, 1982, ISBN 0-85936-271-X.
- David L. Bullock, Allenby's War: The Palestine-Arabian Campaigns 1916–1918, London: Blandford Press, 1988, ISBN 0-7137-1869-2.
- Basil Collier, History of the Second World War, United Kingdom Military Series: The Defence of the United Kingdom, London: HM Stationery Office, 1957.
- Col John K. Dunlop, The Development of the British Army 1899–1914, London: Methuen, 1938.
- Brig-Gen Sir James E. Edmonds, History of the Great War: Military Operations, France and Belgium 1918, Vol III, May–July: The German Diversion Offensives and the First Allied Counter-Offensive, London: Macmillan, 1939/Imperial War Museum and Battery Press, 1994, ISBN 0-89839-211-X.
- Brig-Gen Sir James E. Edmonds & Lt-Col R. Maxwell-Hyslop, History of the Great War: Military Operations, France and Belgium 1918, Vol V, 26th September–11th November, The Advance to Victory, London: HM Stationery Office, 1947/Imperial War Museum and Battery Press, 1993, ISBN 1-870423-06-2.
- Major L.F. Ellis, History of the Second World War, United Kingdom Military Series: Victory in the West, Vol I: The Battle of Normandy, London: HM Stationery Office, 1962/Uckfield: Naval & Military, 2004, ISBN 1-845740-58-0.
- Major L.F. Ellis, History of the Second World War, United Kingdom Military Series: Victory in the West, Vol II: The Defeat of Germany, London: HM Stationery Office, 1968/Uckfield: Naval & Military, 2004, ISBN 1-845740-59-9.
- Capt Cyril Falls, History of the Great War: Military Operations, Egypt and Palestine, Vol II, From June 1917 to the End of the War, London: HM Stationery Office, 1930/Imperial War Museum and Naval & Military Press, 2013, ISBN 1-84574951-0.
- Gen Sir Martin Farndale, History of the Royal Regiment of Artillery: The Years of Defeat: Europe and North Africa, 1939–1941, Woolwich: Royal Artillery Institution, 1988/London: Brasseys, 1996, ISBN 1-85753-080-2.
- Jock Haswell, Famous Regiments Series: The Queen's Royal Regiment (West Surrey) (The 2nd Regiment of Foot), London: Hamish Hamilton, 1967.
- T.A. Heathcote, The Afghan Wars 1839–1919, London: Osprey, 1980, ISBN 0-85045-354-2.
- Lt-Col H.F. Joslen, Orders of Battle, United Kingdom and Colonial Formations and Units in the Second World War, 1939–1945, London: HM Stationery Office, 1960/Uckfield: Naval & Military Press, 2003, ISBN 1843424746.
- N.B. Leslie, Battle Honours of the British and Indian Armies 1695–1914, London: Leo Cooper, 1970, ISBN 0-85052-004-5.
- Norman E.H. Litchfield, The Territorial Artillery 1908–1988 (Their Lineage, Uniforms and Badges), Nottingham: Sherwood Press, 1992, ISBN 0-9508205-2-0.
- Lt-Gen Sir George MacMunn & Capt Cyril Falls, History of the Great War: Military Operations, Egypt and Palestine, Vol I, From the Outbreak of War with Germany to June 1917, London: HM Stationery Office, 1928/Imperial War Museum and Battery Press, 1992, ISBN 1-870423-26-7.
- H. Keatley Moore & W.C. Berwick Sayers, Croydon and the Great War: The Official History of the War Work of the Borough and its Citizens from 1914 to 1919, Croydon: Central Public Library, 1920/Fb&c Limited, 2015, ISBN 978-133138119-3.
- John North, Gallipoli: The Fading Vision, London: Faber & Faber, 1936.
- F.W. Perry, History of the Great War: Order of Battle of Divisions, Part 5b: Indian Army Divisions, Newport: Ray Westlake, 1993, ISBN 1-871167-23-X.
- Brian Robson, Crisis on the Frontier: The Third Afghan War and the Campaign in Waziristan 1919–20, Staplehurst: Spellmount, 2004, ISBN 1-87227-211-5.
- Brig N.W. Routledge, History of the Royal Regiment of Artillery: Anti-Aircraft Artillery 1914–55, London: Royal Artillery Institution/Brassey's, 1994, ISBN 1-85753-099-3.
- Edward M. Spiers, The Army and Society 1815–1914, London: Longmans, 1980, ISBN 0-582-48565-7.
- Titles and Designations of Formations and Units of the Territorial Army, London: War Office, 7 November 1927.
- Ray Westlake, British Regiments at Gallipoli, Barnsley: Leo Cooper, 1996, ISBN 0-85052-511-X.
- Ray Westlake, Tracing the Rifle Volunteers, Barnsley: Pen and Sword, 2010, ISBN 978-1-84884-211-3.
- Leon Wolff, In Flanders Fields: The 1917 Campaign, London: Longmans, 1959/Corgi, 1966.
Online sources[]
- British Army units from 1945 on
- British Military History
- Great War Forum
- Imperial War Museum, War Memorials Register
- The Long, Long Trail
- Orders of Battle at Patriot Files
- Queen's Royal Surrey Regiment website
- The Regimental Warpath 1914–1918 – archive site
- Land Forces of Britain, the Empire and Commonwealth (Regiments.org) – archive site
- Royal Artillery 1939–1945
- Stepping Forward: A Tribute to the Volunteer Military Reservists and Supporting Auxiliaries of Greater London
The original article can be found at 4th Battalion, Queen's Royal Regiment (West Surrey) and the edit history here.