| 4th Light Horse Regiment | |
|---|---|
|
File:4th light horse badge.jpg 4th Light Horse Regiment hat badge | |
| Active | 1914–1919 |
| Country |
|
| Branch | Australian Army |
| Type | Mounted Infantry |
| Size | Regiment |
| Part of |
1st Division 4th Light Horse Brigade |
| Engagements |
First World War North African Campaign Gallipoli campaign Western Front Sinai and Palestine Campaign |
| Battle honours |
France and Flanders 1916–1918 Messines 1917 Ypres 1917 Broodseinde Passchendaele Lys Kemmel Marne 1918 Tardenois Gallipoli 1915–1916 ANZAC Defence at ANZAC Suvla Sari Bair Egypt 1915–1917 Palestine 1917–1918 Beersheba El Mughar Nebi Samwill Jerusalem Jordan (Es Salt) Megiddo |
| Insignia | |
| Unit Colour Patch |
|
The 4th Light Horse Regiment was a mounted infantry regiment of the Australian Army during the First World War. The regiment was raised in August 1914, as the divisional cavalry regiment for the 1st Division.
During the war the regiment fought against the forces of the German Empire and the Ottoman Empire, in Egypt, at Gallipoli, on the Western front, on the Sinai Peninsula, and in Palestine and Jordan. After the armistice the regiment eventually returned to Australia in March 1919. For its role in the war the regiment was awarded twenty-one battle honours.
Formation[]
On 11 August 1914, the 4th Light Horse Regiment was raised in Melbourne, as the divisional cavalry regiment of the 1st Division.[1] Light horse regiments normally comprised twenty-five officers and 497 other ranks serving in three squadrons, each of six troops.[2] Each troop was divided into eight sections, of four men each. In action one man of each section was nominated as a horse holder reducing the regiment's rifle strength by a quarter.[3] However, the 4th Light Horse raised five squadrons. Two of these squadrons were detached to accompany the Australian infantry divisions to France, while the other three remained to the Middle East, serving with the Australian and New Zealand Mounted Division.[1]
All Australian Light Horse regiments used cavalry unit designations, but were mounted infantry,[4] and mounted exclusively on the Australian Waler horse.[5]
Operational history[]

Trooper A. G. Forsyth, 3109 4th Light Horse Regiment transferred to the 2nd Anzac Mounted Regiment after Gallipoli and died of pneumonia on 2 April 1917 in England
Departure for Egypt[]
The regiment sailed for war on 19 October 1914 and arrived in Egypt on 10 December.[1]
Gallipoli[]
When the rest of the division left to take part in the Gallipoli, they were left behind the authorities believing mounted troops would not be needed in the campaign. However infantry casualties were so severe it was decided to send them, without their horse, as infantry reinforcements. They landed at what became known as ANZAC Cove between the 22 and 24 May 1915. They did not initially fight as a regiment, but provided squadrons as reinforcements for infantry battalions and it was not until 11 June that that the regiment reformed. They were mostly used to defend the Allies precarious position on the peninsula, especially in the area of "Ryrie’s Post", and did take part in several small assaults. The regiment left Gallipoli prior to the end of the campaign on 11 December 1915.[1]
Western Front[]
On their return to Egypt the regiment was required to raise a fourth squadron, known as 'D' Squadron, they and 'B' Squadron were detached from the regiment and assigned as the divisional cavalry formations, for the 1st and 3rd Division, and sent France, for service on the Western Front.[1]
The two squadrons took part in the Battle of Messines, the third battle of Ypres, the Battle of Broodseinde, the Battle of Passchendaele, the Battle of the Lys, the Battle of Kemmel, the Second Battle of the Marne and the Battle of Tardenois. The two squadrons together with a squadron from New Zealand were eventually amalgamated and renamed the I Anzac Corps Mounted Regiment.[nb 1] and together earned nine battle honours on the Western Front.[1]
Sinai and Palestine Campaign[]

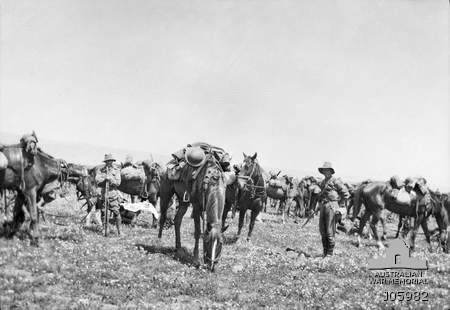
After the war Egypt 1919
With only two squadrons remaining in Egypt a new squadron was raised, confusingly called 'B' Squadron. The regiment were then deployed defending the Suez Canal, for the remainder of the year. In April 1917, the regiment moved into the Sinai but were only used for rear area security.[1]
The regiment was then assigned to the 4th Light Horse Brigade, and on 31 October took part in its first large battle. The Battle of Beersheba was part of the Third battle of Gaza, the 4th and 12th Light Horse carried out a cavalry charge on the town of Beersheba, which has since became known as the "charge of Beersheba".[1]
They were then involved in the advance into Palestine, before being rested in the early months of 1918. During the rest of the campaign the regiment took part in the battle of Mughar Ridge, the battle of Nebi Samwill, the capture of Jerusalem, the battle of Es Sal and the battle of Megiddo. A patrol from the regiment was also the first Allied troops to enter Damascus on 1 October 1918.
The Ottoman Empire signed the Armistice of Mudros on 30 October 1918, and the war in the Middle East ended. However the regiment had to return to Egypt, where rioting had started in March 1919. Finally in June 1919, the regiment sailed for Australia, the war had caused them 105 killed and 332 wounded.[1][nb 2]
Commanding officers[]
- Lieutenant Colonel John Kealty Forsyth
- Lieutenant Colonel Leonard Long
- Lieutenant Colonel Murray William James Bourchier
- Lieutenant Colonel George James Rankin [1]
Battle honours[]
Messines 1917 · Ypres 1917 · Broodseinde · Passchendaele · Lys · Kemmel · Marne 1918 · Tardenois · France and Flanders 1916–1918 · ANZAC · Defence at ANZAC · Suvla · Sari Bair · Gallipoli 1915–1916 · Egypt 1915–1917 · Gaza-Beersheba · El Mughar · Nebi Samwill · Jerusalem · Jordan (Es Salt) · Megiddo.[1]
Notes[]
- Footnotes
- ↑ The I ANZAC Mounted Regiment was formed in July 1916 from 'B' and 'D' Squadrons, 4th Light Horse Regiment and a squadron of the New Zealand Otago Mounted Rifles Regiment and assigned to II Anzac Corps. It was disbanded in December 1918 and its personnel transferred to the 13th Light Horse Regiment and the II Anzac Corps Mounted Regiment.[6]
- ↑ Casualty totals are for Gallipoli and the Middle East only.[1]
- Citations
- ↑ 1.00 1.01 1.02 1.03 1.04 1.05 1.06 1.07 1.08 1.09 1.10 1.11 "4th Light Horse Regiment". Australian War Memorial. http://www.awm.gov.au/units/unit_10555.asp. Retrieved 6 December 2011.
- ↑ "Official History of Australia in the War of 1914–1918 – Volume Vol7". Australian War Memorial. p. 54. http://www.awm.gov.au/collection/records/awmohww1/aif/vol7/awmohww1-aif-vol7-ch5.pdf. Retrieved 29 November 2011.
- ↑ Horner and Williams, "Setting up the Light Horse"
- ↑ "Official History of Australia in the War of 1914–1918 – Volume Vol7". Australian War Memorial. p. 29. http://www.awm.gov.au/collection/records/awmohww1/aif/vol7/awmohww1-aif-vol7-ch3.pdf. Retrieved 29 November 2011.
- ↑ "Official History of Australia in the War of 1914–1918 – Volume Vol7". Australian War Memorial. p. 38. http://www.awm.gov.au/collection/records/awmohww1/aif/vol7/awmohww1-aif-vol7-ch3.pdf. Retrieved 29 November 2011.
- ↑ Mallet, Ross. "Mounted Troops". First AIF. http://www.aif.adfa.edu.au:8888/Light_Horse.html#1st%20Light%20Horse%20Regiment. Retrieved 6 December 2011.
- Horner, David; Williams, Dr Peter (2010). Australia's Military History For Dummies. John Wiley and Sons. ISBN 978-1-74246-894-5.
Further reading[]
- Holloway, D. Hooves, Wheels and Tracks: A History of the 4th/19th Princes of Wales's Light Horse Regiment and its Predecessors, (Fitzroy: Regimental Trustees 4th/19th Prince of Wales's Light Horse Regiment, 1990).
- Smith, N. Men of Beersheba: A History of the 4th Light Horse Regiment 1914–1919, (Melbourne: Mostly Unsung Military Research and Publications, 1993).
| |||||||||||||||||||||||
The original article can be found at 4th Light Horse Regiment (Australia) and the edit history here.