| 8th Anti-Aircraft Division | |
|---|---|
 Formation sign of the division.[1] | |
| Active | 11 November 1940–30 September 1942 |
| Country |
|
| Branch |
|
| Type | Anti-Aircraft Division |
| Role | Air Defence |
| Size | 4–5 Brigades |
| Part of | 1 AA Corps |
| Garrison/HQ | Bristol |
| Engagements |
The Blitz Baedeker Blitz |
8th Anti-Aircraft Division (8 AA Division) was an air defence formation of the British Army during the early years of World War II. It defended South West England during The Blitz and the Luftwaffe 'hit and run' raids, but only had a short career.
Mobilisation
8th Anti-Aircraft Division was one of five new divisions created on 1 November 1940 by Anti-Aircraft Command to control the growing anti-aircraft (AA) defences of the United Kingdom. The division was formed by splitting 5 AA Division, with the new formation taking responsibility for the City of Bristol and the counties of Somerset, Dorset, Devon and Cornwall. Potential targets in this area included the Bristol Aeroplane Company factory and airfield at Filton, and the Royal Navy dockyards at Devonport (Plymouth) and Portland. [2][3][4][5]
The Divisional headquarters (HQ) was at Bristol and the first General Officer Commanding (GOC) was Major-General Robert Allen, who was transferred from commanding 5 AA Division [6][7][8] The division formed part of 1 AA Corps, which was created at the same time to cover Southern England and Wales.[3] The fighting units, organised in four AA Brigades, consisted of Heavy (HAA) and Light (LAA) gun units and Searchlight (S/L) units of the Royal Artillery, with major concentrations of HAA guns in the Bristol and Plymouth Gun Defence Areas (GDAs)
The Blitz


The Blitzed ruins of Temple Church, Bristol
When 8 AA Division was formed the Luftwaffe 's night Blitz on British cities was already under way. There had previously been daylight raids during the Battle of Britain, notably on Bristol and Portland on 25 September 1940,[9] now the night attacks were stepped up both against London and smaller cities, with the ports of Bristol and Plymouth receiving frequent raids, particularly heavy in March 1941 (the Bristol Blitz and Plymouth Blitz).[3][4][10][11]
In 1939 the scale of HAA guns (3-inch and the newer 3.7-inch and 4.5-inch guns) allocated to the Bristol GDA (covering Bristol and Avonmouth) had been 56, and this was increased to 80 in 1940, but by the end of February 1941 only 36 were in place. This increased to 68 a month later, though further additions to the establishment were already being called for.[12] The position on LAA gunsites was worse: only small numbers of Bofors 40 mm guns were available at the start of the Blitz, and most LAA detachments had to make do with Light machine guns (LMGs).[13]
Order of Battle
The division's composition during the Blitz was as follows:[2][14][15][16][17]
- 46 AA Brigade – Bristol
- 76th (Gloucestershire) HAA Rgt[18][19]
- 23 LAA Rgt – to 5 AA Division by May 1941[20][21]
- 66th (Gloucestershire Regiment) S/L Rgt (part)[22][23]
- 68th (Monmouthshire Regiment) S/L Rgt[24][25]
- 55 AA Brigade – Plymouth and Falmouth, Cornwall
- 56th (Cornwall) HAA Rgt[26][27]
- 118th HAA Rgt (part) – new regiment raised in December 1940; to 9 AA Division by May 1941[28][29]
- 58th (Argyll and Sutherland Highlanders) LAA Rgt – part deployed at Plymouth, part under 65 AA Bde at Southampton; left to join 11th Support Group in May 1941[30][31][32]
- 81st S/L Rgt – new unit formed in November 1940 from existing S/L Bty of Cornwall Fortress Royal Engineers[28][33]
- 82nd S/L Rgt – new unit formed in November 1940[28][34]
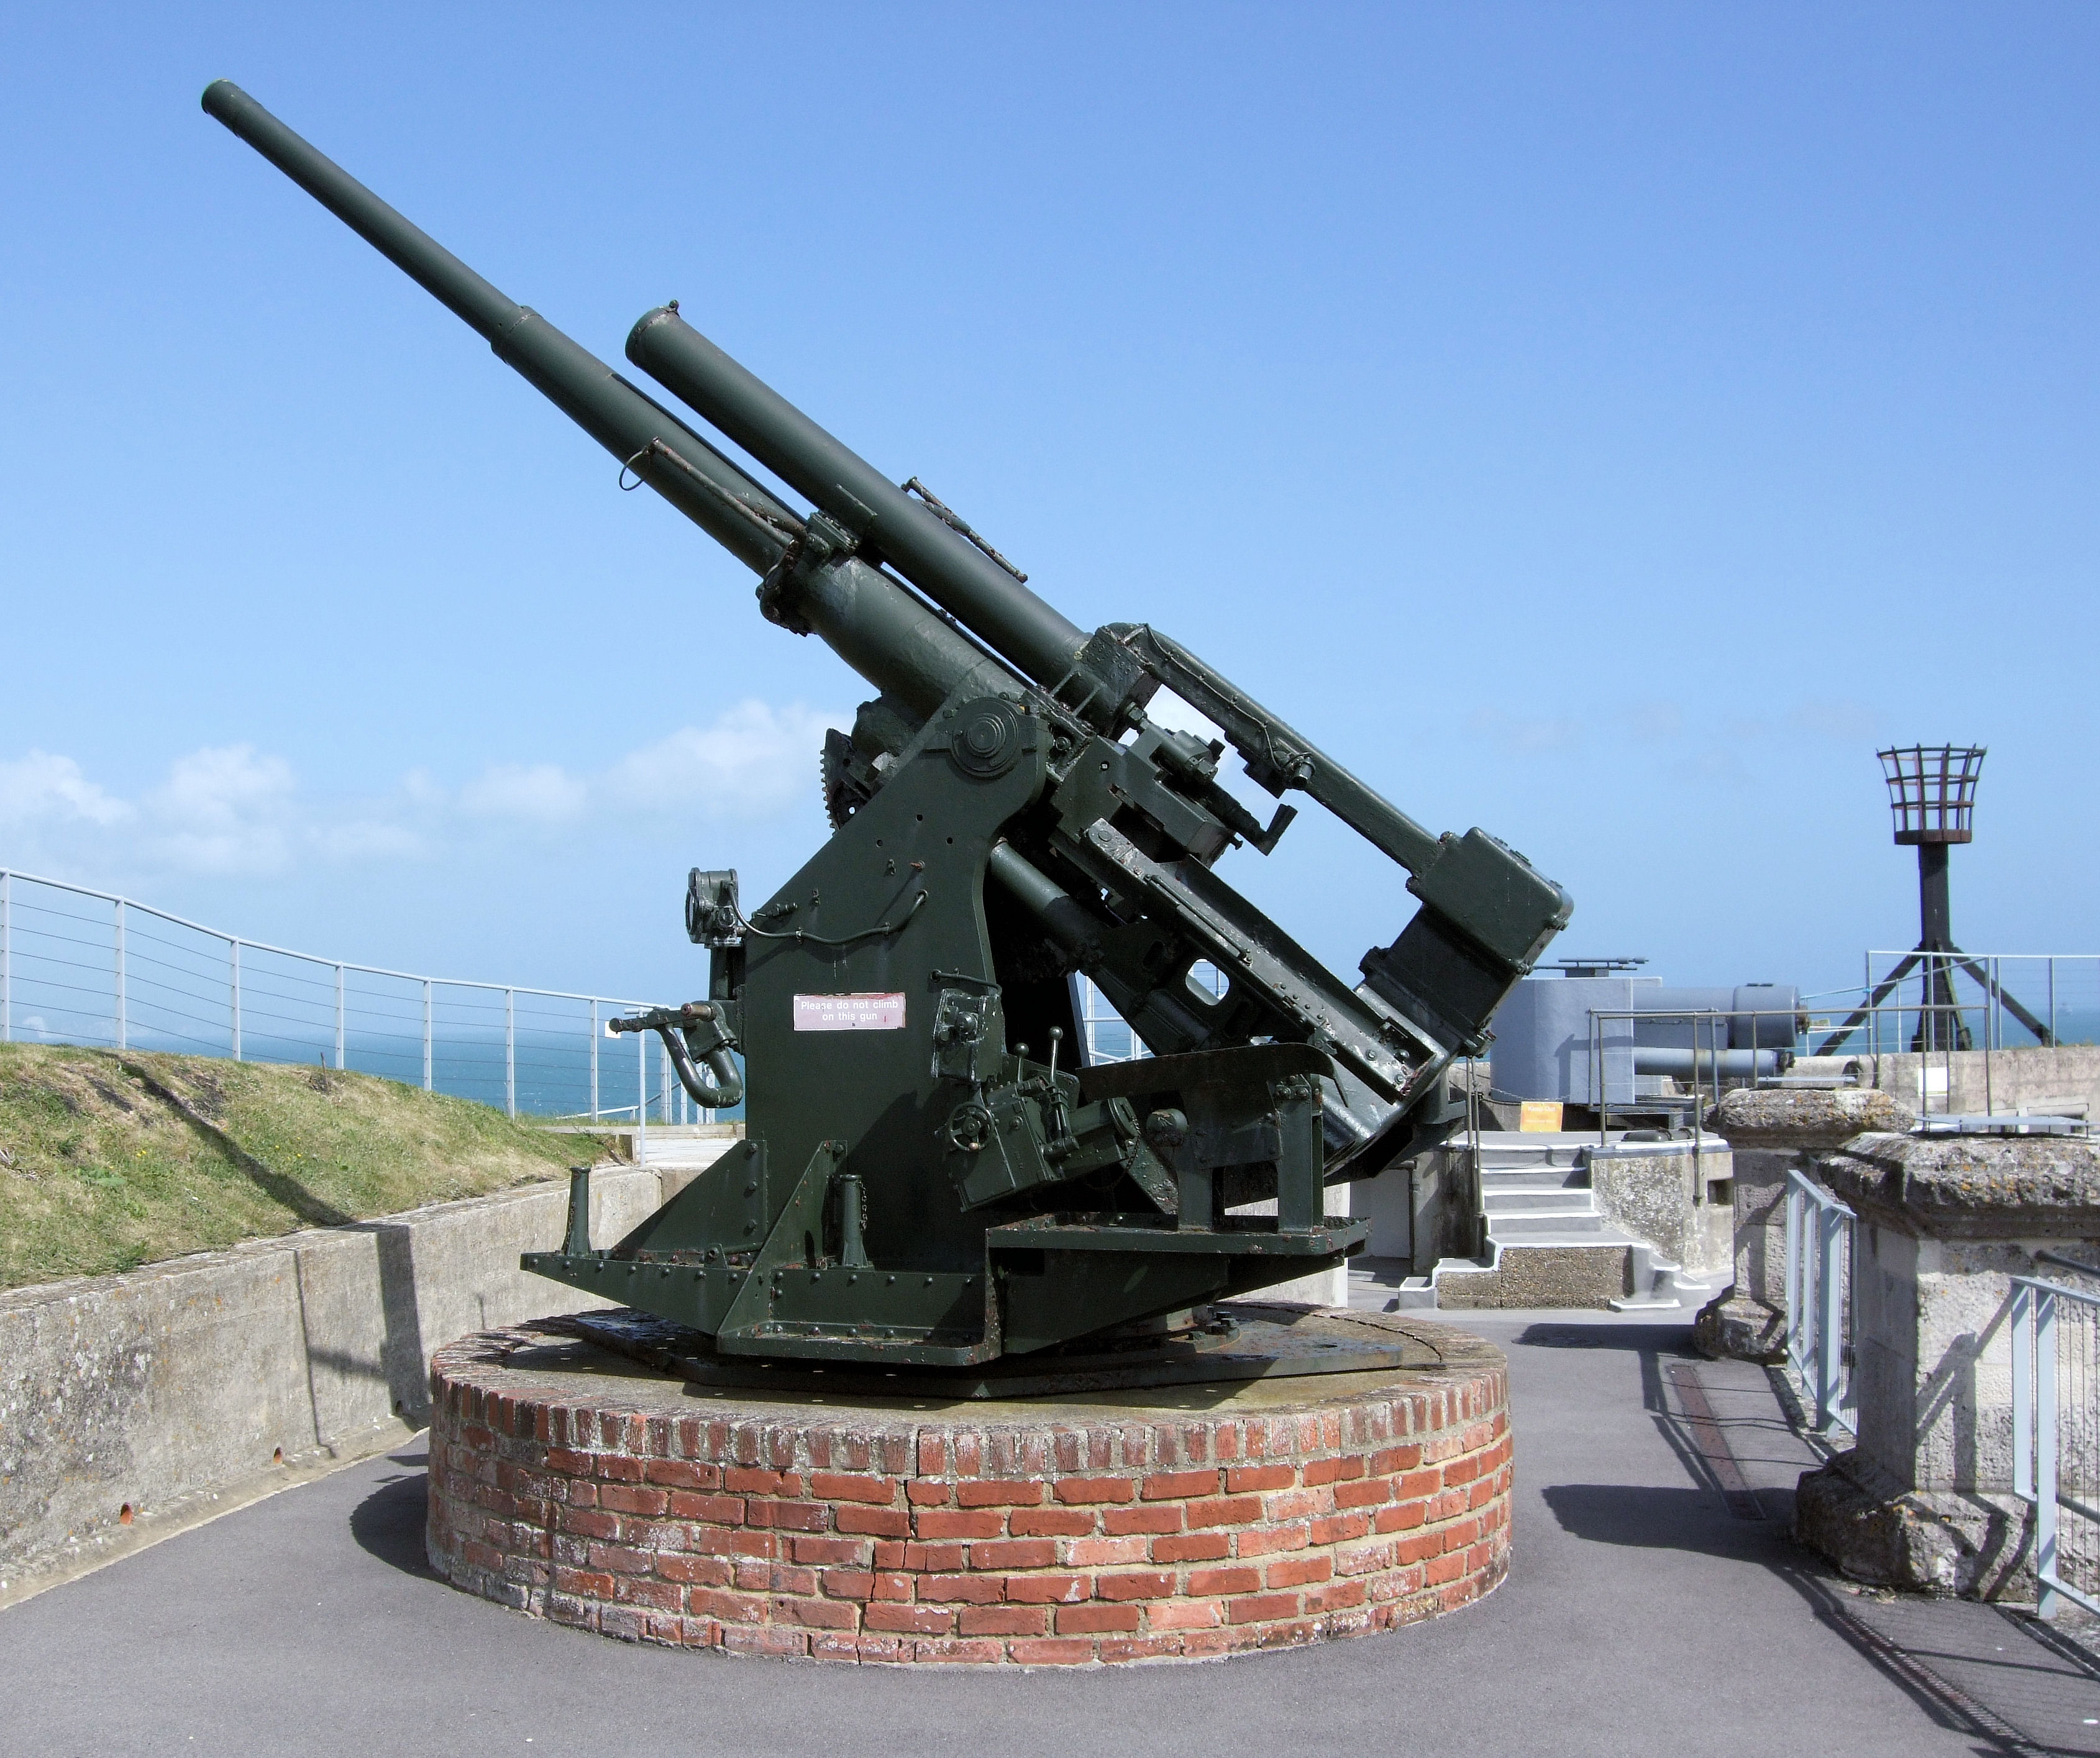

3.7-inch HAA gun preserved at Nothe Fort overlooking Portland Harbour
- 60 AA Brigade – Exeter, Yeovil and Portland
- 64 AA Brigade – Airfield sector layout
- 35th LAA Rgt[37][38]
- 2nd S/L Rgt[39]
- 3rd (Ulster) S/L Rgt – converted into 4th (Ulster) LAA Rgt in January 1942[28][40][41]
- 76th S/L Rgt[42]
- 85th S/L Rgt – new unit raised in January 1941[28][43]
- 9th AA 'Z' Rgt – equipped with Z Battery rocket launchers, formed by 8 AA Division in January 1941[28][44]
- 8 AA Divisional Signals, Royal Corps of Signals (RCS) – formed at Bristol as duplicate of 5th AA Divisional Signals at Reading, Berkshire[45][46]
- 8 AA Divisional Royal Army Service Corps (RASC)
- 191, 915 and 917 Companies
- 8 AA Divisional Company, Royal Army Medical Corps (RAMC)
- 8 AA Divisional Workshop Company, Royal Army Ordnance Corps (RAOC)
Mid-War
By October 1941 the availability of S/L control radar was sufficient to allow AA Command's S/L sites to be 'declustered' into single-light sites spaced at 10,400-yard intervals in 'Indicator Belts' along the coast and approaches to the GDAs, and 'Killer Belts' at 6000-yard spacing to cooperate with the RAF's Night-fighters.[47]


The ruins of St Catherine's Almshouses, Exeter, preserved amongst modern buildings as a memorial of the Blitz
Early in 1942 the Luftwaffe began a new wave of attacks on British cities (the Baedeker Blitz): Exeter and undefended Bath were hit in March, April and May, and Weston-super-Mare in June.[48][49][50] New GDAs were established at Exeter, Taunton, Bath and Salisbury.[6]
Newly-formed AA units joined the division, the HAA and support units increasingly becoming 'Mixed' units, indicating that women of the Auxiliary Territorial Service (ATS) were fully integrated into them. At the same time, experienced units were posted away to train for service overseas. This led to a continual turnover of units, which accelerated in 1942 with the preparations for the invasion of North Africa (Operation Torch) and the need to transfer AA units to counter the Baedeker raids and the Luftwaffe 's hit-and-run attacks against South Coast towns.[4][48]
AA units in the War Office (WO) Reserve rostered for overseas deployment were lent back to AA Command when not required for training. One of these, 103rd HAA Rgt, was moved down from Merseyside, which was rarely attacked by this stage of the war, to reinforce 8 AA Division in Cornwall in April 1942, establishing its batteries at St Ives, Truro and Penzance under 55 AA Bde.[51]
In July, 103rd HAA Rgt was sent for a short attachment to 11 AA Bde (the mobile training brigade in Hampshire) and was relieved by 79th (Hertfordshire Yeomanry) HAA Rgt which had just completed training with 11 AA Bde. 79th HAA Regiment occupied sites at Hayle, Truro and Penzance on 14 July and the Penzance and Truro guns were in action against raiders early the next morning. The deployment lasted three weeks before the regiment left for further training and 103rd HAA Rgt returned.[51][52]
In West Cornwall the main threat was from low level daylight 'hit and run' raids by single engined Luftwaffe aircraft (such as attacks by pairs of Focke-Wulf Fw 190s on St Ives on 28 August and Truro on 7 September), which were difficult for HAA guns to engage. Night raids on Truro on 24 September and on Penzance two nights later were engaged by the regiment with both HAA and light machine guns.[48][51]
In August 1942, 64th AA Brigade was transferred from 8 AA Division to 3 AA Division, a HQ brought down from Scotland to handle the increased workload along the South Coast.[53]
Order of Battle
During this period the division was composed as follows (temporary attachments omitted):[17][53][54][55]
- 46 AA Bde
- 59th (Essex Regiment) HAA Rgt – from 6 AA Division December 1941; to WO control as part of the field force March 1942; later to Operation Torch[56][57]
- 76th (Gloucestershire) HAA Rgt – to 69 AA Bde by December 1941
- 104th HAA Rgt – to 5 AA Division in December 1941
- 112th HAA Rgt – from 11 AA Division by May 1941; to 9 AA Division by December 1941[58]
- 116th HAA Rgt – new unit formed in November 1940; to 55 AA Bde by December 1941[28][59]
- 119 HAA Rgt – from 1 AA Division by May 1941; to 64 AA Bde by December 1941[28][60]
- 133rd (Mixed) HAA Rgt – new unit formed September 1941[28][61]
- 140th HAA Rgt – new unit formed December 1941; to 69 AA Bde by May 1942[28][62]
- 150th (Mixed) HAA Rgt – new unit formed February 1942[28][63]
- 165th HAA Rgt – new unit formed July 1942[28][64]
- 36th LAA Rgt – from 1 AA Division by May 1941; to 69 AA Bde Summer 1941[65]
- 47th LAA Rgt – from 69 AA Bde by December 1941; to Operation Torch 1942[56][57][66]
- 133rd LAA Rgt – from 69 AA Bde July 1942
- 66th S/L Rgt – to 69 AA Bde Summer 1941
- 68th S/L Rgt – to 69 AA Bde Summer 1941
- 1st AA 'Z' Rgt – from 1 AA Division by May 1941, returned by December 1941[67]
- 55 AA Bde
- 56th HAA Rgt– as above; left for India in December 1941[26][68]
- 79th (Hertfordshire Yeomanry) HAA Rgt – from 11 AA Bde for July 1942[69][70]
- 103rd HAA Rgt – from 4 AA Division May 1942[71]
- 116th HAA Rgt – from 46 AA Bde by December 1941
- 162nd (Mixed) HAA Rgt – new unit formed June 1942[28][72]
- 166th (Mixed) HAA Rgt – new unit formed August 1942[28][73]
- 36th LAA Rgt – from 69 AA Bde by December 1941; left for India in April 1942[74]
- 44th LAA Rgt – from 9 AA Division January 1942 (previously 60 AA Bde); left for India in March 1942[74]
- 46th LAA Rgt – from 9 AA Division by May 1941[75]
- 55th (Devonshire) LAA Rgt – from WO Reserve in April 1942; later to Ceylon[76][77][78]
- 137th LAA Rgt – new unit formed February 1942[28][79]
- 29th (Kent) S/L Rgt – from 6 AA Division January 1942; to 60 AA Bde June 1942[80][81]
- 81st S/L Rgt – as above; converted into unbrigaded 131st LAA Rgt in March 1942[28][33]
- 82nd S/L Rgt – to 64 AA Bde December 1941
- 85th S/L Rgt – from 64 AA Bde by December 1941; converted into 132nd LAA Rgt in 5 AA Division in March 1942[28][43]
- 9th AA 'Z' Rgt – from 60 AA Bde by December 1941
- 60 AA Bde
- 108th HAA Rgt – from Orkney and Shetland Defences (OSDEF) by September 1942[82]
- 12th (Finsbury Rifles) LAA Rgt – from 1 AA Division by May 1941; left AA Command and joined WO Reserve June 1941, later to Persia and Iraq Command (PAIFORCE)[83][84][85]
- 44th LAA Rgt – to 9 AA Division by December 1941; then to 55 AA Bde January 1942
- 67th LAA Rgt – from 3 AA Division by September 1942[86]
- 29th (Kent) S/L Rgt – from 55 AA Bde June 1942
- 74th (Essex Fortress) S/L Rgt – from 6 AA Division January 1942[87][88]
- 76th S/L Rgt – from 64 AA Bde December 1941; to 69 AA Bde August 1942
- 88th S/L Rgt – new unit formed in March 1941[28]
- 89th S/L Rgt – new unit formed in March 1941; converted into 133rd LAA Rgt March 1942; to 69 AA Bde June 1942[28][89][90]
- 9thAA 'Z' Rgt – to 55 AA Bde by December 1941
- 64 AA Bde – Left August 1942
- 98th HAA Rgt – from 4 AA Division May 1942[23][91]
- 119th HAA Rgt – from 46 AA Bde by December 1941; to 9 AA Division June 1942
- 35th LAA Rgt – left in November 1941 for Singapore, where it was captured in February 1942[37][92]
- 75th (Middlesex) LAA Rgt – joined from unbrigaded by December 1941; left in July 1942, later in invasion of Sicily (Operation Husky)[28][93][94][95][96]
- 87th LAA Rgt – new unit formed October 1941; to 9 AA Division June 1942[28][97]
- 127th (Queens) LAA Rgt – converted from 63rd (Queens) S/L Rgt, joined July 1942[28][98]
- 2nd S/L Rgt – as above
- 3rd S/L Rgt – to 69 AA Bde December 1941
- 76th S/L Rgt – 'to 60 AA Bde December 1941
- 82nd S/L Rgt – from 55 AA Bde December 1941
- 85th S/L Rgt – to 55 AA Bde by December 1941
- 69 AA Bde – new formation joined June 1941
- 76th (Gloucestershire) HAA Rgt – from 46 AA Bde by December 1941; to Operation Torch by November 1942[18][56][57]
- 140th HAA Rgt – from 46 AA Bde by May 1942
- 24th LAA Rgt – from 5 AA Division; to India 1942[99][100]
- 36th LAA Rgt – from 46 AA Bde on formation; to 55 AA Bde by December 1941
- 47th LAA Rgt – from 9 AA Division on formation; to 46 AA Bde by December 1941[66]
- 72nd LAA Rgt – from 9 AA Division May 1942; left July 1942, later in Operation Torch[56][57][101]
- 83rd LAA Rgt – new unit formed August 1941, joined December 1941; left June 1942, later to Operation Torch[28][56][57][102]
- 87th LAA Rgt – from 9 AA Division (previously 64 AA Bde) in August 1942'
- 133rd LAA Rgt – from 60 AA Bde June 1942, to 46 AA Bde July 1942
- 3rd S/L Rgt – from 60 AA Bde December 1941; converted into unbrigaded 4th (Ulster) LAA Rgt in January 1942[28][40][41]
- 66th S/L Rgt – from 46 AA Bde on formation
- 68th S/L Rgt – from 46 AA Bde on formation
- 76th S/L Rgt – from 60 AA Bde August 1942
The increased sophistication of Operations Rooms and communications was reflected in the growth in support units, which attained the following organisation by May 1942:
- 8 AA Division Mixed Signal Unit HQ, RCS
- HQ No 1 Company
- 8 AA Division Mixed Signal Office Section
- 307 AA Gun Operations Room Mixed Signal Section (Bristol GDA)
- 46 AA Brigade Signal Office Mixed Sub-Section
- 69 AA Brigade Signal Office Mixed Sub-Section
- 110 RAF Fighter Sector Sub-Section (RAF Colerne)
- 19 AA Line Maintenance Section
- HQ No 2 Company
- 55 AA Brigade Signal Office Mixed Sub-Section
- 116 RAF Fighter Sector Sub-Section (RAF Portreath)
- 306 AA Gun Operations Room Mixed Signal Section (Plymouth GDA)
- 318 AA Gun Operations Room Mixed Signal Section (Falmouth)
- 20 AA Line Maintenance Section
- HQ No 3 Company
- 60 AA Brigade Signal Office Mixed Sub-Section
- 120 RAF Fighter Sector Sub-Section (RAF Exeter)
- 64 AA Brigade Signal Office Mixed Sub-Section
- 113 RAF Fighter Sector Sub-Section (RAF Middle Wallop)
- 305 AA Gun Operations Room Mixed Signal Section (Portland)
- 21 AA Line Maintenance Section
- HQ No 1 Company
- HQ 8 AA Div RASC
- 191, 915, 917 Companies
- 8 AA Div RAMC
- 8 AA Div Workshop Company, RAOC
- 8 AA Div Radio Maintenance Company, RAOC
The RAOC companies became part of the new Royal Electrical and Mechanical Engineers (REME) during 1942.
Disbandment
A reorganisation of AA Command in October 1942 saw the AA divisions disbanded and replaced by a number of AA Groups more closely aligned with the groups of RAF Fighter Command. 8 AA Division merged with 5 AA Division into 3 AA Group based at Bristol and cooperating with No. 10 Group RAF.[2][4][5][6][48][103] Major-General Allen retired.[8] 5th and 8th Divisional Signals re-amalgamated at Bristol as 3 AA Group Signals. Postwar the unit became 57 (City and County of Bristol) Signals Squadron, today part of 39 (Skinners) Signal Regiment.[45][46][104]
General Officer Commanding
8 AA Division only had one commander during its existence:[6][7][8]
- Major-General Robert Hall Allen, MC (11 November 1940 – 30 September 1942)
Notes
- ↑ Cole p. 56
- ↑ 2.0 2.1 2.2 8 AA Division 1940 at British Military History.
- ↑ 3.0 3.1 3.2 Routledge, p. 394; Map 34.
- ↑ 4.0 4.1 4.2 4.3 Pile's despatch.
- ↑ 5.0 5.1 AA Command 1940 at British Military History
- ↑ 6.0 6.1 6.2 6.3 Robert Palmer, A Concise History of Anti-Aircraft Command (History and Personnel) at British Military History.
- ↑ 7.0 7.1 Farndale, Annex J.
- ↑ 8.0 8.1 8.2 Allen at Generals of World War II.
- ↑ Routledge, Table LXII, pp. 379–80.
- ↑ Collier, Chapter 17.
- ↑ Collier, Appendix XXX.
- ↑ Collier Chapter 18.
- ↑ Routledge, pp. 383–4, Table LXVI, p. 397, p. 398.
- ↑ Farndale, Annex D, pp. 257–9.
- ↑ Routledge, Table LXV, p. 396.
- ↑ 8 AA Division 1940 at RA 39–45.
- ↑ 17.0 17.1 Order of Battle of Non-Field Force Units in the United Kingdom, Part 27: AA Command, 12 May 1941,with amendments, The National Archives (TNA), Kew, file WO 212/79.
- ↑ 18.0 18.1 76 HAA Rgt at RA 39–45.
- ↑ Litchfield, p. 84.
- ↑ 23 LAA Rgt at RA 39–45.
- ↑ Litchfield, p. 88.
- ↑ 66 S/L Rgt at RA 39–45.
- ↑ 23.0 23.1 Litchfield, p. 86.
- ↑ 68 S/L Rgt at RA 39–45.
- ↑ Litchfield, p. 182.
- ↑ 26.0 26.1 56 HAA Rgt at RA 39–45.
- ↑ Litchfield, p. 35.
- ↑ 28.00 28.01 28.02 28.03 28.04 28.05 28.06 28.07 28.08 28.09 28.10 28.11 28.12 28.13 28.14 28.15 28.16 28.17 28.18 28.19 28.20 28.21 28.22 28.23 Farndale, Annex M.
- ↑ 118 HAA Rgt at RA 39–45.
- ↑ 58 LAA Rgt at RA 39–45.
- ↑ Litchfield, p. 292.
- ↑ Joslen, p. 221.
- ↑ 33.0 33.1 81 S/L Rgt at RA 39–45.
- ↑ 82 S/L Rgt at RA 39–45.
- ↑ 104 HAA Rgt at RA 39–45.
- ↑ 44 LAA Rgt at RA 39–45.
- ↑ 37.0 37.1 35 LAA Rgt at RA 39–45.
- ↑ Litchfield, p. 100.
- ↑ 2 S/L Rgt at RA 39–45.
- ↑ 40.0 40.1 3 S/L Rgt at RA 39–45.
- ↑ 41.0 41.1 Litchfield, p. 310.
- ↑ 76 S/L Rgt at RA 39–45.
- ↑ 43.0 43.1 85 S/L Rgt at RA 39–45.
- ↑ 9 AA Z Rgt at RA 39–45.
- ↑ 45.0 45.1 Lord & Watson, p. 170.
- ↑ 46.0 46.1 Brief History of 39 Signal Regt at British Army website.
- ↑ Routledge, p. 399.
- ↑ 48.0 48.1 48.2 48.3 Routledge, pp. 400–4.
- ↑ Collier, Chapter 20.
- ↑ Collier, Appendix XXXVII.
- ↑ 51.0 51.1 51.2 103 HAA Rgt War Diary 1942, TNA file WO 166/7471.
- ↑ Sainsbury, p. 90.
- ↑ 53.0 53.1 Order of Battle of Non-Field Force Units in the United Kingdom, Part 27: AA Command, 14 May 1942, with amendments, TNA file WO 212/81.
- ↑ Order of Battle of Non-Field Force Units in the United Kingdom, Part 27: AA Command, 2 December 1941, with amendments, TNA file WO 212/80.
- ↑ Order of Battle of Non-Field Force Units in the United Kingdom, Part 27: AA Command, 1 October 1942, TNA file WO 212/82.
- ↑ 56.0 56.1 56.2 56.3 56.4 Joslen, p. 465.
- ↑ 57.0 57.1 57.2 57.3 57.4 Routledge, Tables XXX–XXXII, pp. 188–90.
- ↑ 112 HAA Rgt at RA 39–45.
- ↑ 116 HAA Rgt at RA 39–45.
- ↑ 119 HAA Rgt at RA 39–45.
- ↑ 133 HAA Rgt at RA 39–45.
- ↑ 140 HAA Rgt at RA 39–45.
- ↑ 150 HAA Rgt at RA 39–45.
- ↑ 165 HAA Rgt at RA 39–45.
- ↑ 36 LAA Rgt at RA 39–45.
- ↑ 66.0 66.1 47 LAA LAA Rgt at RA 39–45.
- ↑ 1 AA 'Z' Rgt at RA 39–45.
- ↑ Joslen, p. 519.
- ↑ 79 HAA Rgt at RA 39–45.
- ↑ Litchfield, p. 104.
- ↑ 103rd HAA Rgt at RA 39–45.
- ↑ 162 HAA Rgt at RA 39–45.
- ↑ 166 HAA Rgt at RA 39–45.
- ↑ 74.0 74.1 Joslen, p. 523.
- ↑ 46 LAA Rgt at RA 39–45.
- ↑ Litchfield, p. 43.
- ↑ 55 LAA Rgt at RA 39–45.
- ↑ Joslen, p. 524.
- ↑ 137 LAA Rgt at RA 39–45.
- ↑ Litchfield, p. 108.
- ↑ 29 S/L Rgt at RA 39–45.
- ↑ 108 HAA Rgt at RA 39–45.
- ↑ 12 LAA Rgt at RA 39–45.
- ↑ Joslen, p. 488.
- ↑ Order of Battle of the Field Force in the United Kingdom, Part 3: Royal Artillery (Non-Divisional Units), 25 March 1941, with amendments, TNA files WO 212/5 and WO 33/2323.
- ↑ 67 LAA Rgt at RA 39–45.
- ↑ Litchfield, p. 174.
- ↑ 74 S/L Rgt at RA 39–45.
- ↑ 89 S/L Rgt at RA 39–45.
- ↑ 133 LAA Rgt at RA 39–45.
- ↑ 98 HAA Rgt at RA 39–45.
- ↑ Joslen, p. 558.
- ↑ 75 LAA Rgt at RA 39–45.
- ↑ Litchfield, p. 180.
- ↑ Joslen, p. 466.
- ↑ Routledge, Table XLII, p. 267.
- ↑ 87 LAA Rgt at RA 39–45.
- ↑ 127 LAA Rgt at RA 39–45.
- ↑ 24 LAA Rgt at RA 39–45.
- ↑ Joslen, p. 522.
- ↑ 72 LAA Rgt at RA 39–45.
- ↑ 83 LAA Rgt at RA 39–45.
- ↑ Routledge, Map 36.
- ↑ Nalder, p. 620.
References
- Cole, Howard (1973). Formation Badges of World War 2. Britain, Commonwealth and Empire. London: Arms and Armour Press.
- Basil Collier, History of the Second World War, United Kingdom Military Series: The Defence of the United Kingdom, London: HM Stationery Office, 1957.
- Gen Sir Martin Farndale, History of the Royal Regiment of Artillery: The Years of Defeat: Europe and North Africa, 1939–1941, Woolwich: Royal Artillery Institution, 1988/London: Brasseys, 1996, ISBN 1-85753-080-2.
- Lt-Col H.F. Joslen, Orders of Battle, United Kingdom and Colonial Formations and Units in the Second World War, 1939–1945, London: HM Stationery Office, 1960/Uckfield: Naval & Military Press, 2003, ISBN 1-843424-74-6.
- Norman E.H. Litchfield, The Territorial Artillery 1908–1988 (Their Lineage, Uniforms and Badges), Nottingham: Sherwood Press, 1992, ISBN 0-9508205-2-0.
- Cliff Lord & Graham Watson, Royal Corps of Signals: Unit Histories of the Corps (1920–2001) and its Antecedents, Solihull: Helion, 2003, ISBN 1-874622-92-2.
- Maj-Gen R.F.H. Nalder, The Royal Corps of Signals: A History of its Antecedents and Developments (Circa 1800–1955), London: Royal Signals Institution, 1958.
- Sir Frederick Pile's despatch: 'The Anti-Aircraft Defence of the United Kingdom from 28th July, 1939, to 15th April, 1945' London Gazette 18 December 1947.
- Brig N.W. Routledge, History of the Royal Regiment of Artillery: Anti-Aircraft Artillery 1914–55, London: Royal Artillery Institution/Brassey's, 1994, ISBN 1-85753-099-3.
- Col J.D. Sainsbury, The Hertfordshire Yeomanry Regiments, Royal Artillery, Part 2: The Heavy Anti-Aircraft Regiment 1938–1945 and the Searchlight Battery 1937–1945; Part 3: The Post-war Units 1947–2002, Welwyn: Hertfordshire Yeomanry and Artillery Trust/Hart Books, 2003, ISBN 0-948527-06-4.
External sources
- British Army website
- British Military History
- Generals of World War II
- Royal Artillery 1939–1945 (archive site)
| ||||||||||||||||||||||||||||||||||||
The original article can be found at 8th Anti-Aircraft Division (United Kingdom) and the edit history here.