
The Battle of the Alma (20 September 1854), which is usually considered the first battle of the Crimean War (1853–1856), took place just south of the River Alma in the Crimea. An Anglo-French force under General St. Arnaud and Lord Raglan defeated General Menshikov's Russian army, which lost around 6,000 troops.
Prelude[]

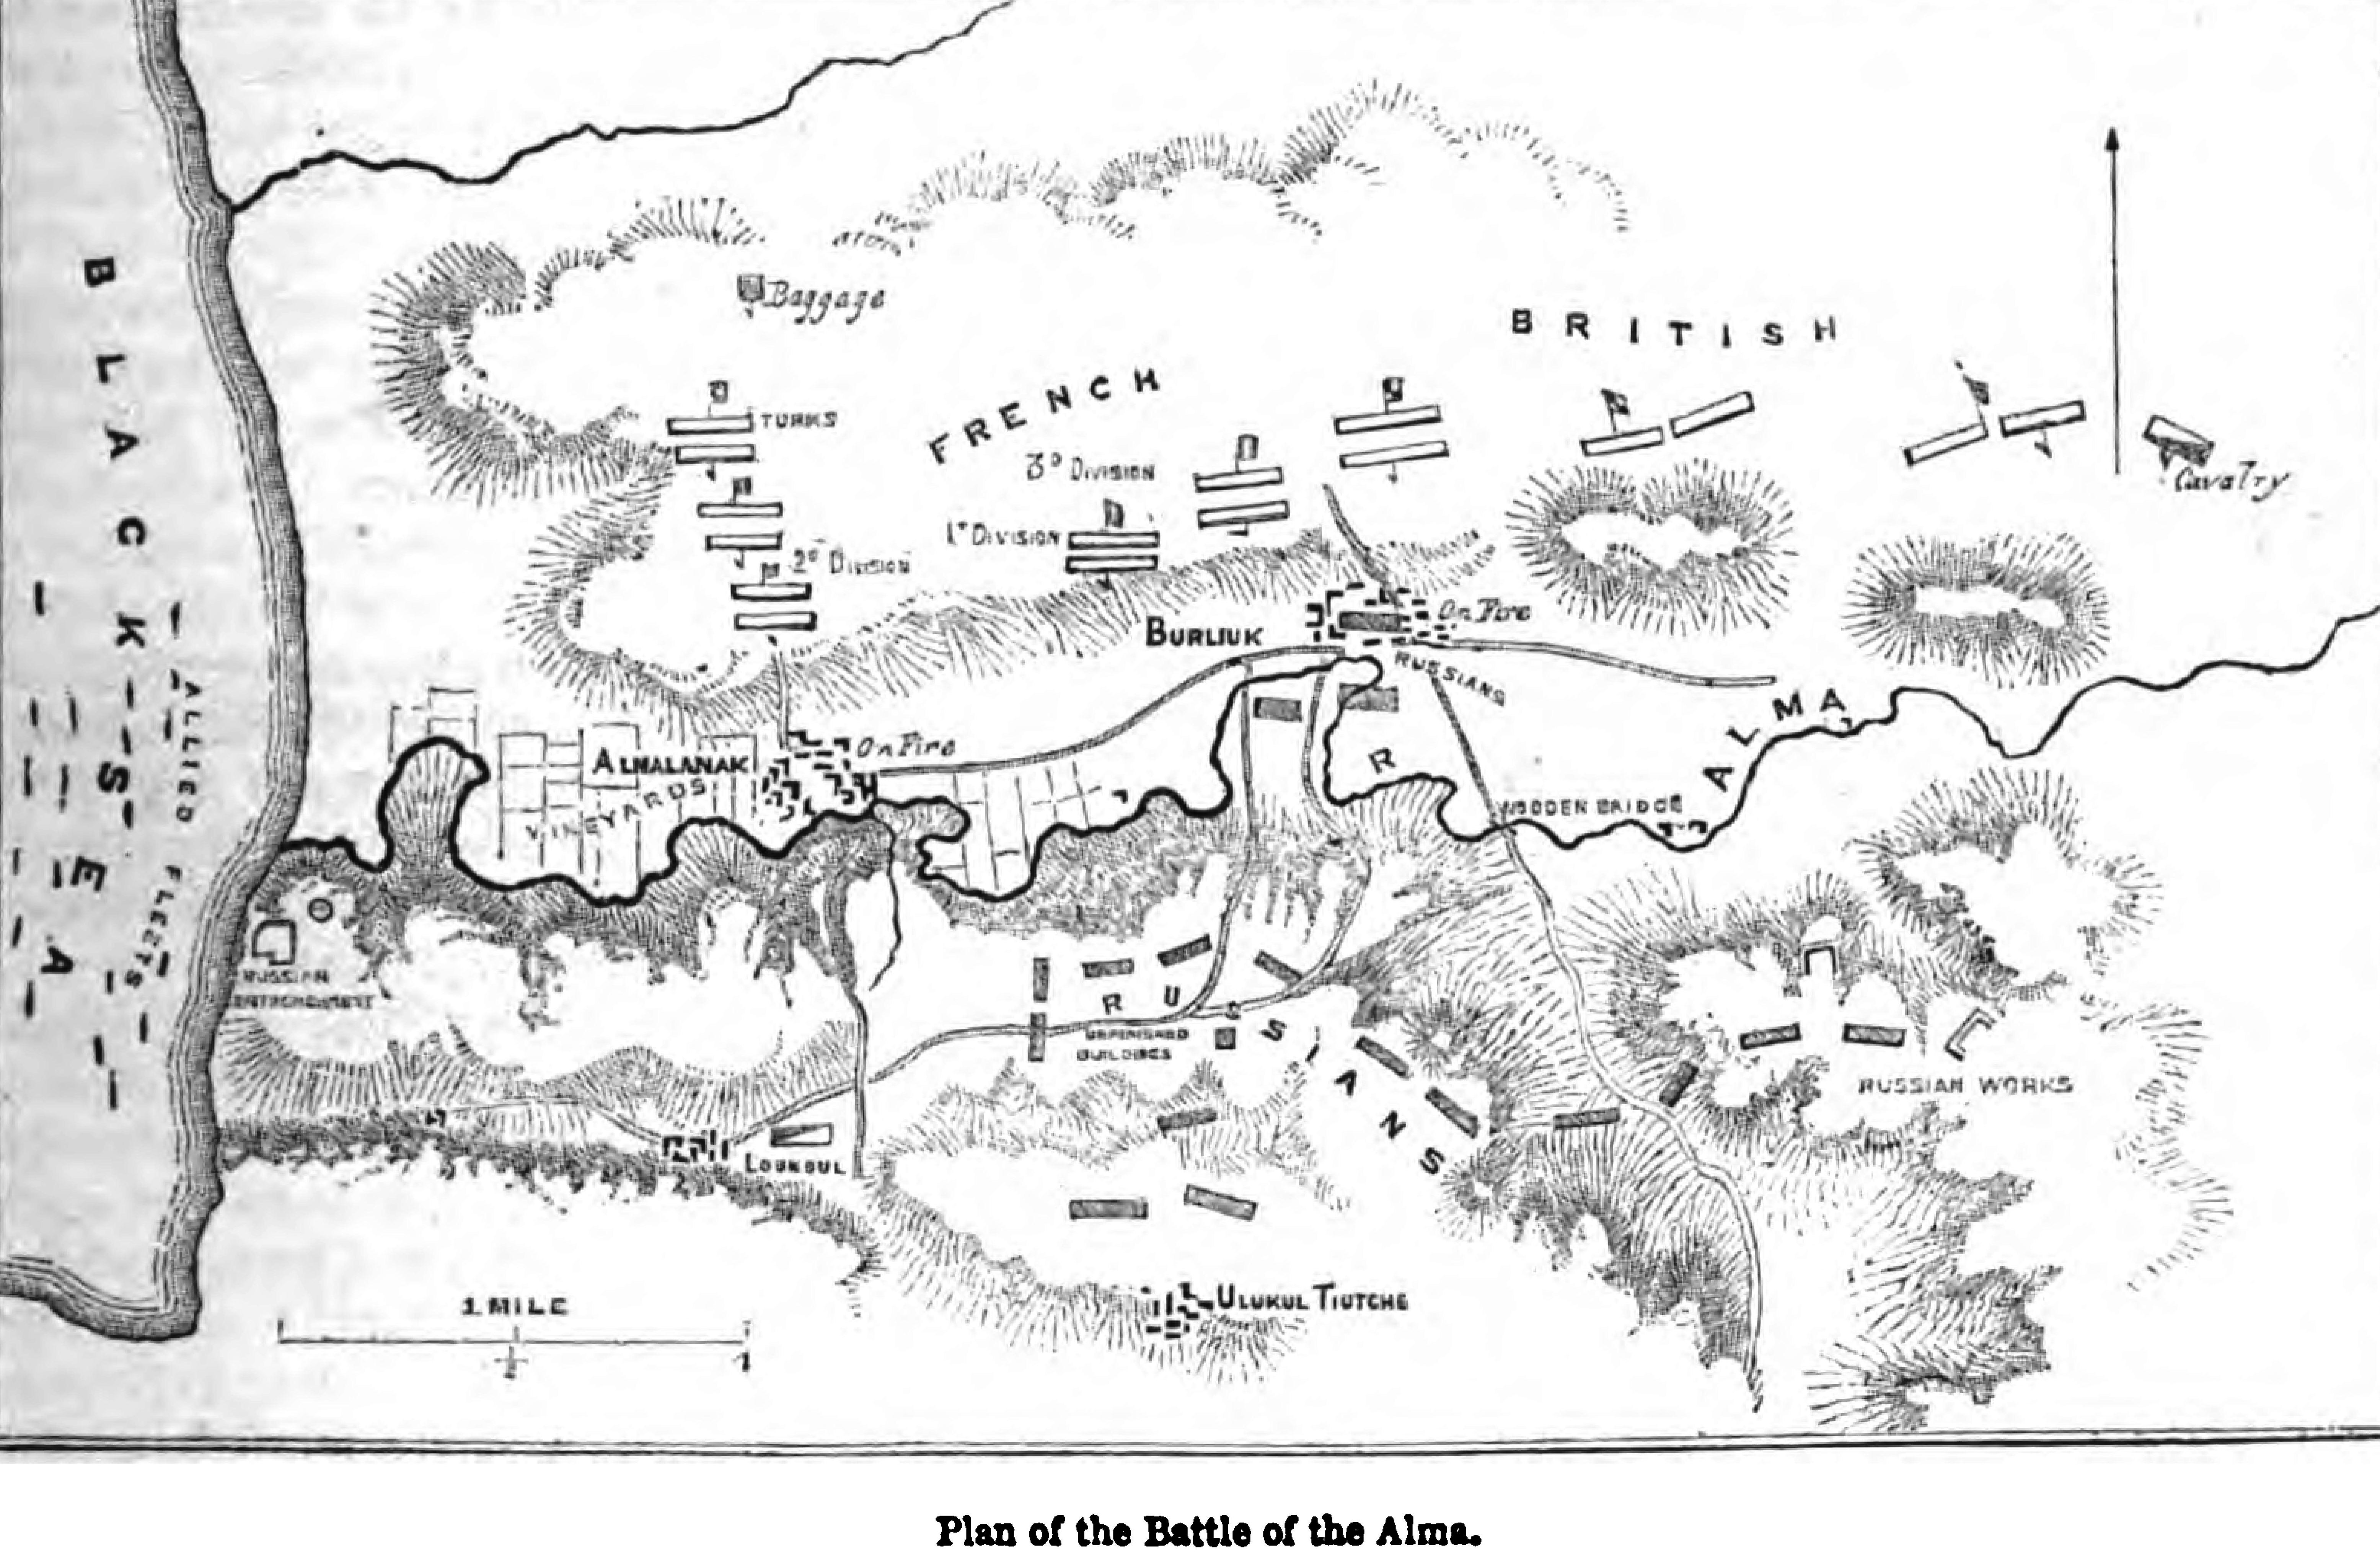
Plan of the Battle of Alma by George Dodd, 1856
The Anglo-French forces landed on the western coast of the Crimean peninsula some 35 miles (56 km) north of Sevastopol, on 13 September 1854, at Calamita Bay ("Calamity Bay").[2] Although disorganised and weakened by disease (mostly cholera and dysentery), the lack of opposition these landings met allowed a beachhead of four miles (6 km) inland to be made.[3] Six days later, 19 September 1854, the two armies headed south.[4] The march involved crossing five rivers—the River Bulganak, the River Alma, the River Kacha, the River Belbek and the River Chernaya.[5] At the River Alma, Prince Alexander Menshikov, Commader-in Chief of the Russians forces in the Crimea, decided to make his stand on the heights above the south banks of the River Alma.[6] Although the Russian Army was numerically inferior to the combined Anglo-French army (35,000 Russian troops as opposed to 60,000 British and French troops[7]), the heights they occupied were a natural defensive position—indeed the last natural barrier to the allied armies on their approach to Sevastopol.[8] Furthermore, the Russians had more than 100 artillery field guns on the heights which they could employ with devastating effect from the heights.[9]
The British and French bivouacked on the northern bank, where the ground sloped gently down to the river.[10] The precipitous cliffs running along the southern bank of the river, 350 feet (107 m) were high and continued inland from the river's mouth for almost two miles (3 km) where they met a less steep, but equally high hill known as Telegraph Hill across the river from the village of Bourliouk.[11] To its east lay Kourgane Hill, a natural strongpoint with fields of fire covering most approaches, and the key to the whole position. Two redoubts had been constructed to protect Kourgane Hill from infantry assault; the Lesser Redoubt on the eastern slope and the Greater Redoubt on the west.[12] The road to Sevastopol ran between Telegraph and Kourgane Hill, covered by Russian batteries sited on the hills and in the narrow valley between them.


Battle of the Alma. George Dodd. Pictorial history of the Russian war 1854-5-6
The Russians had only to hold their ground and keep the pass closed to achieve victory. The French, however, had a plan. Positioned on the allies' right (the western section of allied line, nearest the sea) they would assault the cliffs across the river.[13] In theory, such an obvious attempt to turn the Russian flank would so concern the Russians that they would fail to notice a British attack on their centre and left.
Battle[]
Attack at the Greater Redoubt[]


French troops in the Battle of Alma
On the far right, General Bousquet's division, supported by the guns of the French fleet, crossed the river, scaled the cliffs and were able to expel the Russian infantry and artillery stationed there.[14] Bousquet could not continue the advance without reinforcements, reinforcements that would not arrive quickly. On Bousquet's left, French troops under General Canrobert crossed the river but were unable to move their guns up the steep cliffs. To Canrobert's left Prince Napoleon's division were not even able to cross the river.[15] In the face of heavy fire from Telegraph Hill their advance stalled and the troops took shelter in the vineyards outside the village of Bourliouk.


,_by_Horace_Vernet.png)
Horace Vernet, Battle of Alma
Meanwhile, the British had moved forward. The army was arranged in two lines; the first had the Light Division on the left under Sir George Brown and the 2nd Division under Sir George de Lacy Evans on the right. Behind them on the right of the second line, Sir Richard England led his 3rd Division while on his left the Duke of Cambridge commanded the 1st Division. The 4th division under Sir George Cathcart and the cavalry under Lord Lucan were held in reserve.
Unfortunately, the Light Division had not extended its line far enough to the left and as it advanced it did so at a slight angle. Sir George Brown was extremely shortsighted and he failed to notice that this had occurred. Soon the troops on the right of the Light Division and the left of the 2nd Division were merging. The parade ground precision with which the British had set off had now been lost. The Russians were now faced, not with a disciplined British formation, but by something with the outward appearance of a mob.
Unable to reorganise their men into anything like their original makeup, British officers finally ordered their men to charge as they were. The men charged, and as they struggled up the slope a densely packed mass of Russian infantry came towards them. The British troops stopped and opened fire on the Russians. The skill of the British as professional riflemen, using the newly developed Minié ball, forced the Russians back.[16] The Crimean War was the first war in which the Minié ball was employed. Most British regiments in the Crimea had been fitted with the new type of shot that took advantage of the rifling inside the barrel of the new British guns. Thus, a spin was placed on the Minié ball in flight on its way to the target. This produced much more accuracy, over a much greater range,than the old style smooth bore muskets with which the Russian Army was supplied.[17] Here at the Battle of the Alma, the Minié ball was to have a devastating impact on the Russians. The Russians had to be within 300 paces of the British to attain any kind of accuracy with their smooth bore muskets while the British began firing their rifled Minié balls accurately on the Russians at a distance of 1200 paces.[18]
As the red-coated line started back up the hill, the Russian artillery guns opened up. Scrambling up the slopes of Kourgane Hill in the face of determined artillery fire, the British line was no solid mass of troops, forming more of a thick skirmishing line which with the accuracy of the Minié ball left the Russian artillery field guns unable to stop the British attack, but only slow it.[18] The British continued upward and on until they finally tumbled over the walls of the Greater Redoubt, as the Russians were trying to move their guns. However the Russians were set to rout and fled in all directions.[19]
As the British celebrated in the Great Redoubt, some troops carved their initials on captured Russian guns and marveled at their achievement, the lack of reinforcements soon made itself clear. The First Division, consisting of the Guards and Highland Brigades, was still crossing the river and a great Russian column was moving straight for the Greater redoubt in counterattack. At one point during the Russian counterattack on the Great Redoubt as the British prepared to meet the Russian counterattack, an unknown officer shouted "Do not fire! They are French." Other officers shouted the order to fire and in the confusion the British troops began to withdraw from the Redoubt.
Retreat and second attack[]

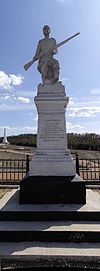
Battle of Alma memorial
As the Russians column marched down to the Greater Redoubt, an astonishing fact became apparent. Earlier in the day, Menshikov had left Kourgane Hill and proceeded to view the action on the far left of the Russian army where the French had seemed to be initially, causing a danger. Now his second in command, watching his men push the British down the hill, looked westward for a sign of Menshikov. Instead he saw the cocked hats and white plumes of British staff officers atop a spur of Telegraph Hill calmly watching the battle. Lord Raglan had wanted a better view of the proceedings and followed by his staff had ridden past the French skirmishers on the left of Prince Napoleon's division and through the Russian skirmishers facing them. Stumbling across an upward path, he finally found himself on a ridge jutting out from Telegraph Hill, overlooking Kourgane Hill and the valley between. Suggesting to his staff that it might be a good idea to have some guns in such a commanding position, the thought was taken as an order and soon two nine-pounders were firing from the ridge. The Russian batteries in the valley were forced to withdraw by fire from these guns, and a few shots fired in their direction persuaded the Russians pursuing the retreating British down the hill that this was unwise.
By now, the First Division had finally crossed the river and the Russians by the Greater Redoubt saw approaching below them the Grenadier Guards on the right of the British line, the Scots Fusilier Guards in the centre and the Coldstream Guards on the left. Out of sight on the far left was the Highland Brigade. Below the Greater Redoubt, however, a group of Royal Welch Fusiliers had held their ground when their comrades had retreated and were firing up at the redoubt. Suddenly the Russians unleashed hundreds of soldiers, who swarmed over the parapets of the retaken redoubt and poured a shattering volley of musket fire downwards. The Royal Welch Fusiliers were smashed and rushed down the hill, crashing into the advancing Scots Guards with such force that the line was broken in many places. The Scots Guards faltered, and when they were 40 yards (40 m) from the redoubt the Russians mounted a massive bayonet charge. The Scots Guards were forced to retreat and they did so stopping only when they reached the river. Almost 200 of them lay dead on the slope.
A large gap now existed between the Grenadiers and the Coldstream Guards. The Russian generals saw their chance and pushed two battalions into the gap. As the Grenadiers prepared to meet this charge, again strange orders were given, as had occurred earlier in the Greater Redoubt. An unknown officer told the Grenadiers to retire. The captain commanding the left-wing company of the Grenadiers, however, felt this order to be foolish and instead ordered his company to form a right angle with the rest of the battalion which thus now assumed an 'L' shape, with the base of the 'L' pointing back down to the river. As the Russians moved into the gap, his men were able to pour deadly accurate fire into their flank. The recently invented Minié ball bullet combined with this well executed manoeuvre caused the Russians to hesitate in their attack. Seeing this, the British Grenadiers and the Coldstream Guards were soon able to close the gap between them and the Russians were forced to retreat.[16] The Greater Redoubt was again in British hands and the defences on the left of the Russian centre were shattered.[20]
Final stage[]
The last act came on the far right of the Russian line where 10,000 troops were still unused and uncommitted. They were faced by the advancing Highland Brigade; a mere three battalions. Led by Sir Colin Campbell, the 93rd (Highland) Regiment, the 79th (Cameron Highlanders) Regiment and the 42nd (Royal Highland) Regiment were advancing in a dangerously thin line extended for almost 2,000 yards (2,000 m) although in the smoke and confusion of battle the Russians were unable to see that it was only two ranks deep. The highly disciplined Highland Brigade advanced firing, a task difficult to accomplish in those days. For the Russians it proved too much and they fell back. The Battle of the Alma was effectively over. On the right of the Allied line, Canrobert had finally got his guns up the cliffs and his Zouaves seized Telegraph Hill. The ridge Lord Raglan had so dramatically made his own was now swarming with red-coated troops. The Russian right was fleeing before the Highland Brigade, the Greater Redoubt was taken and the road to Sevastopol was now open.
The Russian retreat became a rout and Lord Raglan sought permission to pursue the Russians.[21] Had the allies pursued the Russians at this point, they might have taken Sevastopol by surprise.[22] However, General St. Arnaud decided this was impossible for his French troops had left their packs at their start points across the river and would have to go back for them before further advances. Furthermore, unlike the British, the French had no cavalry with which to give chase.[21] Further, convincing certain allied commanders of the need not follow the Russians was the Russians own decision to blown up and sink their own navy across the opening of the harbor of Sevastopol. Realizing that their fleet could not match the allied fleet in speed or gunpower, the Russians made this bold decision to sink the ships across the opening of the harbor to prevent the allies from entering the harbor. The successful allied land forces on the River Alma now realized that any attack on Sevastopol would have to be made without any support from their navies.[23] Accordingly, under all these restrictions the French commanders were reluctant to pursue the Russians at this point. Raglan was unwilling to pursue the enemy without French support and the broken Russian army was able to escape unmolested. Only on 23 September 1854, did the British and French land armies begin the march to Balaclava to begin the siege of Sevastopol.[24]
Aftermath[]
During the battle, the First battalion of Zouaves lost 222 men, the Second battalion 74 men and the Third battalion 63 men. In the United Kingdom "Alma", as a girls' name, became popular as a result of the victory. Also numerous public houses and streets bear the name. In Paris, Pont de l'Alma is a bridge over the River Seine and other French streets are named after the battle. After the battle the Manx survivors made a pact that each man would name their first-born son Alma as a permanent reminder down the ages. Each son named Alma was to pass on the tradition to their own first-born son and name him Alma, and so on.[citation needed] A popular folk ballad of the time, The Heights of Alma, celebrates the battle.
See also[]
Bibliography[]
- Baron de César Bazancourt (1856). The Crimean Expedition, to the Capture of Sebastopol 2 vols. London.
- Alexander William Kinglake (1863–87). The Invasion of the Crimea, 8 vols. Edinburgh
- Blake, R.L.V Ffrench (1973). The Crimean War. Sphere Books.
- Brighton, Terry (2005). Hell Riders: The Truth about the Charge of the Light Brigade. Penguin Books. ISBN 978-0-14-101831-7
- Figes, Orlando (2010). The Crimean War: A History. Picador Publishing. ISBN 978-1-250-00252-5
- Fletcher, Ian & Ishchenko, Natalia (2004). The Crimean War: A Clash of Empires. Spellmount Limited. ISBN 1-86227-238-7
- Christopher Hibbert (1963). The Destruction of Lord Raglan: A tragedy of the Crimean War 1854–55. Pelican Books
- Pemberton, W. Baring (1962). Battles of the Crimean War. Pan Books Ltd. ISBN 0-330-02181-8
- Royle, Trevor (2007). Crimea: The Great Crimean War 1854–1856. Abacus. ISBN 978-0-349-11284-8
References[]
- ↑ William Howard Russell, The British Expedition to the Crimea, Routledge & co. 1858. p. 154 "The English army present at the Alma, in round numbers as stated in the official returns, consisted of 27,000 men; the French, of 25,000; the Turks, of 6,000 men."
- ↑ Orlando Figes, The Crimean War: A History (Picador Press, New York, 2010) p. 201.
- ↑ Orlando Figes, The Crimean War: A History, pp. 191 and 203-204.
- ↑ Orlando Figes, The Crimean War: A History, p. 204.
- ↑ See map on top of page XXVII in Orlando Figes, The Crimean War: A History.
- ↑ Orlando Figes, The Crimean War, p. 205.
- ↑ Orlando Figes, The Crimean War: A History, p. 206
- ↑ Orlando Figes, The Crimean War: A History, pp. 205-206.
- ↑ Orlando Figes, The Crimean War: A History, 206.
- ↑ See map on the bottom of page XXVII of Orlando Figes, The Crimean War: A History.
- ↑ See the map on the bottom of page XXVII of Orlando Figes, The Crimean War: A History.
- ↑ See the map on the bottom of page XXVII of Orlando Figes, The Crimean War: A History
- ↑ Orlando Figes, The Crimean War: A History, p. 208.
- ↑ Orlando Figes, The Crimean War: A History, p. 209.
- ↑ Orlando Figes, The Crimean War: A History, p. 210.
- ↑ 16.0 16.1 Orlando Figes, The Crimean War: A History, p. 214.
- ↑ Orlando Figes, The Crimean War: A History, pp. 214-215.
- ↑ 18.0 18.1 Orlando Figes, The Crimean War: A History, p. 215.
- ↑ Orlando Figes, The Crimean War: A History, 216.
- ↑ Orlando Figes (2010). The Crimean War: A History. Metropolitan Books US. pp. 214–216. http://books.google.com/books?id=dimVhWPx_88C. Retrieved 2011-11-05.
- ↑ 21.0 21.1 Orlando Figes, The Crimean War: A History, p. 224.
- ↑ Orlando Figes, The Crimean War: A History, p.222.
- ↑ Orlando Figes, The Crimean War: A History, pp. 224-225.
- ↑ Orlando Figes, The Crimean War: A History, p. 225.
External links[]
The original article can be found at Battle of Alma and the edit history here.