Lua error in Module:Location_map at line 408: Malformed coordinates value. The Capture of Wytschaete was a tactical incident in the Battle of Messines (7–14 June 1917) on the Western Front during the First World War. On 7 June, the ridge was attacked by the British Second Army; the 36th (Ulster) Division and the 16th (Irish) Division of IX Corps captured the fortified village of Wytschaete on the plateau of Messines Ridge, which had been held by the German 4th Army since the First Battle of Ypres (19 October – 22 November 1914).
In April 1917, the senior German commanders in Flanders were willing to contemplate a retirement from the Messines salient (Wytschaetebogen) but the local Gruppe (corps) and divisional commanders objected because the convex slope of the eastern side of the ridge would obstruct artillery observation and the proximity of the Ypres–Comines canal and the river Lys would interfere with the assembly of reserves. The existing defences had been fortified over two years and the local commanders had been assured that British mining attempts had been defeated.
The British attack at Messines was set for 7 June and the British plan included the detonation of the deep mines that had been laid under the German front position since 1915. The IX Corps was due to attack the apex of the German salient and advance 3,000 yd (2,700 m), to capture the fortified village of Wytschaete and the far side of the plateau. The divisional boundary of the 36th (Ulster) Division and the 16th (Irish) Division ran through the village and battalions of both divisions overran the remaining defenders and captured the village by 8:00 a.m.
The German 2nd Division occupied the Wytschaete sector and its infantry was devastated by the seven mine explosions along the front position. The defenders in the village had also been severely depleted by heavy artillery artillery and gas bombardment and were not able to resist a tank and the Irish infantry who overran the village, although at considerable cost to the 16th (Irish) Division. The Gruppe Wytschaete commander, General Maximilian von Laffert was sacked after the battle; writing after the war, Generalleutnant Hermann von Kuhl wrote that had Crown Prince Rupprecht overruled the local commanders on 30 April, the Germans would have avoided one of the "worst tragedies of the war".
Background[]
Messines ridge[]
A chain of low hills runs from south-west to north-east around the Belgian city of Ypres in West Flanders, with spurs extending from the east side of the ridge. A spur from Wytschaete to Messines is also a ridge and runs for about 2 mi (3.2 km) south-east from Wytschaete. The ridge has a shallow decline on the east side but an incline of up to 1:10 on the west side. South of the ridge is the marshy valley of the Douve river, then Ploegsteert (Plugstreet to the British) Wood and Hill 63. The Wulverghem (also Spanbroekmolen) Spur is parallel to the ridge on the west side, the Oosttaverne Spur is to the east and lesser spurs run towards Gheluvelt, Becelaere and Keiberg. South of Ypres, the land is marked by low ridges and shallow depressions; the ridge blocks access to the district of Heuvelland from Werviq, Comines and Warneton in the Lys valley to the east.[1] In 1917, the two villages on the flat-topped ridge were in ruins but had been fortified for all-round defence. The plateau extended further north, via a sunken road known as Damm Strasse to the White Château on the south side of the Ypres–Comines canal. North of the canal is Hill 60, Observatory Ridge, Stirling Castle and Zonnebeke.[2]
Battle of Messines (1914)[]
The British 1st Cavalry Division occupied Messines on 14 October 1914. German troops began to attack the ridge during the morning of 21 October and slowly forced back the British left flank. Next day the 2nd Cavalry Division dug in and by 31 October held a line just in front of Messines village. Early in the morning, the Germans attacked and overran the defences on the south-east side of the village but were forced back as dawn broke, as were attackers further north. As mist cleared German artillery bombarded the village and after more attacks the British began slowly to retire to the west side of the village and after a lull the Germans began to fight hand-to hand through the village. During the afternoon, British counter-attacks forced back the German infantry but recaptured few houses.[3] The 2nd Cavalry Division held a 3.5 mi (5.6 km) line further north was also attacked on 31 October but no ground was lost. At 1:00 a.m. on 1 November Messsines and Wytschaete were attacked again and German infantry filtered through gaps in the line and attacked from the flanks and from behind and by early in the morning had captured Wytschaete and the ridge between the villages. Wytschaete was eventually re-captured by British cavalry and infantry of the French 32nd Division but the garrison of Messines was ordered to retreat at 9:00 a.m. to avoid being cut off from the north. By now the line further north was held by French troops, with 32nd Division troops in Wytschaete, which was attacked on 2 November from the south by the 6th Bavarian Reserve Division; the French being forced out of the village.[4]
4th Army[]
The 4th Army (General Sixt von Armin) began operations in Belgium in 1914 and by 1917 held the Western Front from the junction with the 6th Army at Warneton to Dixsmude (Diksmuide), under the command of Heeresgruppe Kronprinz Rupprecht (Army Group Rupprecht of Bavaria, Feldmarschall Rupprecht, Crown Prince of Bavaria).[5] The 4th Army defences on Messines Ridge were held by the divisions of Gruppe Wytschaete, the IX Reserve Corps headquarters with the 204th, 35th, 2nd (holding the Wytschaete sector), 40th Division (being relieved by the 3rd Bavarian Division) and the 4th Bavarian Division, where the front line had settled during the Battles of Ypres in 1914.[6] The German defences were on a forward slope and overlooked from Haubourdin Hill (Hill 63) south of the Douve valley and Kemmel Hill, 5,000 yards (4,600 m) west of Wytschaete, which the experience of 1916 showed to be obsolete. In February 1917, work began on the Flandernstellung, incorporating the experience of the Battle of the Somme, 6 mi (9.7 km) behind Messines ridge, northwards from the Lys at Werviq, giving good artillery observation to the west.[7]
In April, Rupprecht and his chief of staff, Lieutenant-General Hermann von Kuhl, favoured withdrawal to the Warnetonstellung, a reserve line just west of Warneton, to forestall a British attack. The divisional commanders objected, having been assured that counter-mining had neutralised the British underground threat and because of the inferiority of the Warnetonstellung. The convex eastern slope of Messines Ridge limited artillery observation and the Ypres–Comines canal and the river Lys restricted the space below the ridge where infantry could manoeuvre for counter-attacks. British observation from the ridge would make the ground to the east untenable as far back as the Flandernstellung. A 6 mi (9.7 km) withdrawal to the east would uncover the southern slopes of Menin Ridge, which was the most vital part of Flandern position. Rupprecht re-examined the Warnetonstellung and the Sehnenstellung (Oosttaverne line to the British) to the west between the Warnetonstellung and the Höhenstellung (higher line) on the ridge and dropped the withdrawal proposal.[8] By June, Gruppe Wytschaete had 344 field guns, 242 medium guns and 44 heavy guns and howitzers on its 9 mi (14 km) front from St Yves to Mt Sorrel.[9]
Prelude[]
German defences[]

The German front line regiments in the Wytschaetebogen (Wytschatete arc/salient) held areas 700–1,200 yards (640–1,100 m) wide with one (the Kampfbattaillon, battle battalion) forward, a second (Bereitschaftsbataillon, readiness battalion) in support and the third (Ruhebattaillon, rest battalion) in reserve 3–4 mi (4.8–6.4 km) back.[10] About 32 machine-gun posts per regimental sector were dispersed around the defensive zone. The German defence was intended to be mobile and Stosstrupps in Ic the third breastwork, were to conduct immediate counter-attacks to recapture Ia and Ib. If they had to fall back, the support battalions would advance to restore the front system, except at Spanbroekmolen, which due to its importance was to be held at all costs (unbedingtes Halten).[11] Gruppe Wytschaete (General Maximilian von Laffert) held Wytschaete with the 2nd Division on a front of 4,000 yards (3,700 m); the front position was lightly held, with strongpoints distributed up to 0.5 mi (0.80 km) back.[12] At the end of May, British artillery fire was so damaging that the relief of the 2nd Division was promised for 7/8 June.[13] Gruppe Wytschaete was substantially reinforced with artillery, ammunition and aircraft and the 35th and 3rd Bavarian divisions, which had been trained as Eingreif divisions (specialist counter-attack divisions), were used to relieve the Stellungsdivisionen and to replace them, two divisions were transferred from Gruppe Ypres, which did not know the area and had no Eingreif training. [14]
The preliminary bombardment began on 8 May and intensified on 23 May. The breastworks of the front position trenches were demolished and concrete shelters on both sides of the ridge were systematically destroyed. Air superiority allowed the British artillery observation aircraft to cruise over the German defences, despite the efforts of Jagdgeschwader 1 (the Richthofen Circus) of the Luftstreitkräfte. On 26 May, the German front garrisons were ordered to move forward 50 yards (46 m) into shell-holes in no man's land at dawn and return to their shelters at night. When the shelters were destroyed, the shell-hole positions were made permanent as were those of the support companies further back. Troops in the Höhenstellung were withdrawn behind the ridge and by the end of May, the front battalions were being relieved every two days instead of every five, to maintain their battle-worthiness.[15] The village of Wytschaete was on the summit of the ridge and the main defensive position at the north end of the plateau, having been fortified and prepared for all-round defence. A line of trenches traced the edge of the village and an inner line went round the houses at the village square and the church. The most formidable part of the defences were machine-gun nests in emplacements and house cellars along the western fringe of the village.[16]

Some troops on the ridge were convinced that their positions had been undermined and their morale was depressed further by a prisoner taken on 6 June, who said that the attack would be synchronised with mine explosions.[17] On 1 June, the British bombardment became more intense and nearly every German defensive position on the forward slope was obliterated. British heavy and super-heavy artillery bombarded Wytschaete on 3 June and was followed up by a gas bombardment from the field artillery, which smashed many of the defensive positions in the village. Infantry Regiment 44 lost 57 men killed and 198 wounded from 1–6 June, Grenadier Regiment 4 and Fusilier Regiment 33 having about the same number of casualties each.[18] The German air effort reached its maximum from 4–5 June, when German aircraft observed 74 counter-battery shoots. Wireless interception by the British showed that 62 German aircraft escorted by up to seven fighters each, were directing the German artillery reply against the Second Army.[19] British air observation on the reverse slope was less effective than in the foreground but Messines and Wytschaete villages were demolished, as were much of the Höhenstellung and Sehnenstellung (Oosttaverne line) although many pill boxes survived. Long-range fire on Comines, Warneton, Wervicq, smaller villages, road junctions, railways and bridges caused much damage and several ammunition dumps were destroyed.[20]
British preparations[]
The British had begun to mine under Messines Ridge in 1916; sappers tunnelled into a layer of blue clay 80–120 ft (24–37 m) below the surface, then drifted galleries to points deep underneath the German front position. Canadian, Australian, New Zealand and British miners laid 26 mines with 447 long tons (454 t) of ammonal explosive. On the right flank of the 36th (Ulster) Division the 107th Brigade faced three mines at Kruisstraat and 800 yd (730 m) north was the larger Spanbroekmolen mine. The mine close to Peckham House was opposite the 109th Brigade on the left flank. The 47th Brigade of the 16th (Irish) Division was to advance into the area of the Maedelstede mine and the 49th Brigade past two at Petit Bois. On the left of the 16th (Irish) Division, the 19th (Western) Division was also to advance with the assistance of mines north of Wytschaete.[21]
The Second Army devised a centralised artillery plan of great sophistication, using field survey, gun calibration, weather data and a new and highly accurate 1:10,000 scale map, to increase the accuracy of British artillery.[22] Wire cutting bombardments had to destroy about 280 mi (450 km) of barbed wire and using the new methods, all German guns within 9,000 yards (8,200 m) of the attack front were to be neutralised.[23][24] Methodical target-finding with new sound-ranging equipment, better organisation of flash-spotting and the centralisation of command at a new Army Report Centre, based at Locre Château were introduced. Second Army counter-battery artillery bombardments increased from twelve in the week ending 19 April, to 438 in the last ten days before the attack.[25] IX Corps arranged four counter-battery groups, each with one heavy artillery group and five bombardment groups, one for each of its three attacking divisions and two (with the heaviest howitzers) in reserve. A Heavy Artillery Group Commander was attached to each divisional artillery headquarters, to command the heavy artillery once the infantry attack began. The IX Corps field artillery groups and sub-groups were formed to have an artillery liaison officer for every infantry brigade, with two sub-groups, one with six 18-pounder batteries and one with six 4.5-inch howitzer batteries.[26]
Surplus field artillery brigade headquarters planned forward moves for the guns and were kept ready to replace casualties.[26] It was expected that much of the artillery would need to switch rapidly from bombardment to engaging German counter-attacks and divisional Forward Observation Officers (FOOs) were to control the artillery which had remained in place. The reserve divisions due to advance to the Oosttaverne line would control artillery hidden close to the front line and the guns moved forward into no man's land.[27] Two thirds of the 18-pounders were to fire a creeping barrage of shrapnel immediately ahead of the advance, while the remainder of the field guns and 4.5-inch howitzers were to fire a standing barrage, 700 yards (640 m) further ahead on German positions and lift to the next target, when the infantry came within 400 yards (370 m) of the barrage. Each division was given four extra batteries of field artillery, which could be withdrawn from the barrage at the divisional commander's discretion to engage local targets.[28] The field batteries of the three reserve divisions were placed in camouflaged positions, close to the British front line. As each objective was taken by the infantry, the creeping barrage was to pause 150–300 yards (140–270 m) ahead and become a standing barrage, while the infantry consolidated. During this time the pace of fire was to slacken to one round per-gun per-minute, allowing the gun-crews a respite, before resuming full intensity as the barrage moved on.[29]
The heavy and super-heavy artillery was to fire on German artillery positions and rear areas and 700 machine-guns were to fire a barrage over the heads of the advancing troops.[30] In the week up to 7 June, 2,230 guns and howitzers bombarded the German trenches, cut wire, destroyed strong-points and conducted counter-battery fire against the 630 German guns opposite, using 3,561,530 shells.[31] The intensity of bombardment in the salient begain to increase on 8 May, wire-cutting began on 21 May and an extra two days were added to the bombardment for more counter-battery fire. The general bombardment intensified again from 23 May, smashing the German breastworks in the first position and the pillboxes on the forward slope. The main bombardment began on 31 May, with only one day of poor weather before the attack and until the infantry advance, more than 3,000,000 shells were fired on a 6 mi (9.7 km) front.[32] The attack barrage was rehearsed on 3 June to allow British air observers to plot masked German batteries, which mainly remained hidden but many minor flaws in the British barrage were reported. A repeat performance on 5 June induced a larger number of hidden German batteries to open fire and reveal themselves.[33] Wytschaete was subjected to a special super-heavy bombardment and the garrison from Grenadier Regiment 4 reported that the village was smashed by columns of shells dropping onto the village.[20]
Air operations[]


Two flights of each artillery-observation squadron concentrated on counter-battery observation and one became a bombardment flight, working with particular artillery bombardment groups for wire-cutting and trench-destruction; when the attack began, these flights undertook contact-patrols to observe the positions of British troops.[34] German artillery positions and the Höhenstellung were on the reverse slope and not visible to British ground observers. For observation over the rear slopes of the ridge, 300 aircraft were concentrated in II Brigade RFC and eight balloons of II Kite Balloon Wing were placed 3,000–5,000 ft (910–1,520 m) behind the British front line.[24] British fighter aircraft tried to prevent German aircraft observing for their artillery, by dominating the air from the British front line to the German balloon line, about 10,000 yards (9,100 m) beyond. The "barrage line" was patrolled all day for the week before the attack by fighters at 15,000 ft (4,600 m), with more at 12,000 ft (3,700 m) in the centre of the attack front.[35] The weather was fair or fine except for 16, 17 and 29 May, when it was very bad).[36] No British corps aircraft were shot down by German aircraft until 7 June, when 29 corps aircraft were directing artillery fire simultaneously.[35]
Behind the British barrage line lay a second line of defence, which used wireless interception to take bearings on German artillery observation aircraft and guide British aircraft into areas where German flights were most frequent. Aeroplane compass stations and an aeroplane intercepting station, were linked by telephone to the army wing headquarters, fighter squadrons, the anti-aircraft commander and the corps heavy artillery headquarters.[37] Areas threatened by German bombardment could be warned, German artillery-observation aircraft could be attacked and German artillery batteries fired on, when they revealed themselves. From 1–7 June, II Brigade had 47 calls through wireless interception, shot down one German aircraft, damaged seven and stopped 22 German artillery bombardments.[38] Normal offensive patrols continued beyond the barrage line out to a line from Ypres to Roulers and Menin, where large formations of British and German aircraft clashed in long dogfights, after German air reinforcements arrived. Longer-range bombing and reconnaissance flights concentrated on German-occupied airfields and railway stations; the night bombing specialists of 100 Squadron attacked trains around Lille, Courtrai, Roulers and Comines.[39] Two squadrons were reserved for close air support on the battlefield and low attacks on German airfields.[40][lower-alpha 1]
IX Corps preparations[]


.jpg)
The 2nd Field Survey Company (2nd FSC) set up W Section for sound-ranging in the IX Corps sector, which provided targeting information for the corps counter-battery artillery.[42] Communication was to be by visual means, messenger pigeon, wireless, Fullerphone, runners and SOS rockets. Two cable lines up to the front line were buried by the Royal Engineers Signal Service for the Fullerphones and advanced bases were chosen in the German lines at Spanbroekmolen and Peckham, to be connected by armoured cables across no man's land. When the infantry reached the final objective the advanced stations were to move up to the crest of the ridge. Brigade intelligence sections were to set up observation posts at Spanbroekmolen and Peckham and battalion intelligence sections were to follow their battalions and find places to observe the infantry up to the final objective and send scouts to contact flanking battalions and establish the situation. A divisional signal station was installed on Kemmel Hill in line of sight with the brigade advanced sections to communicate via Lucas lamp.[43]
Attack training took place on ground marked to show the German defences and officers of flanking battalions attended training sessions to ensure that plans were compatible. A scale model of the ridge was built by the IX Corps Chief Engineer on the Scherpenberg Hill between Locre and La Clytte, with boards around the edges for about a company of men to examine the model together. To assist with communication a message map was devised with the map on one side and a form on the other containing a list of the information needed by the recipient to act on it. Supply dumps for the 36th, 16th and 19th divisions were established at Lindenhoek crossroads and on the Lindenhoek–Neuve Eglise road and beyond these was an advanced dump a brigade dump and one for each of the six attacking battalions. A pack-transport system and 250 Yukon packs for carriers were issued, along with plans to carry up a hot meal to the front line on the midnight before the attack. Oranges, Oxo cubes, chewing-gum and lime juice were issued to each man and every fourth man had a tin of solidified alcohol for cooking.[44]
The 16th (Irish) Division began training for the attack in April, the 49th Brigade rehearsing over a replica of the ground around Wytschaete, during which the junior officers were put under great pressure to perform. The division used the model of Messines Ridge near the Scherpenberg for everyone to become familiar with Wytschaete and the vicinity; the model was adapted to every German alteration to the defences as the British artillery smashed some and the Germans dug others. The division patrolled and raided almost nightly to gather information; a raid on 27 May consisting of 322 men, took 30 prisoners, killed 50 German troops and lifted many valuable documents and reconnaissance photographs, for 52 casualties. On 4 June, 250 men raided Wytschaete Wood, killed 60 Germans and captured 7, for 43 casualties.[45] From 2–8 June, the 16th divisional artillery fired 142,686 18-pounder field gun shells and 36,596 4.5-inch howitzer rounds beyond the divisional sector from Maedelstaede Farm to the Vierstraat–Wytschaete road. The attack was to be conducted by the 47th Brigade and the 49th Brigade, in which each brigade would attack on a two-battalion front, with two battalions in support, the 48th Brigade and a brigade of the 11th Division being held in reserve.[46]
IX Corps Plan[]
IX Corps (Lieutenant-General Sir Alexander Hamilton-Gordon) was to attack Wytschaete with the 36th (Ulster) Division and 16th (Irish) Division, supported by 16 tanks of the II Brigade, Heavy Branch Machine-Gun Corps and the 11th (Northern) Division in reserve.[47] IX Corps had three intermediate objectives, where fresh infantry would leap-frog through the troops on the objective to continue the advance to the next objective, followed by an advance down the far slope in the afternoon.[48] IX Corps was to attack on a 5,000 yards (4,600 m) front, which tapered to 2,000 yards (1,800 m) on the plateau.[49] At 3:10 a.m. the mines would be detonated and the blue line (first objective) was to be occupied by zero + 1:40 hours, followed by a two-hour pause. At zero + 3:40 hours the advance to the black line (second objective) would begin and consolidation was to start by zero + 5:00 hours. Fresh troops from reserve would then pass through, to attack the Oosttaverne line at zero + 10:00 hours. As soon as the black line was captured, all guns were to bombard the Oosttaverne line, conduct counter-battery fire and place a standing barrage beyond the black line, the 24 tanks in reserve would join the tanks still operational and join in the advance to the Oosttaverne line.[50]
Battle[]
IX Corps[]
36th (Ulster) Division[]


Zero hour was 3:10 a.m. when visibility was expected to be 100 yd (91 m). The usual pattern of night bombardment had continued as a deception but then the mines and the British artillery were fired. Crimson cylinders of flame rose from the mines and pieces of earth landed 0.5 mi (0.80 km) distant. Black smoke rose after the flames; there was a flash, the earth shook and then a great roar moved outwards from the detonations. In twilight and dust the first wave advanced at an interval of 25 yd (23 m) in case of a German counter-barrage. The Spanbroekmolen mine was fifteen seconds late and some soldiers of the 14th Battalion Royal Irish Rifles (RIR) were knocked over, then got up and closed up to the creeping barrage. Keeping direction was difficult while going round the crater edges and platoon commanders used compasses to find the way. Men from the 25th Division on the right strayed into the 36th (Ulster) Division area causing minor congestion but the Germans still alive in the front position were incapable of resistance. Two machine-guns fired on the 109th Brigade front after the British barrage had passed over them; one gun was knocked out by rifle-grenade fire and the other by a Lewis gun.[51]
The German artillery reply was poor and fell on the empty British front line as the British infantry followed the creeping barrage, reaching the red line at 3:45 a.m. (zero + 35), the mopping up battalion collecting prisoners. The barrage stood still for fifteen minutes and the two following companies in each battalion leap-frogged the leading ones, ready to take over the advance to the blue line. As the advance resumed, the right hand battalion of the 107th Brigade descended into the Steenbeek valley on the right; as soon as the barrage had passed, German machine-guns began to fire from L'Enfer Wood (Waldlust), Earl Farm, Skip Point and Scott Farm. The machine-guns at Skip Point fired until the 9th RIR and troops from the 14th RIR rushed them from two directions; the garrison fought on inside until more than 150 Germans surrendered. At Scott Farm, the commander stood on the blockhouse rallying the garrison until shot down by a sniper, which caused the Germans inside to surrender. The most formidable German position below the ridge was at Jump Point but this fell quickly and the leading waves reached the blue line at 4:50 a.m., in contact with the flanking divisions.[52]
The advance halted again and the troops began to consolidate the ground as the four battalions to attack the black line moved forward in artillery formation, the 107th Brigade battalions encountering a small amount of German artillery-fire in the Steenbeek valley but losing few casualties. At 6:50 a.m. the barrage began to move forward towards the green intermediate line and as the troops moved beyond it, the garrison of Pick House offered resistance. Rifle-grenades were fired along with a captured machine-gun from the flank and the troops inside surrendered. (The British Vickers gun crews had fallen behind, toiling over the crater-fields with the guns, tripods and ammunition boxes.) The 10th Battalion Royal Inniskilling Fusiliers (RIF) to the north was held up by a machine-gun but a tank nearby was directed towards it and knocked out the gun. The left flank of the Inniskillings was pinned down by German infantry lined along a ditch until a platoon of the 9th Battalion outflanked the position, killed three of the Germans and took the rest prisoner. The 9th Inniskillings and two tanks attacked right-hand side of Wytschaete and the battalion fought its way through the village, taking a battalion headquarters and about fifty prisoners in a house near the Messines–St Eloi road.[53]
The German defence was most successful on the right flank against the 15th RIF, where 100–200 yd (91–183 m) before the road between Messines and Wytschaete, German machine-gunners forced the attackers under cover until the positions of the strongpoints were found. A Lewis gun fired at Lumm Farm (Heckenschloss) on the right, while the rest of the platoon attacked and another machine-gun nest on the left was engaged; Lumm Farm was captured by hand-to-hand fighting. Consolidation of the black line began and at 8:40 a.m. patrols went forward, keeping touch with the flanking divisions, for about 1,000 yd (910 m) to the dotted black line (later called the mauve line), which was to be held as an outpost line. Field artillery began to move up to the old front line and some crossed no man's land to the red line, the moved being completed just after 10:00 a.m. but no sign of a substantial German counter-attack was seen for another two hours. Around noon, IX Corps HQ reported that German infantry and transport had been reported moving west from the Ypres–Comines Canal at Houthem by aircraft and balloon observers. The digging in on the black line and strong points further back was well advanced, engineer stores were delivered by pack mule and a big dump of German barbed wire found at Guy Farm was commandeered.[54]
16th (Irish) Division[]
The attacking troops began their assembly on 6 June, collecting equipment from dumps as they moved to their jumping-off points. From 2:00–2:45 a.m. on 7 June, the British artillery fell silent and then at 3:10 a.m. the mines began to detonate.[46] As soon as the mines detonated the British artillery opened fire, creating three barrage lines and the counter-battery groups bombarded German artillery positions with gas. The infantry began to advance, finding it darker than expected, visibility being reduced by the smoke and dust of the mines mixing with that of the shell explosions, limiting the view to 50 yd (46 m), illuminated only by white and green SOS flares rising from the German lines.[55] The 16th (Irish) Division attacked between Maedelstede Farm and the Vierstraat–Wytschaete road. The mines at Maedelstede and the two on the left at Petit Bois had devastated the defenders; the Petit Bois mines in the 49th Brigade area were about 12 seconds late and knocked over some of the advancing infantry.[56] The advance continued through the remains of Wytschaete wood and Grand Bois, which had been hit by a 2,000 oil drum Livens Projector bombardment on the night of 3/4 June and by standing barrages on all the known German positions in the woods.[57] The garrison of l'Hospice in the northern part of the wood did not surrender until 6:48 a.m., after being by-passed.[58] The second intermediate objective, the first trench of the German second line on the west side of the plateau, was reached just after 5:00 a.m. (Captured records showed that the Germans had predicted that an attack would be stopped short of the western crest until reinforcements from the Eingreif divisions arrived.)[57] A two-hour pause ensued before the attack on the next objective, the second trench of the German second line at the rear (eastern) crest of the ridge began and at 7:00 a.m. the British artillery barrages began to creep forward again and the infantry of the 16th (Irish) Division followed with some of the 16 tanks of the II Tank Brigade in support. A tank drove into Wytschaete followed by the 1st Battalion Munster Fusiliers, who advanced into the wreckage of the village from all sides as the 2nd Battalion, Royal Irish Regiment captured the northern fringe. The infantry found that the special bombardment of 3 June had demolished the houses and the area was quickly overrun. The Germans in Wytschaete wood held out for longer, despite the Livens Projector bombardment, managing to get several machine-guns into action. Half of the attacking companies were reserved for mopping up in the village and by 9:30 a.m., the village had been secured.[59] The supporting battalions leap-frogged the attacking battalions and several tanks passed through to the eastern side of the village on schedule at H-hour + 3 hours, 40 minutes, although all the tanks broke down. The attacking battalions overran other troops of Grenadier Regiment 4 in the Höhen line and reached the objective on the far side of the Messines–St Eloi road, in touch with the 36th (Ulster) Division on the right.[60] By 8:00 a.m., the division had captured 682 prisoners and passed on another 300–400 to neighbouring divisions.[58]
Air support[]


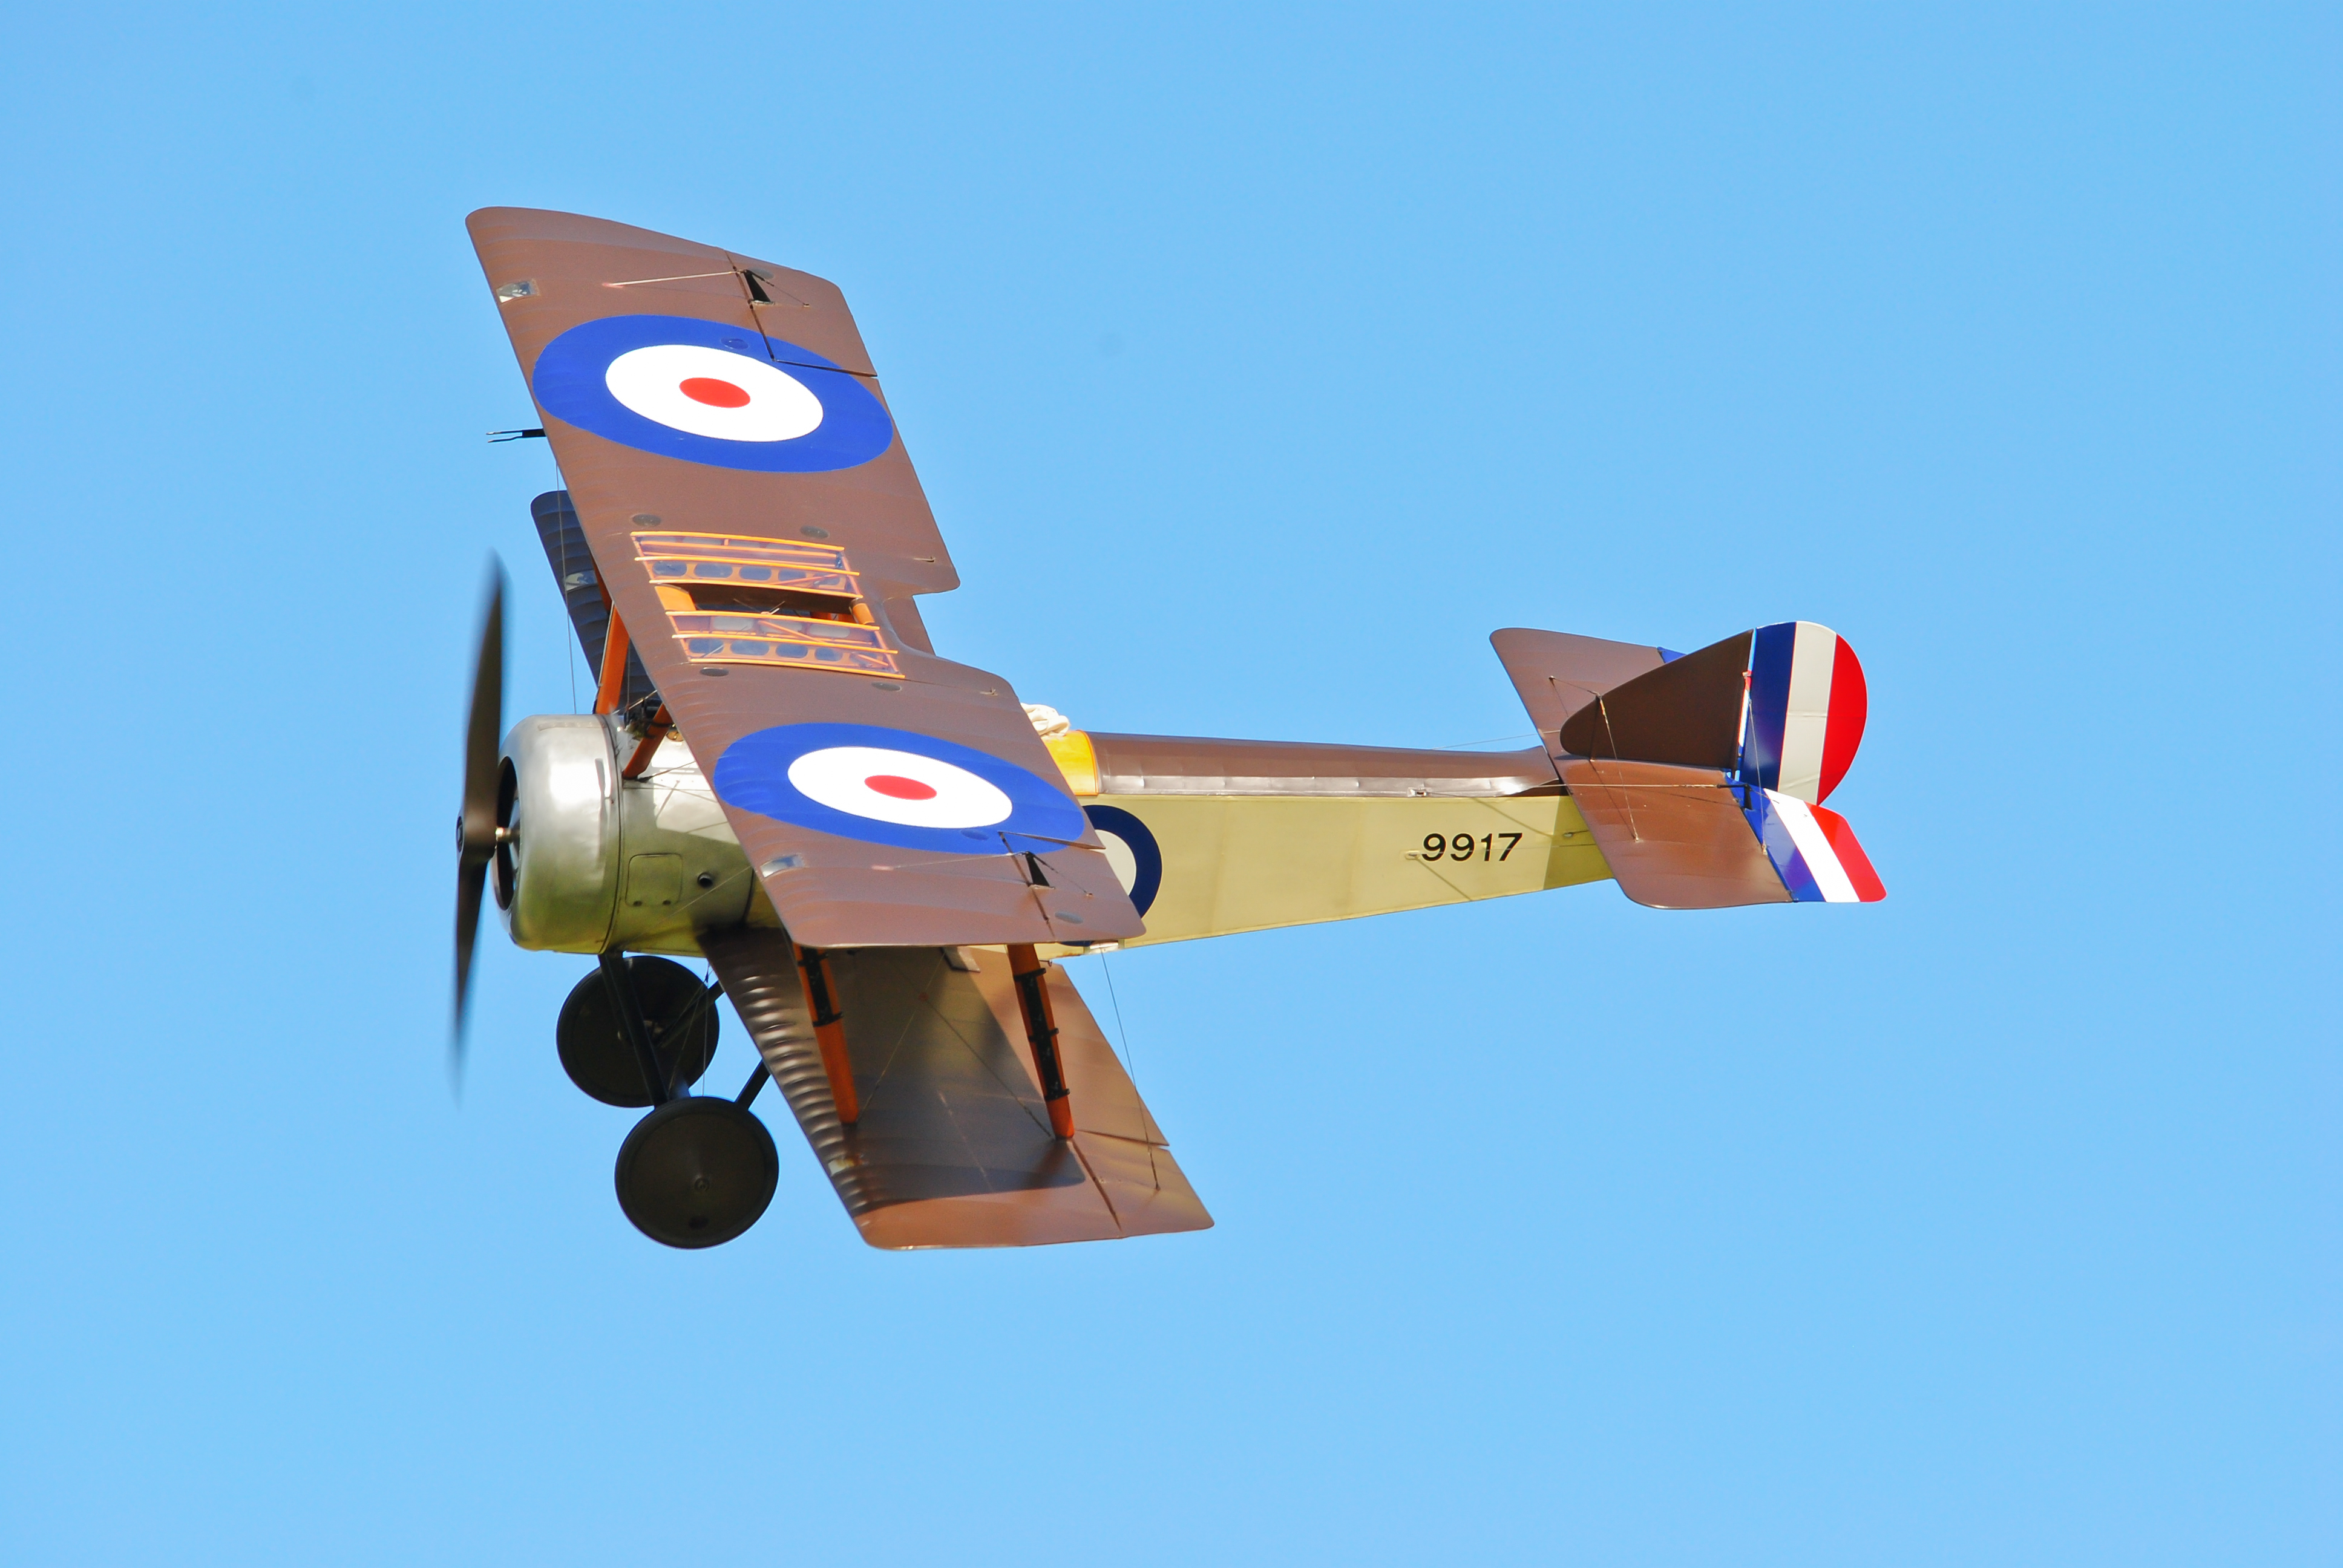
An example of a Royal Aircraft Factory R.E.8, the standard British reconnaissance and artillery-observation aircraft from mid-1917. (Duxford Airshow 2012)
As the infantry moved to the attack contact-patrol aircraft flew low overhead, two being maintained over each corps during the day. The observers were easily able to plot the positions of experienced troops, who lit flares and waved anything to attract attention. Some troops, poorly trained and inexperienced, failed to co-operate, fearing exposure to the Germans so aircraft flew dangerously low to identify them, four being shot down in consequence.[61] Although air observation was not as vital to German operations because of their control of commanding ground, the speed by which reports from air observation could be delivered made it a most valuable form of liaison between the front line and higher commanders. German infantry proved as reluctant to reveal themselves as the British so German flyers also had to make visual identifications.[62] Reports and maps were dropped at divisional headquarters and corps report centres, allowing the progress of the infantry to be followed. During the pause on the ridge crest, an observer reported that the Oosttaverne line was barely occupied, at 2:00 p.m. a balloon observer reported a heavy German barrage on the II Anzac Corps front and a counter-attack patrol aircraft reported German infantry advancing either side of Messines. The German counter-attack was "crushed" by artillery fire by 2:30 p.m.[63]

.jpg)
Each corps squadron kept an aircraft on counter-attack patrol all day, to call for barrage fire if German troops were seen in the open. The speed of the British advance resulted in few German counter-attacks. Artillery observers watched for German gunfire and made 398 zone calls but only 165 managed to have German guns engaged. (Zones were based on lettered squares of the army 1:40,000 map; each map square was divided into four sections 3,000 yards (2,700 m) square. The observer used a call-sign of the map square letter then the zone letter to signal to the artillery. All guns and howitzers up to 6 inches (150 mm) able to bear on the target, opened rapid fire using corrections of aim from the air observer.[63] The observers regulated the bombardment of the Oosttaverne line and the artillery of VIII Corps to the north of the attack, which was able to enfilade German artillery opposite X Corps.[64]
Fourteen fighters were sent to strafe from low altitude, German ground targets ahead of the British infantry, roving behind German lines, attacking infantry, transport, gun-teams and machine-gun nests; the attacks continued all day, with two of the British aircraft being shot down. Organised attacks were made on the German airfields at Bisseghem and Marcke near Courtrai and the day bombing squadrons attacked airfields at Ramegnies Chin, Coucou, Bisseghem (again) and Rumbeke. Reconnaissance reports of German troops concentrating from Quesnoy–Warneton, led to aircraft setting out to attack them within minutes. German fighters made a considerable effort to intercept corps observation aircraft over the battlefield but were frustrated by patrols on the barrage line and offensive patrols beyond; only one British corps aircraft was shot down by German aircraft during the day. After dark, the night-bombing specialists of 100 Squadron bombed railway stations at Warneton, Menin and Courtrai. Ignorance of the situation at the northern end of the II Anzac Corps front, was resolved by air reconnaissance at dawn on 8 June.[65]
Gruppe Wytschaete[]
At 2:50 a.m. on 7 June, the British artillery bombardment ceased; expecting an immediate infantry assault, the German defenders returned to their forward positions. At 3:10 a.m. mines began to explode, destroying most of the middle breastwork Ib of the front system, killing most of the garrison and paralysing the survivors of the eleven German battalions in the front line, who were swiftly overrun. The 2nd Division, holding the Wytschaete sector received seven of the mine detonations.[66] Some of the Stoßtruppen (Stormtroops) in breastwork Ic were able to counter-attack but were overwhelmed quickly, as the British advanced.[41] The Sonnestellung usually held half of the support battalions but had been reduced to about 100 men and six machine-guns in each 800 yards (730 m) regimental sector (Abschnitt). Smoke and dust from the British barrage limited visibility to 100 yards (91 m) and some defenders thought that figures moving towards them were German and were also overrun. After a pause, the British continued to the Höhenstellung, held by half of the support battalions, a company of each reserve battalion and 10–12 machine-guns per regimental Abschnitt. The sun was up but the defenders only saw occasional shapes in the dust and smoke as they endured a deluge of artillery fire and strafing by swarms of British aircraft. The German defence around Messines at the south end of the ridge collapsed, uncovering the left flank of each unit further north in turn, forcing them to retire to the Sehnenstellung, except for the garrison of Wytschaete, which held on, waiting to be freed by counter-attacks.[67]
Laffert expected the two Eingreif divisions to reach the Höhenstellung before the British. The divisions had reached assembly areas near Gheluvelt and Warneton by 7:00 a.m. and the 7th Division was ordered from Zandvoorde to Hollebeke, to attack into the British northern flank across the Comines canal towards Wytschaete. On the southern flank, the 1st Guard Reserve Division was to move to the Warneton line east of Messines, then advance around Messines to recapture the original front system. Neither division had been trained for Eingreif operations, were new to the area and their advances were plagued by delays; the 7th Division was shelled by British artillery all the way to the Comines canal. Part of the division was diverted to reinforce the remnants of the front divisions around Hollebeke and when the rest of the division arrived at 4:00 p.m., the British had already taken the Sehnenstellung. The 1st Guard Reserve Division was bombarded as it crossed the Warneton (third) line but reached the area east of Messines by 3:00 p.m. only to be devastated by the British barrage as it began to creep forward again. The division was forced back to the Sehnenstellung and Laffert contemplated ordering a further withdrawal, until discovering that the British advance had stopped.[68]
Aftermath[]
Analysis[]


Cyril Falls, the 36th (Ulster) Division historian, wrote in 1922 that at conferences and in questionnaires there was some criticism of H-Hour being a few minutes too early and that the creeping barrage had moved too quickly but that the troops had kept up, which contributed to the success of the attack. The mine explosions had guaranteed the capture of the front system up to the red line and had thoroughly demoralised the Germans further back; the tanks had been useful and had prevented some casualties but were not essential to the success of the attack. All regimental officers praised the rear-area services for their prompt arrival on the ridge with supplies, stores and equipment. The infantry judged the new platoon structure introduced in February 1917 with SS 143 Instructions for the Training of Platoons for Offensive Action, to have turned platoons into "...a little self-sufficing force, an army in miniature....", some of which had been led with great tactical skill.[69]
In 1948, the British official historian, J. E. Edmonds wrote that the Battle of Messines was a great victory, which had been achieved with a speed surpassing all other British defeats of the Germans; only the capture of Vimy Ridge in April stood comparison. After two years of occupation, the Germans had been ejected from the high ground on the south side of the Ypres Salient; all of the objectives had been captured and 7,354 prisoners had been taken. The British had suffered few casualties in the attack but the unexpectedly low losses had led to overcrowding on the ridge which was exploited by the Germans close to the ridge to engage with machine-guns and such artillery as was still operational. The division of authority between two artillery command structures had also caused problems, with one set of observers accidentally bombarding troops in contact with the other organisation and of 24,562 casualties from 1–12 June, more than 50 percent were in the II Anzac Corps. Edmonds wrote that the victory was not exploited by gaining ground at the west end of the Gheluvelt Plateau, which had been emphasised in earlier plans.[70]
Casualties[]
In 1948, James Edmonds, the British official historian, gave casualties of 5,263 men in IX Corps.[70] Cyril Falls, the 36th ( Ulster) Division historian wrote in 1922, that the division had about 700 casualties in the attack, inflicted around three times that number on the defenders; up to 9 June the division had 1,119 casualties and took 1,239 prisoners.[71] In 2014, Terence Denman wrote that the 16th (Irish) Division had 1,183 casualties from the night of 6/7 to 9 June.[72] Edmonds recorded 21,886 German casualties, including 7,548 missing, from 21 May – 10 June, using strength returns for Gruppen Ypern, Wytschaete and Lille in Der Weltkrieg. Edmonds then wrote that 30 percent should be added for wounded likely quickly to return to duty, since they were "omitted" in Der Weltkrieg, a claim that has been severely criticised ever since.[73][74] In 2007, Sheldon gave 22,988 casualties for the German 4th Army from 1–10 June 1917. On 8 June, Grenadier Regiment 8 of the 2nd Division was relieved and only 44 men were left of the troops in the front position; in one day the regiment had suffered 1,416 casualties, Fusilier Regiment 33 had 1,123 casualties and Infantry Regiment 44 lost 1,024 men.[75]
Subsequent operations[]
Oosttaverne line[]
A pause of five hours was considered necessary to defeat the German Eingreif divisions, before resuming the advance on the Oosttaverne (Sehnen) line. The pause was extended by two hours to 3:10 p.m., after Plumer received reports on the state of the ground. More artillery joined the masked batteries close to the front line and others moved as far into no-man's-land as the terrain allowed. On the nearside of the ridge, 146 machine-guns were prepared to fire an overhead barrage and each division placed sixteen more guns in the observation line on the eastern slope. The 24 tanks in reserve began to advance at 10:30 a.m. twelve to join IX Corps; surviving tanks of the morning attack in X Corps, were to join in from Damm and Denys woods.[76] On the IX Corps front, the 33rd Brigade (11th Division) had been ordered to advance to Vandamme Farm at 9:25 a.m. but the message was delayed and the troops did not reach the assembly area at Rommens Farm until 3:50 p.m., half an hour late. To cover the delay, the corps commander ordered the 57th Brigade (19th Division) from reserve, to take the Oosttaverne line from Van Hove Farm to Oosttaverne village then to Bug Wood, so that only the southern 1,200 yards (1,100 m) were left for the 33rd Brigade. These orders were also delayed and the 19th Division commander asked for a postponement, then ordered the 57th Brigade to advance without waiting for the 33rd Brigade. The troops only knew that they were to advance downhill and keep up to the barrage but were able to occupy the objective in 20 minutes against light opposition, meeting the Australians at Polka Estaminet.[77]
Notes[]
- ↑ Fine weather was forecast for 4 June, with perhaps a morning haze (from 15 May – 9 June. There was a thunderstorm in the evening of 6 June but by midnight the sky had cleared and at 2:00 a.m., British aircraft cruised over the German lines, to camouflage the sound of tanks as they drove to their starting points.[41]
Footnotes[]
- ↑ Edmonds 1925, pp. 129–130.
- ↑ Harington 2017, pp. 89–90.
- ↑ Edmonds 1925, pp. 153, 231, 305–307.
- ↑ Edmonds 1925, pp. 311–312, 351–353, 363–365.
- ↑ Edmonds 1991, p. 31.
- ↑ Edmonds 1991, p. 93; Sheldon 2007, pp. 1, 40.
- ↑ Wynne 1976, pp. 262–263.
- ↑ Wynne 1976, p. 263.
- ↑ Edmonds 1991, p. 93.
- ↑ Stachelbeck 2016, p. 158.
- ↑ Wynne 1976, pp. 266–271.
- ↑ Sheldon 2007, pp. 1–3.
- ↑ Wynne 1976, p. 266; Edmonds 1991, p. 65.
- ↑ Wynne 1976, pp. 265–266.
- ↑ Wynne 1976, p. 268.
- ↑ Edmonds 1991, p. 68.
- ↑ Wynne 1976, p. 271.
- ↑ Edmonds 1991, p. 68; Sheldon 2007, pp. 13–14.
- ↑ Jones 2002, pp. 119–120.
- ↑ 20.0 20.1 Wynne 1976, p. 269.
- ↑ Edmonds 1991, pp. 57–58.
- ↑ Liddle 1997, pp. 120–121.
- ↑ Harington 2017, p. 88.
- ↑ 24.0 24.1 Farndale 1986, p. 185.
- ↑ Liddle 1997, pp. 121–123.
- ↑ 26.0 26.1 Farndale 1986, p. 186.
- ↑ Farndale 1986, p. 191.
- ↑ Simpson 2001, p. 110.
- ↑ Hart & Steel 2001, p. 45.
- ↑ Hart & Steel 2001, p. 54.
- ↑ Edmonds 1991, p. 49.
- ↑ Wynne 1976, pp. 267–269.
- ↑ Jones 2002, pp. 110–118, 125.
- ↑ Jones 2002, pp. 110–118.
- ↑ 35.0 35.1 Wise 1981, p. 410.
- ↑ Jones 2002, p. 413.
- ↑ Jones 2002, p. 116.
- ↑ Wise 1981, p. 409.
- ↑ Jones 2002, pp. 112–117, 124.
- ↑ Wise 1981, p. 411.
- ↑ 41.0 41.1 Edmonds 1991, pp. 54–55.
- ↑ Chasseaud 1997, pp. 122–123.
- ↑ Falls1996, p. 84.
- ↑ Falls1996, pp. 82–84.
- ↑ Denman 2014, pp. 110–111.
- ↑ 46.0 46.1 Denman 2014, p. 111.
- ↑ Edmonds 1991, p. 67.
- ↑ Edmonds 1991, p. 32.
- ↑ Terraine 1977, p. 118.
- ↑ Edmonds 1991, pp. 416–418.
- ↑ Falls 1996, pp. 91–93.
- ↑ Falls 1996, pp. 93–94.
- ↑ Edmonds 1991, p. 69; Falls 1996, pp. 94–95.
- ↑ Falls 1996, pp. 95–96.
- ↑ Edmonds 1991, p. 55.
- ↑ Edmonds 1991, pp. 58–59.
- ↑ 57.0 57.1 Edmonds 1991, pp. 64–65.
- ↑ 58.0 58.1 Denman 2014, pp. 113–114.
- ↑ Wynne 1976, pp. 275–276.
- ↑ Edmonds 1991, pp. 67–69.
- ↑ Jones 2002, p. 126.
- ↑ Hoeppner 1994, pp. 110–111.
- ↑ 63.0 63.1 Jones 2002a, pp. 175–176.
- ↑ Jones 2002, pp. 127–129.
- ↑ Jones 2002, pp. 129–133.
- ↑ Sheldon 2007, p. 13.
- ↑ Wynne 1976, pp. 272–275.
- ↑ Wynne 1976, pp. 278–281.
- ↑ Falls 1996, pp. 101–102.
- ↑ 70.0 70.1 Edmonds 1991, pp. 87–88.
- ↑ Falls 1996, pp. 100–101.
- ↑ Denman 2014, p. 114.
- ↑ Edmonds 1991, p. 88.
- ↑ Liddle 1997, p. 481.
- ↑ Sheldon 2007, p. 315.
- ↑ Edmonds 1991, pp. 75–77.
- ↑ Edmonds 1991, p. 80.
References[]
Books
- Chasseaud, P. (1997). "Field Survey in the Salient: Cartography and Artillery Survey in the Flanders Operations in 1917". In Liddle, P. H.. Passchendaele in Perspective: The Third Battle of Ypres. Barnsley: Pen & Sword. pp. 117–139. ISBN 978-0-85052-588-5.
- Denman, T. (2014). Ireland's Unknown Soldiers: The 16th (Irish) Division in the Great War, 1914–1918 (pbk. repr. Sallins, Co. Kildare ed.). Dublin: Irish Academic Press. ISBN 978-0-7165-3258-3.
- Edmonds, J. E. (1925). Military Operations France and Belgium, 1914: Antwerp, La Bassée, Armentières, Messines and Ypres October–November 1914. History of the Great War Based on Official Documents by Direction of the Historical Section of the Committee of Imperial Defence. II. London: Macmillan. OCLC 220044986.
- Edmonds, J. E. (1991). Military Operations France and Belgium, 1917: 7 June – 10 November. Messines and Third Ypres (Passchendaele). History of the Great War Based on Official Documents by Direction of the Historical Section of the Committee of Imperial Defence. II. Nashville, TN: Imperial War Museum and Battery Press. ISBN 978-0-89839-166-4.
- Falls, C. (1996). The History of the 36th (Ulster) Division (Constable ed.). Belfast: McCaw, Stevenson & Orr. ISBN 978-0-09-476630-3.
- Farndale, M. (1986). Western Front 1914–18. History of the Royal Regiment of Artillery. London: Royal Artillery Institution. ISBN 978-1-870114-00-4.
- Harington, C. (2017). Plumer of Messines. converted isbn 978-4-00-608977-1 (facsimile pbk. Gyan Books, India ed.). London: John Murray. OCLC 186736178. 4-44406-089779.
- Hart, P.; Steel, N. (2001). Passchendaele: The Sacrificial Ground. London: Cassell. ISBN 978-1-4072-1467-2.
- Hoeppner, E. W. von (1994). Deutschlands Krieg in der Luft: Ein Rückblick auf die Entwicklung und die Leistungen unserer Heeres-Luftstreitkräfte im Weltkriege (Battery Press ed.). Leipzig: K. F. Koehle. ISBN 978-0-89839-195-4.
- Jones, H. A. (2002). The War in the Air, Being the Story of the Part Played in the Great War by the Royal Air Force. II (Imperial War Museum and Naval & Military Press ed.). London: Clarendon Press. ISBN 978-1-84342-413-0. https://ia801609.us.archive.org/29/items/warinairbeingsto02rale/warinairbeingsto02rale.pdf. Retrieved 4 October 2014.
- Jones, H. A. (2002). The War in the Air, Being the Part Played in the Great War by the Royal Air Force. IV (Imperial War Museum and Naval & Military Press ed.). Oxford: Clarendon Press. ISBN 978-1-84342-415-4. https://ia801608.us.archive.org/26/items/warinairbeingsto04rale/warinairbeingsto04rale.pdf. Retrieved 1 March 2017.
- Liddle, P. H., ed (1997). Passchendaele in Perspective: The Third Battle of Ypres. Barnsley: Pen & Sword. ISBN 978-0-85052-588-5.
- Perry, R. A. (2014). To Play a Giant's Part: The Role of the British Army at Passchendaele. Uckfield: Naval & Military Press. ISBN 978-1-78331-146-0.
- Sheldon, J. (2007). The German Army at Passchendaele. London: Pen and Sword Books. ISBN 978-1-84415-564-4.
- Stachelbeck, C. (2016). "The Road to Modern Combined Arms Warfare". In Strohn, M.. The Battle of the Somme. Oxford: Osprey. ISBN 978-1-4728-1556-9.
- Terraine, J. (1977). The Road to Passchendaele: The Flanders Offensive 1917, A Study in Inevitability. London: Leo Cooper. ISBN 978-0-436-51732-7.
- Wise, S. F. (1981). Canadian Airmen and the First World War. The Official History of the Royal Canadian Air Force. I. Toronto: University of Toronto Press. ISBN 978-0-8020-2379-7.
- Wynne, G. C. (1976). If Germany Attacks: The Battle in Depth in the West (Greenwood Press, Westport, CT ed.). Cambridge: Clarendon Press. ISBN 978-0-8371-5029-1.
Theses
- Simpson, A. (2001). The Operational Role of British Corps Command on the Western Front 1914–18 (PhD). London: London University. OCLC 53564367. http://ethos.bl.uk/OrderDetails.do?did=2&uin=uk.bl.ethos.367588. Retrieved 13 March 2017.
Further reading[]
- Bean, C. E. W. (1982). The Australian Imperial Force in France, 1917. Official History of Australia in the War of 1914–1918. IV (11th ed.). St Lucia, Queensland: University of Queensland in Association with the Australian War Memorial. ISBN 978-0-7022-1710-4. https://www.awm.gov.au/collection/RCDIG1069753/. Retrieved 2 March 2017.
- Die Kriegsführung im Frühjahr 1917. Der Weltkrieg 1914 bis 1918 Die militärischen Operationen zu Lande. XII (Die digitale landesbibliotek Oberösterreich ed.). Berlin: Mittler. 2012. OCLC 310653206. http://digi.landesbibliothek.at/viewer/image/AC01860055/1/LOG_0003/. Retrieved 2 March 2017.
- Histories of Two Hundred and Fifty-one Divisions of the German Army which Participated in the War (1914–1918). Document (United States. War Department). number 905. Washington D.C.: United States Army, American Expeditionary Forces, Intelligence Section. 1920. OCLC 565067054. https://archive.org/details/historiestwohun00stafgoog. Retrieved 22 July 2017.
- Liddell Hart, B. H. (1936). The Real War 1914–1918. New York: Little, Brown. ISBN 978-0-316-52505-3.
- Lucas, A.; Schmieschek, J. (2015). Fighting the Kaiser's War: The Saxons in Flanders 1914/1918. Barnsley: Pen & Sword Military. ISBN 978-1-78346-300-8.
- Wolff, L. (2001). In Flanders Fields: Passchendaele 1917 (repr. ed.). London: Penguin. ISBN 978-0-14-139079-6.
External links[]
| Wikimedia Commons has media related to Capture of Wytshaete. |
The original article can be found at Capture of Wytschaete and the edit history here.