| 2nd Anti-Aircraft Brigade | |
|---|---|
| Active | 1936–1945 |
| Country |
|
| Branch |
|
| Type | Anti-Aircraft Brigade |
| Role | Air Defence |
| Part of |
British Expeditionary Force Eighth Army |
| Garrison/HQ | Lichfield |
| Engagements |
Battle of France Dunkirk evacuation Western Desert Campaign Operation Husky Operation Baytown Italian Campaign |
| Commanders | |
| Notable commanders | Brigadier H.M.J. McIntyre, CBE, DSO |
2nd Anti-Aircraft Brigade (2 AA Bde) was an air defence formation of the British Army during World War II, seeing active service in the Battle of France and the North African and Italian campaigns.
Origin[]
During the 1930s the development of airpower led the British Army to expand its anti-aircraft (AA) defences. 2nd Anti-Aircraft Group was formed at Lichfield on 1 October 1936 as part of Northern Command. Initially it comprised the two senior Royal Artillery (RA) AA gun 'brigades' (at that time an RA 'brigade' was a regimental-size unit). Brigadier Edward Chadwick, MC, former Commanding Officer (CO) of 1st AA Bde (Rgt) was brought back from commanding the Mediterranean Air Defence Group in Egypt to lead the new Group, which was composed as follows:[1][2][3][4]
- 1st AA Bde
- 1, 2, 17 AA Batteries, 4 Machine Gun (MG) Battery
- 2nd AA Bde
- 4, 5, 6 AA Batteries, 2 MG Battery
Terminology changed frequently: for a while the new group was termed 2nd Air Defence Brigade, and by July 1937 the MG batteries were termed Light Anti-Aircraft (LAA) batteries. In January 1938 the RA changed the designation of a lieutenant-colonel's command from 'brigade' to 'regiment' allowing the AA groups to take the more usual designation of 'brigade'. By the outbreak of World War II in September 1939, 2 AA Bde at Lichfield came under Western Command, but its wartime role was to support the British Expeditionary Force (BEF) that was to be sent to France.[1][5]
World War II[]
Phoney War[]
The prewar planning for the BEF had envisaged two AA brigades, one for forward defence and one guarding the bases and lines of communication, but this was quickly expanded, new headquarters (HQs) were created and the Regular Army AA units were supplemented by part-time units of the Territorial Army (TA) that had been mobilised for war service under Anti-Aircraft Command. The order to mobilise was received by 2 AA Bde HQ on 1 September and the advance party disembarked at Nantes on 5 September, followed by the main body aboard SS Manxman on 11 September. 1st and 2nd AA Regiments crossed to France the following day. 2 AA Bde HQ remained at Nantes throughout September organising disembarkation of searchlight units and awaiting the arrival of its signals, workshop and transport companies. 1st AA Regiment moved up to the forward area on 8 October, where it joined another brigade, as did 2nd AA Rgt. By November, 2 AA Bde HQ was established at Beauval, Somme, with the following units under command:[6][7][8]
3-inch AA guns of 2 AA Bty, 1st AA Rgt with the BEF in France, 19 October 1939.
- 60th (City of London) AA Rgt (TA) – 24 x 3-inch guns
- 210 Bty of 73rd AA Rgt (TA) – 8 x semi-mobile 3-inch guns
- 51st (Devon) LAA Rgt (TA) – 12 x Bofors 40 mm guns, 48 x Light machine guns (LMGs)
- 1st Searchlight Battalion, Royal Engineers (Regular) – 96 x searchlights (S/Ls)
- 2 AA Bde Signals, Royal Corps of Signals (RCS)
- 2 AA Bde Workshop, Royal Army Ordnance Corps (RAOC)
- 2 AA Bde Company, Royal Army Service Corps (RASC)
A new 5 S/L Bde took over responsibility for all the BEF's searchlights in February 1940, and there were several changes in 2 AA Bde's composition and locations. Its HQ moved to Villers-Bretonneux in April, by which time its responsibilities were to defend Royal Air Force (RAF) airfields of the BEF's Air Component, together with certain French power stations.[6]
Battle of France[]
The so-called Phoney War was a monotonous period of watching and training. It ended on 10 May 1940 with the German invasion of the Low Countries, and surprise attacks on RAF airfields in France.
Order of Battle 10 May 1940[]
At this point 2 AA Bde's dispositions were as follows:[6][9][10][11]
- 2nd AA Rgt
- 6, 21 AA Btys – 16 x 3.7-inch defending Arras airfield
- 60th (City of London) AA Rgt
- 168 AA Bty – 4 x 3-inch at each of Abbeville and Poix airfields
- 169 AA Bty – 4 x 3-inch at each of Vitry and Seclin airfields
- 194 AA Bty – 4 x 3-inch at each of Amiens–Glisy and Rosieres-en-Santerre airfields
- 210/73 AA Bty – 6 x 3-inch at Mons-en-Chaussee, 2 x 3-inch at Péronne Civil Airport
- 51st (Devon) LAA Rgt
- 151 LAA Bty – 4 x Bofors at each of Abbeville, Poix and Amiens Glisy
- 152 LAA Bty – 4 x Bofors at Mons-en-Chaussee, 8 x AA LMGs at each of Rosieres and Vitry
- 153 LAA Bty – 4 x Bofors at Vitry, 4 x Bofors and 8 x AA LMGs at Seclin
- 58th (Argyll & Sutherland Highlanders) LAA Rgt
- 172 LAA Bty – 4 x Vickers Mk VIII 2-pounders at each of Pont-à-Vendin, Lomme and Comines
- 173 LAA Bty – 4 x 2-pounders at each of Douai and Dechy
The gunsites of 2nd and 60th AA Rgts and 51st LAA Rgt were each supported by a S/L Troop or half-Troop from 5 S/L Bde.
Guns of 2 AA Bde were in action from the beginning: 151 LAA Bty at Abbeville airfield claimed a number of hits and suffered a few casualties as the first air raids began on 10 May.[12] As the campaign developed, the BEF followed the pre-arranged Plan D and advanced into Belgium to take up defences along the Dyle. 2 AA Brigade's role was to defend the Air Component's airfields in its rear. Brigade HQ had moved up to Anzin-Saint-Aubin near Arras by 14 May, and GHQ gave it an AA Operations Room (AAOR) to control AA engagements. Arras was badly bombed on the night of 14/15 May. Afterwards, three GL Mk I gun-laying radar stations were moved to 2 AA Rgt there and the S/L allocation was increased to introduce a S/L Illuminated Zone round the town and airfield.[6][13]
However, the German Army's rapid breakthrough in the Ardennes soon threatened the BEF's flank. On 17 May, as the situation worsened, 2 AA Bde's forward units were ordered to withdraw, while others prepared for ground defence of their airfields and established roadblocks on the main roads. 210 AA Battery and its accompanying S/L Trps were re-positioned at Conteville and Crécy airfields as Péronne fell on 18 May.[6][14][15][16]
By the night of 18/19 May enemy columns were approaching Arras. 60th AA Regiment was sent to Béthune, while the rest of the brigade was initially ordered cooperate in the defence of Arras. The CO of 60th AA Rgt was ordered to assume command if 2 AA Bde HQ was cut off, and the brigade's staff captain was sent away with the main body of the HQ. Later the brigade was ordered to withdraw towards Hazebrouck. Its RASC lorries took as many rations as possible from the abandoned stores, but came under fire from Panzers as they withdrew. Clearly, the enemy had almost surrounded Arras, and on 21 May as the brigade continued its retreat, the BEF counter-attacked in the Battle of Arras.[6][17]
Brigade HQ was re-established at Renescure, outside Saint-Omer. Meanwhile, 2nd AA Rgt and 58th LAA Rgt had been redeployed to defend Hazebrouck and the Channel ports of Boulogne, Calais and Dunkirk, while 60th AA Rgt, and 51 LAA Rgt were disposed around Saint-Omer and Merville, inland of Dunkirk; most of these units had S/L detachments with them. As well as AA defence, the brigade had to organise its troops to defend the Canal de l'Aa. The RAF's fighter squadrons were withdrawing from France, and 2 AA Bde was allowed to withdraw all its units from Abbeville, Conteville and Crécy airfields along with the RAF ground crews. The static 2-pounders had to be abandoned and there was a shortage of towing vehicles for the semi-mobile 3-inch guns, so 60th AA Rgt and 2nd S/L Rgt lent their lorries. 210 AA Battery and its accompanying S/L Trps were ordered west to Rouen to join 3 AA Bde, but they found that 2nd Panzer Division was already in Abbeville, and they had to disable their guns and fight a rearguard action to get back to Boulogne and then to Dunkirk.[6][17][18]
Order of Battle 22 May 1940[]


Situation map, 21 May 1940.
On 22 May the brigade reorganised into ad hoc groups under regimental commanders:[6]
- 'Huntforce' – Merville airfield
- RHQ 60th AA Rgt
- 169 AA Bty (less 1 Trp)
- 1 Trp 194 AA Bty
- 151 LAA Bty
- 'Hammondforce' – Saint-Omer and Clairmarais
- RHQ 51st LAA Rgt
- 168 AA Bty
- 194 AA Bty (less 1 Trp)
- 155 LAA Bty from 52nd (East Lancashire) LAA Rgt
- 'Forbesforce' – Hazebrouck
- 21 AA Bty (with a pool of 13 gun tractors for the whole brigade)
- 152 LAA Bty
- 1 Trp 1 Independent LAA Bty
- 1 Trp 173 LAA Bty
- 3 and 4 S/L Btys of 1st S/L Rgt
- 2nd S/L Rgt less 11⁄2 Btys – Point de Jour
- 1⁄2 5 S/L Bty with Huntforce
On the evening of 22 May, 2 AA Bde HQ was divebombed and three drivers and signalmen were killed. That night the HQ moved to Droglandt, near Cassel.
By now, rear area troops were being evacuated back to the UK and German forces were advancing on the Channel ports from the south. Early on 23 May, a Troop of 2nd AA Rgt at Boulogne lost all its guns, but destroyed two tanks of 2nd Panzer Division. The evacuation from Boulogne went on steadily through the day, and most of the garrison were taken off by Royal Navy destroyers during the night of 23/24 May. 172 LAA Battery of 58th LAA Rgt and the detachments of 2nd AA Rgt and of 1st and 2nd S/L Rgts in Calais were less lucky, for having fought alongside the garrison until the evening of 26 May they were forced to surrender.[18][19]
As the German net round Dunkirk tightened, the AA units moved back towards the port. On 24 May Brig Chadwick and 2 AA Bde HQ was given control of all AA gun defences in Dunkirk, and two days later the decision was made to evacuate the isolated BEF through that port (Operation Dynamo).[6][20][21][22]


3-inch AA guns abandoned on the seafront at Dunkirk 1940.
The brigade still had 60th AA Rgt and 51st LAA Rgt under its command, and was joined by 85th (Tees) AA Rgt, which had been withdrawn from Belgium with two batteries of 3.7-inch guns. 85th AA Rgt took the eastern sector, with 174 Bty at Téteghem and 175 Bty at Leffrinckoucke, while the 3-inch guns of 60th AA Rgt were disposed in a dual AA/Anti-tank role at the bridges across the Colme Canal south of Dunkirk. 51st LAA Regiment deployed its Bofors guns to cover the road, rail and canal entrances to Bergues. Brigade HQ was near Rosendaël in the suburbs. Dunkirk was heavily bombed and machine-gunned from 24 May onwards, but only 28 rounds of 3.7-inch ammunition were available until more arrived by sea on 26 May and again on 31 May. The AA guns were ordered to remain in action while the BEF passed through them, until forced to withdraw themselves after direct contact with enemy ground forces.[6][21][23]
From 26 May non-essential AA personnel were sent off for embarkation, and heavy equipment such as transport and the secret GL radar sets was destroyed. Casualties among the AA gunners increased as the Luftwaffe bombed the town constantly. By 28 May Bde HQ and most of its units were on the beaches.[6][22] Part of 173/58 LAA Bty had already been at Dunkirk for several days and its guns were the first in action on the beach. 'A' Troop of 151/51 LAA Bty was still at Cassel on 29 May where it was attacked by tanks and aircraft: one gun was hit and another had to be abandoned. The remaining two crews were never heard of again and only one Non-Commissioned Officer and 22 men eventually got out through Dunkirk. The last three guns of 'B' Trp had been constantly in action at Bray-Dunes, where one gun was destroyed by a direct hit. It was joined by 152/51 LAA Bty at Dunkirk Docks, and both were in continuous action from 21 to 25 May, bringing down a number of aircraft but losing two battery commanders. By 27 May the battery had expended all its ammunition, destroyed its guns and made for the evacuation beaches. 53rd (King's Own Yorkshire Light Infantry) LAA Rgt reached the beachhead on 28 May with 16 Bofors guns still serviceable: 157 and 159 Btys were placed under 2 AA Bde on the beach and 158 Bty went to La Panne, where all three were in action against low-flying attacks on 30 and 31 May, claiming 9 'kills'. Ammunition was running low, but 157 Bty salvaged boxes that had been dumped in a dyke. 54th (Argyll & Sutherland Highlanders) LAA Rgt had also made its way back from Belgium, and its guns were in action on Dunkirk Mole itself, protecting the embarkation of many of the troops.[12][24][25]
The brigade was ordered to destroy its remaining guns and instruments and prepare for evacuation, which was carried out gradually by thinning out the gun crews. 51st and 53rd LAA Regiments remained in action until near the end, eventually embarking on 1 June.[6][21][22]
Home Defence[]
On arrival in England the AA troops were sent to various AA training camps to reform. 2 AA Brigade HQ was re-established at Perranporth in Cornwall on 14 June. It had nothing to command, but on 27 June it was ordered to Tunbridge Wells in Kent to take over from 'N' Mobile AA Bde.[6] This was a temporary formation organised to support the field army in the event of invasion of Southern England. Under the command of Brig D.J.R. Richards of 49 AA Bde, it could call on the following units of AA Command (but they were only to move from the fixed defences if the situation required):[26]
- 250 and 251 Btys of 80th (Berkshire) AA Rgt – 3.7-inch guns at Portsmouth
- 235 Bty of 89th (Cinque Ports) AA Rgt – 3.7-inch guns at Allhallows, Kent
- 284 Bty of 90th AA Rgt – 3-inch guns at Littlehampton
- 31 LAA Bty of 11th (City of London Yeomanry) LAA Rgt
AA Command had decided that the AA brigade HQs returned from the BEF with their experience of mobile warfare should take over these mobile forces. Although 2 AA Bde was attached to 6 AA Division of AA Command, it would operate under Eastern Command. Brigade HQ was established at Pembury outside Tunbridge Wells and began reconnoitring possible AA positions in Kent and Sussex in a scheme codenamed 'Bovril'. These covered Ashford, Canterbury, Edenbridge, Sevenoaks and Tenterden, while the Battle of Britain raged overhead. For some time the brigade only had 260 HAA Bty of 84th (Middlesex, London Transport) HAA Rgt under its command. (AA units equipped with 3-inch, 3.7-inch or larger guns were redesignated 'Heavy AA' (HAA) in the summer of 1940 to distinguish them from LAA units with Bofors or LMGs.) In mid-July Bde HQ was joined in these reconnaissances by RHQ of 6th AA Rgt, also returned from Dunkirk, together with 181 HAA Bty from 65th (Manchester Regiment) HAA Rgt and 251/80 HAA Bty.[26][27] The brigade was joined by 3 AA Bde Signals (3 AA Bde having reverted to AA Command) which was redesignated '2 AA Bde Signals'.[28]
Order of Battle, August 1940[]
At the end of August the brigade's composition was as follows:[26]
- RHQ 6th HAA Rgt
- 12/6 HAA Bty
- 251/80 HAA Bty
- 260/84 HAA Bty
- 152/51 LAA Bty
- 2 AA Bde Signals, RCS
- 2 AA Bde Company, RASC
As the Luftwaffe switched to bombing London in September (the start of The Blitz) 6th HAA Rgt was sent to man AA positions around the city.[29]
Egypt[]
On 5 October 1940 the brigade was warned that it was earmarked for overseas service in tropical kit and was ordered to mobilise by 5 November. Brigade HQ accompanied by its RAOC Workshop moved to Paignton and Brigadier Edward Wilson, MC, from 37 AA Bde took over command on 11 November. On 15 November Bde HQ entrained for Liverpool and sailed on 17 November. After travelling via Freetown and Durban it arrived at Suez and detrained at Giza on 31 December.[3][26][30] On 1 January it set up office in the Semiramis Hotel in Cairo and on 8 January 9th (Londonderry) and 74th (City of Glasgow) HAA Rgts came under command.[31]
The brigade's task was to build up the permanent defences at the harbours of Alexandria, Port Said and Suez, along the Suez Canal, and to defend the landing grounds and supply dumps formed in the desert to support Western Desert Force (soon to become XIII Corps). The intention was to have an integrated joint-service control and reporting system on the Air Defence of Great Britain model that had proved successful during the Battle of Britain. Together with early warning radar and an RAF sector operations room, the AA Defence Commander (AADC) in each major defended area would have a Gun Operations Room (GOR). Unfortunately, little of the necessary equipment was available. AA gun positions were still without gun-laying radar and there was an acute shortage of Bofors guns, so that even the most important vital points (VPs) were allocated no more than two or three each.[32]
Order of Battle, January 1941[]
The brigade HQ took control of all AA and coast defence artillery units in No 1 Line of Communication District in the Nile Delta under British Troops Egypt (BTE), but a number of sub-units were detached elsewhere. At the end of January the AA troops in the Delta were as follows:[31][33][34]
- 9th (Londonderry) HAA Rgt
- 24, 26 HAA Btys, 5 LAA Bty at Alexandria
- 25 HAA Bty at Port Sudan
- 28 HAA Bty at Haifa
- 74th (City of Glasgow) HAA Rgt on the Canal and at Suez
- 230, 231, 232 HAA Btys, 6 LAA Bty
- 15th (Isle of Man) LAA Rgt
- 41 LAA Bty in the Sudan
- 42 LAA Bty
- 129 LAA Bty in Crete
- 5 LAA Bty Royal Malta Artillery
- S/L Dets of 37 & 38 LAA Btys of 13th LAA Rgt
However, during the Spring, AA troops were drawn away to the campaigns in Greece and Crete and to the defence of Tobruk, and 2nd AA Bde was left with just five batteries of 9th and 74th HAA Rgts, three independent LAA batteries (one of them Palestinian), and S/L detachments manned by a squadron of the Royal Wiltshire Yeomanry.[32] HQ and two sections of 2 AA Bde Signals merged into Eighth Army Signals, and 3 Section went to Paiforce (Persia and Iraq Force).[28]
Slowly the AA manpower and equipment shortages were addressed. 27th (London Electrical Engineers) S/L Rgt took over the S/L provision, though two of its own batteries were detached to Crete and Tobruk. Improved GL Mk II radar arrived for HAA batteries, but this had technical difficulties, so 2 AA Bde retained barrage fire as the prime method of defending the harbour at Alexandria. The GL sets were used to plot an accurate course and height for an incoming raid, and this was then projected forward to intersect with one of the pre-arranged barrage lines; gun sites then fired on this line. In mid-June 1941 there were heavy bombing raids on Alexandria and Port Said. The batteries of 2 AA Bde were supplemented by a Royal Marines Mobile Naval Base Defence Organisation (MNBDO), bringing the armament state at Alexandria up to 40 x 3.7-inch, 24 x Bofors, and 9 x 150 cm S/Ls. The mixture of predicted shoots and barrages proved effective in keeping the harbour in action, though there was damage in the town and a mass exodus of inhabitants.[35]
2 AA Brigade's attention now switched to defending the Suez Canal and the harbours of Port Said and Suez at either end, which were vital to the flow of supplies and reinforcements to the Western Desert. Apart from bombing the ports, Axis aircraft could interdict the canal by dropping Parachute mines. Defending against this was an obvious role for S/Ls and LAA guns, but the numbers required for complete coverage were excessive.The compromise plan involved siting single S/Ls on either side of the canal at 2,200 yards (2,000 m) intervals, with additional rows on the flanks spaced at 5-6000-yard intervals. Thus illumination was restricted to a belt along the length of the canal. Fighter aircraft were to provide the main defence, but the problem of intercepting low-level raids led to the deployment of single Bofors guns spaced at intervals of about 3,500 yards (3,200 m) yards on the banks of the narrow stretches of the canal. By October 1941, the Suez Canal defences had absorbed 72 HAA and 96 LAA guns, and 66 S/Ls.[35]
Order of Battle, June 1941[]
In June 1941 the brigade attained the following strength:[31]
- 74th (City of Glasgow) HAA Rgt
- 68th (North Midland) HAA Rgt
- 89th (Cinque Ports) HAA Rgt
- 15th (Isle of Man) LAA Rgt
- 25th LAA Rgt
- 27th (LEE) S/L Rgt
Brigadier Wilson left on 23 August to join HQ BTE as AA Defence Commander (AADC) Egypt and was replaced by Col J.S. Muirhead, the CO of 74th HAA Rgt, but on 3 September Brig Murray McIntyre became brigade commander and Muirhead went to command 4 AA Bde at Tobruk.[3][31]
Order of Battle, October 1941[]

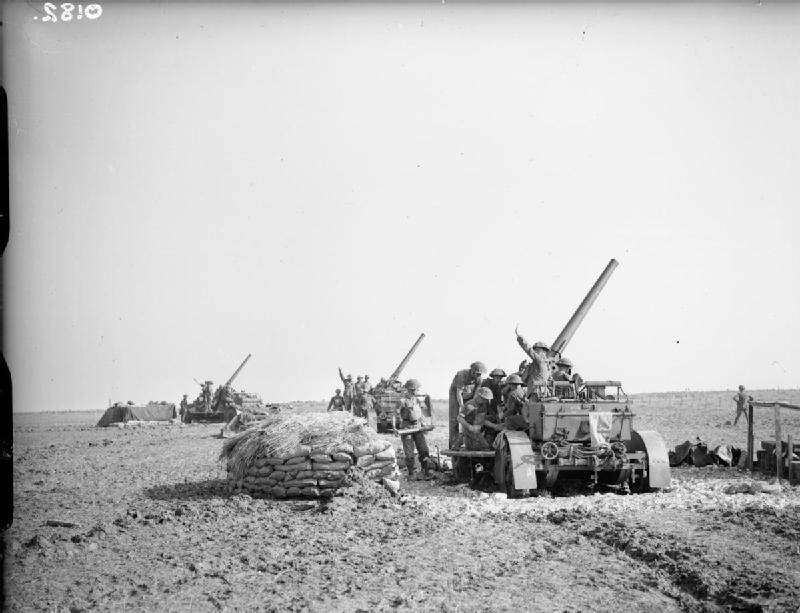
A 3.7-inch HAA gun in the Western Desert, 27 June 1941.
In October 1941, 2 AA Bde had the following dispositions:[36][37]
- Brigade HQ: Moascar
- Alexandria
- HQ AA Defences, Alexandria
- GOR Alexandria
- GOR Aboukir
- 9th HAA Rgt, less 1 Bty – 16 x 3.7-inch
- 277/68 HAA Bty – 8 x 3.7-inch
- 283/88 HAA Bty – 8 x 3.7-inch
- 5 Royal Marine (RM) HAA Bty – 8 x 3.7-inch
- 38/13 LAA Bty, less 1 Trp – 8 x Bofors
- 22 RM LAA Bty – 12 x Bofrs
- Trp 155/52 LAA Bty – 4 x Bofors
- Trp 390/27 S/L Bty – 8 x 150 cm
- Port Said and Port Fuad
- AA Sector Operations Room, Port Said
- AA Sector Operations Room, Fayid
- 74th HAA Rgt – 24 x 3.7-inch
- *305/27 S/L Rgt – 24 x S/L
- Suez and Shallufa
- 88th HAA Rgt – 24 x 3.7-inch
- 205/89 HAA Bty – 8 x 3.7-inch
- 5 Australian HAA Bty – 8 x 3.7-inch
- 100/52 LAA Bty – 12 x Bofors
- 9 Australian LAA Bty – 12 x Bofors
- 81/25 LAA Bty – 12 x Boforsm
- Trps of 1, 38/13, 41/15 LAA Btys – 12 x Bofors
- 390/27 S/L Bty less 1 Trp – 18 x S/L
- Suez Canal
- 200/69 HAA Bty – 8 x 3.7-inch
- 37/13 LAA Bty – 12 x Bofors
- 42/15 LAA Bty – 12 x Bofors
- 41/15 LAA Bty less 1 Trp – 8 x Bofors
- 155/52 LAA Bty less 1 Trp – 8 x Bofors
- Trp 23 RM LAA Bty - 4 x Bofors
- 1 (Ind) LAA Bty less 1 Trp – 8 x Bofors
- 304/27 S/L Bty – 24 x S/L
Alamein[]
The AA defences of Egypt remained relatively static for the next year while the great battles of the Western Desert Campaign were fought – Operation Crusader (November–December 1941), Gazala (May–June 1942), First Alamein (July 1942) and Alam el Halfa (August–September 1942). After Eighth Army had stabilised the El Alamein line and prepared to go over to the offensive, it organised its AA forces into two brigades, with 2 AA Bde to advance directly under Army HQ for line of communication protection while 12 AA Bde was assigned to advance with the Desert Air Force. Other AA Bde HQs would come into play as the Army advanced.[38]
Order of Battle, October 1942[]
For this new mobile role, 2 AA Bde had the following organisation:[39][40][41]
- 69th HAA Rgt
- 61, 199 HAA Btys – 16 x 3.7-inch
- 2nd LAA Rgt
- 6, 155 LAA Btys – 48 x Bofors
- 21 AA Bde Co, RASC
- 2 AA Bde Workshop, Royal Electrical and Mechanical Engineers (REME)
- 2 LAA Regt Workshop Sec, REME
- 101 AA Defence HQ (AADC Railways) – remaining btys
The Second Battle of El Alamein opened on 23 October 1942 and went on for 11 days before the final breakthrough (Operation Supercharge).[42] 2 AA Brigade then followed the pursuit, leap-frogging forward to Tobruk, Benghazi and later Tripoli.[38]
Order of Battle, January 1943[]
At Tripoli in January 1943, supporting XXX Corps 2 AA Bde had the following composition:[43]
- 9th HAA Rgt
- 24, 25, 26 HAA Btys – 24 x 3.7
- 94th HAA Rgt
- 261, 291, 292 HAA Btys – 24 x 3.7
- 40th LAA Rgt – on loan from 51st (Highland) Division[44]
- 105, 140, 268 LAA Btys – 35 x Bofors
- 53rd LAA Rgt
- 157, 158, 159 LAA Btys – 36 x Bofors
- 166/56, 167/56 LAA Btys – detached from 8th Armoured Division
- 274/52 LAA Bty – 12 x Bofors
- 306/27 S/L Bty – 24 x S/Ls
- 2 AA Bde Signals – joined Tripoli Signals[28]
In February 1943, as Eighth Army fought its way westwards towards Tunisia to join up with the Allied forces that had landed in Algeria (Operation Torch), Tripoli became an important supply point and a target for Luftwaffe attacks, They found the AA defence too intense for low-level attack and switched to medium-level bombing. By now the 'tail' of AA commitments in Eighth Army's rear came under RAF control and the Army's commander, Sir Bernard Montgomery, complained bitterly when his ammunition stocks at Tripoli were destroyed in a bombing raid. In March the rear area AA defences were reorganised again, with 2 AA Bde relieving 12 AA Bde of its airfield commitments behind Tripoli.[38][45]

A Bofors crew watches the sky after a Stuka raid during Eighth Army's advance to Tripoli, 29 January 1943.
Order of Battle, May 1943[]
When the North African Campaign ended in May 1943, 2 AA Bde was responsible for AA Defence Area Tripolitania with the following composition:[46]
- 9th HAA Rgt
- 69th HAA Rgt
- 2nd LAA Rgt
- 30th LAA Rgt
- 38th LAA Rgt
- 83/25 LAA Bty
- 274/52 LAA Bty
- 306/27 S/L Bty
- Two AAORs
Sicily[]


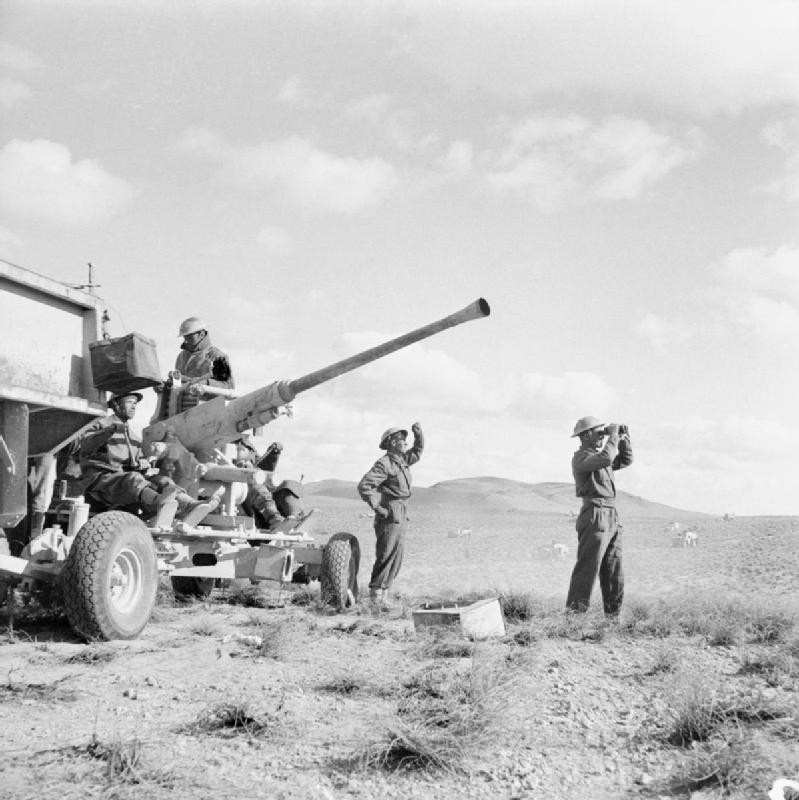
Bofors crew of 268 Bty, 40th LAA Rgt on alert in Sicily, 16 July 1943.
For the following Allied invasion of Sicily (Operation Husky), AA batteries were included in the assault waves to defend the landing points. Although the plan was successful in getting guns ashore, coordination and communication was poor, there being no overall AA commander on the spot. Brigadier McIntyre landed with 2 AA Brigade's Tactical HQ at Syracuse on 13 July, three days after the initial landings, together with RHQ and one battery of 73rd HAA Rgt (the other two batteries having been among the beach groups) and 66th LAA Rgt. Together with the lightly-equipped assault batteries, the brigade took up defence of Syracuse harbour and the captured airfields at Pachino and Cassibile, which suffered numerous dive-bombing and strafing attacks, and high level bombing by night and day. After the landings, Eighth Army made rapid progress up the east coast of Sicily and the follow-up AA forces began to land. 62 AA Bde HQ arrived in Syracuse on 17 July, taking over responsibility for the harbour and airfield defence while 2 AA Bde moved on to Augusta, which was also heavily attacked. By early August, 2 AA Bde had moved up with Eighth Army to Catania with 51st (London) HAA Rgt and 40th and 74th LAA Rgts under command.[47][48]
Italy[]
After the remaining Axis forces evacuated Sicily, Eighth Army regrouped to invade mainland Italy. The opening phase was Operation Baytown, an assault crossing of the Strait of Messina by XIII Corps supported by 2 AA Bde. Brigade HQ began reconnoitring sites to cover the operation on 18 August, the day after Messina fell, and sent forward two batteries of 51st HAA and two of 74th LAA Rgts for the first deployment. 298 HAA Battery of 97th (London Scottish) HAA Rgt also went forward to support XIII Corps in the medium artillery role. The crossing was to be made with a variety of landing craft and these required AA protection as did the assembly and embarkation points and supply dumps. 2 AA Brigade left 298/97 HAA Bty and two LAA batteries, 13/40 and one from 2nd Canadian LAA Rgt, to defend these areas, and embarked with 51st and the rest of 97th HAA Rgts, 53rd and 74th LAA Rgts to deploy on the Italian side.[48] For the three beach 'bricks', 2 AA Bde allotted 11⁄2 batteries of 97th HAA Rgt and 158/53 LAA Bty, a total of 12 x 3.7-inch and 18 x Bofors guns. After an extensive bombardment, XIII Corps began landing during the night of 2/3 September. There was little serious ground resistance, but enemy aircraft were active and the beaches were dive-bombed. The landing programme went smoothly, the AA batteries reached the town of Reggio Calabria on 4 September and by 5 September the brigade was fully deployed:[49]


3.7-inch AA gun of 242 Bty, 51st (London) HAA Rgt in action in the field artillery role in Italy, 15 December 1943.
Order of Battle, September 1943[]
- Reggio
- 242/51 HAA Bty – 8 x 3.7-inch
- 186/74 and Canadian LAA Bty – 16 x Bofors
- Beaches
- 299/97 and 319/97 HAA Btys – 16 x 3.7-inch
- 53rd LAA Rgt – 54 x Bofors
- Airfield
- 152/51 and 153/51 HAA Btys – 16 x 3.7-inch
- 225/74 LAA Bty – 18 x Bofors
- 150 AAOR, 6 x GL radar, 1 x Local Warning radar
- Smoke units
- Messina
- 298/97 HAA Bty – 8 x 3.7-inch
- Canadian LAA Bty – 18 x Bofors
There was only one raid of importance on Reggio, when four Focke-Wulf Fw 190s bombed the harbour and attacked the AA positions: 319/97 HAA Bty had a command post destroyed, suffering nine dead and eight wounded. XIII Corps worked cautiously and methodically through Calabria, 2 AA Bde following up to cover the small harbours and airfields, and being rejoined by 298/97 HAA Bty from Messina. In late September the brigade was warned to concentrate for a long move across Italy to defend the captured Foggia Airfield Complex.[50]
2 AA Brigade reached Foggia and the port of Bari by 30 September, where it was joined by 88th HAA Rgt, 47th and 117th LAA Rgts. 62 AA Brigade HQ arrived on 2 October and took over responsibility for Bari, but 2 AA Bde remained at Foggia for another two weeks, with 1st Airlanding LAA Rgt from 1st Airborne Division temporarily under command to boost the low-level defences.[51]
On 27 October 2 AA Bde moved forward to a fresh set of landing-grounds and a railhead in support of 1st Canadian Division. Brigadier McIntyre was an enthusiast for using the versatile 3.7-inch HAA guns for ground support tasks, and two batteries of 51st HAA Rgt were allotted to the Canadians in this role while the rest of the brigade was split up into small packets at airfields and on Corps tasks. The crossing of the Sangro and Biferno rivers involved long artillery fire programmes at the end of November, for which 51st HAA was assigned to 6th Army Group Royal Artillery (6th AGRA), after which it switched to protecting the assembly and bridgehead areas for the actual assault. During the winter of 1943–44, when Eighth Army faced the German Winter Line, McIntyre disposed two-thirds of his HAA guns in the forward area, the rest at landing grounds as far back as Foggia, and he rotated batteries between the tasks. For 'Operation Kishan', carried out by 10th Infantry Brigade in May 1944, 84th and 88th HAA Rgts deployed 44 guns and fired 9881 rounds in bombardment and harassing fire in one week. In one occasion, three Troops (12 guns) of 84th HAA broke up a concentration of 300 German troops forming up for an attack. When the Adriatic coast campaign began moving again in May 1944, 2 AA Bde moved up with V Corps and in July it reached Ancona.[52][53]
After a short period of refitting and re-training at Anzio in August, 2 AA Bde's units returned to the line between Arezzo and Florence in September, a 270 miles (430 km) journey across mountains that was unusually carried out as a single road convoy. Between September and December, as the Allied armies closed up to the Gothic Line, its units were widely distributed, some supporting XIII Corps with Fifth US Army, others with X Corps and II Polish Corps under Eighth Army. In late 1944 the Luftwaffe was suffering from such shortages of pilots, aircraft and fuel that serious air attacks were rare. At the same time the British Army was suffering a severe manpower shortage. The result was that a number of AA units were deemed surplus and were disbanded to provide reinforcements to other arms of service. 84th HAA Regiment was the unit selected from 2 AA Bde, and it was broken up in October and formally placed in 'suspended animation' in November 1944, with its drivers converted into 84th General Transport Company. Some units such as 51st HAA Rgt had already been 'diluted' (as it was termed at the time) by soldiers of the African Pioneer Corps to be trained as gunners to release British other ranks for other duties. Other units now retrained as infantry or in the case of LAA units re-equipped some of their Bofors batteries with 3-inch or 4.2-inch mortars for infantry support. For the first part of this period, the brigade held a section of the line as an independent formation, with two of its LAA regiments deployed as infantry. Its HAA regiments were now entirely committed to ground targets and during the battle of the Gothic Line two regiments fired over 22,000 rounds in ground support. These tasks included counter-battery (CB), defensive fire (DF) and harassing fire (HF) shoots, but also air-burst shoots against entrenched positions, and destruction of hard targets such as buildings. The regiments suffered some casualties from retaliatory fire.[52][53][54][55]
Having spent December 1944 to March 1945 facing the German Winter Line, dispersed from XIII Corps to the Adriatic coast, with occasional AA engagements, the brigade came back fully under Eighth Army command as it broke through into the Po Plain. The brigade now had a medium artillery regiment and a composite heavy battery of 7.2-inch howitzers and 155mm guns under its command, and was expanded with units from 10th Indian Division to form 'Macforce' (named after Brig McIntyre). Initially Macforce operated under 6th AGRA, then the brigade's AAOR began to operate as an AGRA in its own right and brigade signals took responsibility for a communication hub linking Fifth Army and IV US Corps to X Corps and Macforce.[52][53][lower-alpha 1] In April Macforce drove down Route 9 in pursuit of the retreating Axis forces, firing in support of the Friuli and Folgore Combat Groups of the Italian Co-belligerent Army.
Order of Battle, August 1944–April 1945[]


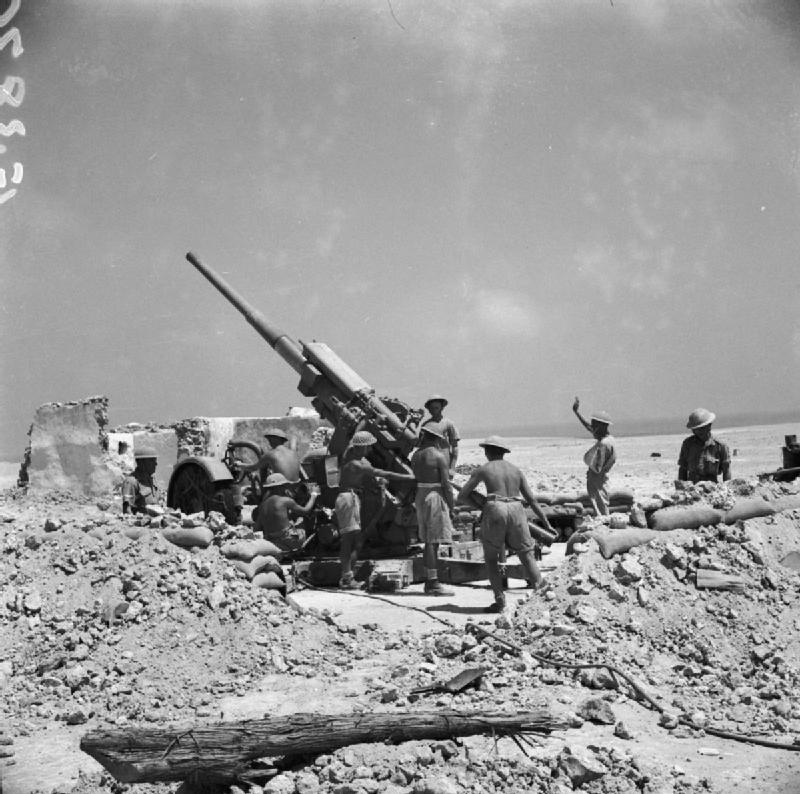
3.7-inch gun of 97th (London Scottish) HAA Rgt bombarding enemy positions on the Gothic Line, 2 September 1944.
The brigade had the following units under its command between August 1944 and April 1945:[53]
- 1st HAA Rgt
- 51st HAA Rgt – returned to the line after 'dilution' October 1944, less one bty at Anzio
- 84th HAA Rgt – disbanded in October 1944
- 97th HAA Rgt – left in September 1944
- 11th LAA Rgt – operating in defence, mortar and heavy machine gun roles
- 26th LAA Rgt – joined November 1944; one bty on smoke-making duty
- 51st LAA Rgt – operating in defence, mortar and heavy machine gun roles
- 52nd LAA Rgt – left in September 1944
- 53rd LAA Rgt – serving as infantry in September 1944
- 47 AAOR
- 400 (Independent) S/L Bty
- 66th Medium Rgt
- One Battery 75th Heavy Rgt
- 169 Line Section, RCS
Macforce[]
'Macforce' comprised the following units in April 1945:[53]
- 2nd Battalion Loyal North Lancashire Regiment
- 4th Battalion, 11th Sikhs
- Jodhpur Sardar Infantry
- Lovat Scouts
- 2nd Battalion Highland Light Infantry
- 85th Mountain Rgt Group:
- 85th Mtn Rgt – less 1 bty
- 57th Field Rgt
- 11th LAA Rgt – less 1 Bty
- 66th Medium Rgt
- One Trp 11th LAA Rgt
- 51st LAA Rgt – including counter-mortar organisation
2 AA Brigade's last action was on 20 April 1945, when a battery of 1st HAA Rgt fired on a high-flying Messerschmitt Me 262. It then went into reserve with X Corps, and hostilities ended on 2 May with the Surrender of Caserta. At the end of the campaign, the brigade with 1st and 51st HAA and 11th and 53rd LAA regiments was reorganised as a motor transport group based at Forli and Faenza. Brigadier McIntyre was awarded a CBE for his work, particularly for his use of the 3.7-inch gun for field and medium artillery tasks.[52][53]
When the Regular Army's AA units were reorganised in 1947, 2 AA Brigade did not re-appear in the order of battle.[57]
Commanders[]
The following officers commanded 2 AA Bde:
- Brigadier E.W. Chadwick, MC (1 October 1936 – 11 November 1940)
- Brigadier E.W.G. Wilson, MC (11 November 1940 – 23 August 1941)
- Brigadier J.S. Muirhead, DSO, MC, TD (23 August–3 September 1941)
- Brigadier H.M.J. McIntyre, CBE, DSO (from 3 September 1941)
Footnotes[]
- ↑ The brigade history comments that this was the first time an AA brigade had operated as an AGRA (AA) under battle conditions.[53] This organisation became common in the postwar Territorial Army.[56]
Notes[]
- ↑ 1.0 1.1 MonthlyArmy List various dates.
- ↑ Chadwick at Generals of World War II.
- ↑ 3.0 3.1 3.2 Farndale, Annex J.
- ↑ Routledge, p. 46.
- ↑ Western Command 3 September 1939 at Patriot Files.
- ↑ 6.00 6.01 6.02 6.03 6.04 6.05 6.06 6.07 6.08 6.09 6.10 6.11 6.12 2 AA Bde War Diary, France 1940, The National Archives (TNA), Kew, file WO 167/427.
- ↑ Farndale, p. 12–3; Annex A.
- ↑ Routledge, pp. 113-4; Table XVII, p. 125.
- ↑ Ellis, Appendix I.
- ↑ Farndale, Annex A.
- ↑ Routledge, pp. 115–6; Table XVIII, p. 126.
- ↑ 12.0 12.1 Farndale, pp. 63–4.
- ↑ Routledge, pp. 116–7.
- ↑ Ellis, Chapter IV.
- ↑ Ellis, Chapter V.
- ↑ Routledge, p. 117.
- ↑ 17.0 17.1 Ellis, Chapter VI.
- ↑ 18.0 18.1 Ellis, Chapter X.
- ↑ Routledge, pp. 119–20.
- ↑ Ellis, Chapter XI.
- ↑ 21.0 21.1 21.2 Farndale, pp. 77–8.
- ↑ 22.0 22.1 22.2 Routledge, pp. 117–9.
- ↑ Farndale, p. 44.
- ↑ Routledge, p. 121.
- ↑ 53 LAA Rgt War Diary September 1939–June 1940, TNA file WO 166/651.
- ↑ 26.0 26.1 26.2 26.3 2 AA Bde War Diary, Home Forces May–October 1940, TNA file WO 166/2221.
- ↑ Walker, pp. 39–40.
- ↑ 28.0 28.1 28.2 Lord & Watson, p. 174.
- ↑ Walker, pp. 49–52.
- ↑ 2 AA Bde War Diary Nov-Dec 1940, TNA file WO 169/297.
- ↑ 31.0 31.1 31.2 31.3 2 AA Bde War Diary, Middle East, 1941, TNA file WO 169/1560.
- ↑ 32.0 32.1 Routledge, p. 129.
- ↑ Joslen, p. 479.
- ↑ Routledge, Table XIX, p. 141.
- ↑ 35.0 35.1 Routledge, pp. 134–5.
- ↑ Routledge, Table XXII, p. 143.
- ↑ Farndale, Annex F.
- ↑ 38.0 38.1 38.2 Routledge, pp. 155–60.
- ↑ Routledge, Table XXIII, p. 161.
- ↑ Joslen, p. 566.
- ↑ Eighth Army Order of Battle 5 October 1942, TNA file WO 201/693.
- ↑ Playfair, Vol IV, pp. 36–69.
- ↑ Routledge, Table XXIV, p. 162.
- ↑ Joslen, p. 83.
- ↑ PLayfair, Vol IV, pp. 318, 422.
- ↑ Routledge, Table XXV, p. 164.
- ↑ Molony, Vol V, p. 58.
- ↑ 48.0 48.1 Routledge, pp. 258–64; Table XLII, p. 267.
- ↑ Routledge, pp. 269–70.
- ↑ Routledge, p. 270.
- ↑ Routledge, pp. 274, 281.
- ↑ 52.0 52.1 52.2 52.3 Routledge, p. 282.
- ↑ 53.0 53.1 53.2 53.3 53.4 53.5 53.6 2 AA Brigade, 'History of the Italian Campaign for the Period August 1944–April 1945', TNA file WO 204/7240.
- ↑ Jackson, pp. 260–4.
- ↑ Routledge, pp. 285, 293.
- ↑ Litchfield, Appendix 5.
- ↑ Routledge, Table XXIV, p. 441.
References[]
- Major L.F. Ellis, History of the Second World War, United Kingdom Military Series: The War in France and Flanders 1939–1940, London: HM Stationery Office, 1954/Uckfield, Naval & Military Press, 2004.
- Gen Sir Martin Farndale, History of the Royal Regiment of Artillery: The Years of Defeat: Europe and North Africa, 1939–1941, Woolwich: Royal Artillery Institution, 1988/London: Brasseys, 1996, ISBN 1-85753-080-2.
- Ashley Jackson, The British Empire and the Second World War, London: Hambledon Continuum, 2006, ISBN 1-85285-417-0.
- Lt-Col H.F. Joslen, Orders of Battle, United Kingdom and Colonial Formations and Units in the Second World War, 1939–1945, London: HM Stationery Office, 1960/Uckfield: Naval & Military Press, 2003, ISBN 1-843424-74-6.
- Norman E.H. Litchfield, The Territorial Artillery 1908–1988 (Their Lineage, Uniforms and Badges), Nottingham: Sherwood Press, 1992, ISBN 0-9508205-2-0.
- Cliff Lord & Graham Watson, Royal Corps of Signals: Unit Histories of the Corps (1920–2001) and its Antecedents, Solihull: Helion, 2003, ISBN 1-874622-92-2.
- Brig C.J.C. Molony,History of the Second World War, United Kingdom Military Series: The Mediterranean and Middle East, Vol V: The Campaign in Sicily 1943 and the Campaign in Italy 3rd September 1943 to 31st March 1944, London: HMSO, 1973/Uckfield, Naval & Military Press, 2004, ISBN 1-845740-69-6.
- Maj-Gen I.S.O. Playfair & Brig C.J.C. Molony, "History of the Second World War, United Kingdom Military Series: The Mediterranean and Middle East, Vol IV: The Destruction of the Axis forces in Africa, London: HMSO, 1966/Uckfield, Naval & Military Press, 2004, ISBN 1-845740-68-8
- Brig N.W. Routledge, History of the Royal Regiment of Artillery: Anti-Aircraft Artillery 1914–55, London: Royal Artillery Institution/Brassey's, 1994, ISBN 1-85753-099-3.
- Patrick Walker, 6th Heavy Anti-Aircraft Regiment, Royal Artillery, Rev Edn, Gloucester: Choir Press, 2013, ISBN 978-0-9562190-4-6.
External sources[]
The original article can be found at 2nd Anti-Aircraft Brigade (United Kingdom) and the edit history here.