Kaga (加賀?) was an aircraft carrier of the Imperial Japanese Navy (IJN), the third to enter service, named after the former Kaga Province in present-day Ishikawa Prefecture. Originally intended to be one of two Tosa-class battleships, Kaga was converted under the terms of the Washington Naval Treaty to an aircraft carrier as the replacement for the battlecruiser Amagi, which had been damaged during the 1923 Great Kanto earthquake. Kaga was rebuilt in 1933–35, increasing her top speed, improving her exhaust systems, and adapting her flight decks to more modern, heavier aircraft.
The ship figured prominently in the development of the IJN's carrier striking force doctrine, which grouped carriers together to give greater mass and concentration to their air power. A revolutionary strategic concept at the time, the employment of the doctrine was crucial in enabling Japan to attain its initial strategic goals during the first six months of the Pacific War.
Kaga's aircraft first supported Japanese troops in China during the Shanghai Incident of 1932 and participated in the Second Sino-Japanese War in the late 1930s. With other carriers, she took part in the Pearl Harbor raid in December 1941 and the invasion of Rabaul in the Southwest Pacific in January 1942. The following month her aircraft participated in a combined carrier airstrike on Darwin, Australia, helping secure the conquest of the Dutch East Indies by Japanese forces. She missed the Indian Ocean raid in April as she had to return to Japan for permanent repairs after hitting a reef in February.
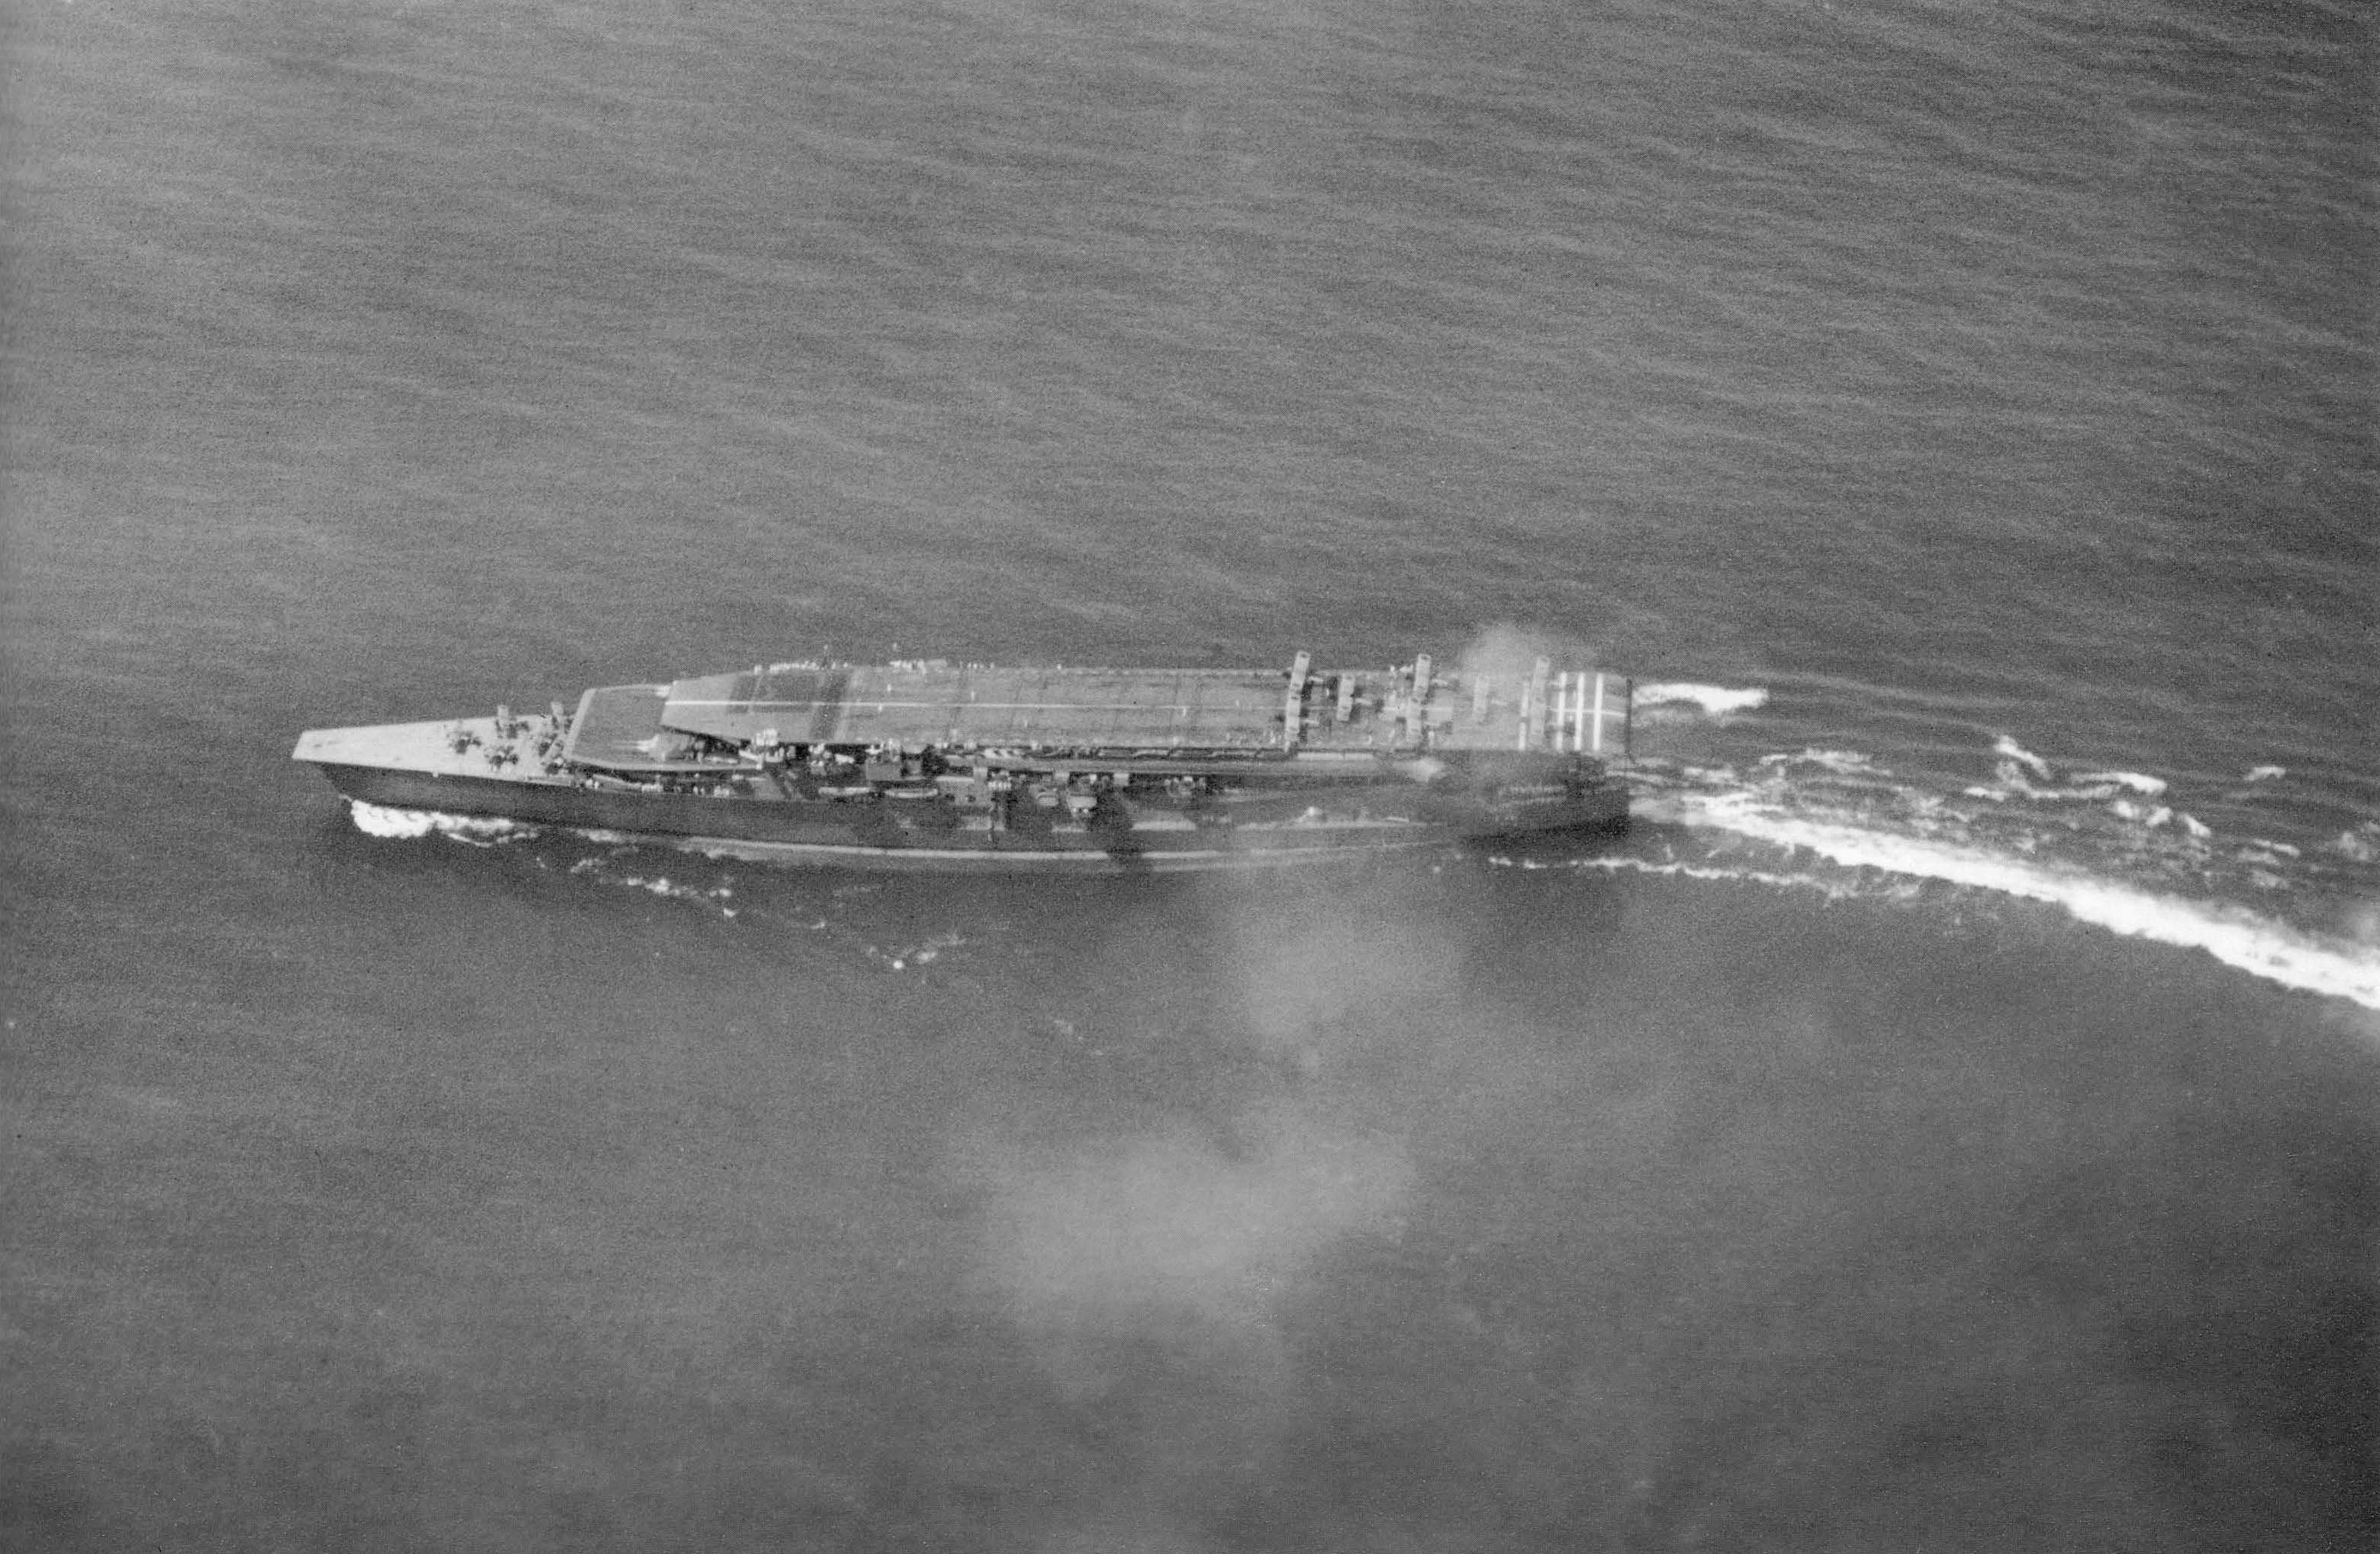
Following repairs, Kaga rejoined the 1st Air Fleet for the Battle of Midway in June 1942. After bombarding American forces on Midway Atoll, Kaga and three other IJN carriers were attacked by American aircraft from Midway and the carriers Enterprise, Hornet, and Yorktown. Dive bombers from Enterprise severely damaged Kaga; when it became obvious she could not be saved, she was scuttled by Japanese destroyers to prevent her from falling into enemy hands. The loss of four large attack carriers, including Kaga at Midway was a crucial setback for Japan, and contributed significantly to that nation's ultimate defeat. In 1999, debris from Kaga including a large section of the hull was located on the ocean floor at a depth in excess of 5000 meters; 350 miles northwest of Midway Island. GPS coordinates :28deg 38' 34" N 176deg 29 '16" W;[3] the main body of the carrier has not yet been found.
Kaga was laid down as a Tosa-class battleship, and was launched on 17 November 1921 at the Kawasaki Heavy Industries shipyard in Kobe. On 5 February 1922 both Tosa-class ships were canceled and scheduled to be scrapped under the terms of the Washington Naval Treaty.[4]
The Treaty authorized conversion of two battleship or battlecruiser hulls into aircraft carriers of up to 33,000 long tons (34,000 t) standard displacement. The incomplete battlecruisers Amagi and Akagi were initially selected, but the Great Kantō Earthquake of 1923 damaged Amagi's hull beyond economically feasible repair, and Kaga was selected as her replacement. The formal decision to convert Kaga to an aircraft carrier was issued 13 December 1923, but no work took place until 1925 as new plans were drafted and earthquake damage to the Yokosuka Naval Arsenal was repaired. She was officially commissioned on 31 March 1928, but this signified only the beginning of sea trials. She joined the Combined Fleet (Rengo kantai) on 30 November 1929 as the IJN's third carrier to enter service, after Hōshō (1922) and Akagi (1927).[5]
Kaga was completed with a length of 238.5 meters (782 ft 6 in) overall. She had a beam of 31.67 meters (103 ft 11 in) and a draft at full load of 7.92 meters (26 ft 0 in). She displaced 26,900 long tons (27,300 t) at standard load, and 33,693 long tons (34,234 t) at full load, nearly 6,000 long tons (6,100 t) less than her designed displacement as a battleship.[6] Her complement totaled 1340 crewmembers.[7]
Flight deck arrangements[]
Kaga as completed, with all three flight decks visible
Kaga, like Akagi, was completed with three superimposed flight decks, the only carriers ever to be designed so. The British carriers converted from "large light cruisers", HMS Glorious, HMS Courageous, and HMS Furious, each had two flight decks, but there is no evidence that the Japanese copied the British model. It is more likely that it was a case of convergent evolution to improve launch and recovery cycle flexibility by allowing simultaneous launch and recovery of aircraft.[8]Kaga's main flight deck was 171.2 meters (561 ft 8 in) long, her middle flight deck was only about 15 meters (49 ft 3 in) long and started in front of the bridge, and her lower flight deck was approximately 55 meters (180 ft 5 in) long. The utility of her middle flight deck was questionable as it was so short that only some of the lightly loaded aircraft could use it, even in an era when the aircraft were much lighter and smaller than they were during World War II.[9] At any rate the ever-increasing growth in aircraft performance, size and weight during the 1930s meant that even the bottom flight deck was no longer able to accommodate the take-off roll required for the new generations of aircraft being fielded and it was plated over when the ship was modernized in the mid-1930s.[10]Kaga's main flight deck was completely flat until a conning tower was added during the modernization.[11]
As completed, the ship had two main hangar decks and a third auxiliary hangar with a total capacity of 60 aircraft. The hangars opened onto the middle and lower flight decks to allow aircraft to take off directly from the hangars while landing operations were in progress on the main flight deck above. No catapults were fitted.[12] Her forward aircraft lift was offset to starboard and 10.67 by 15.85 meters (35.0 by 52.0 ft) in size. Her aft lift was on the centerline and 12.8 by 9.15 meters (42 ft 0 in by 30 ft 0 in). Her arresting gear was a French transverse system as used on their aircraft carrier Béarn and known as the Model Fju (Fju shiki) in the Japanese service.[13]
Kaga's fitting-out in 1928. This stern view shows the long funnel extending aft below the flight deck, and three 8-inch (200 mm) guns in casemates.
Kaga was armed with ten 20 cm/50 3rd Year Type guns: one twin-gun Model B turret on each side of the middle flight deck and six in casemates aft. They fired 110-kilogram (240 lb) projectiles at a rate of three to six rounds per minute with a muzzle velocity of 870 m/s (2,900 ft/s); at 25°, they had a maximum range between 22,600 and 24,000 m (24,700 and 26,200 yd). The Model B turrets were nominally capable of 70° elevation to provide additional anti-aircraft (AA) fire, but in practice the maximum elevation was only 55°. The slow rate of fire and the fixed 5° loading angle minimized any real anti-aircraft capability.[14][15] This heavy gun armament was provided in case she was surprised by enemy cruisers and forced to give battle, but her large and vulnerable flight deck, hangars, and other features made her more of a target in any surface action than a fighting warship. Carrier doctrine was still evolving at this time and the impracticability of carriers engaging in gun duels had not yet been realized.[16][Note 2]
She was given an anti-aircraft armament of six twin 12-centimeter (4.7 in) 45-caliber 10th Year Type Model A2 gun mounts fitted on sponsons below the level of the funnels, where they could not fire across the flight deck, three mounts per side.[17] These guns fired 20.3-kilogram (45 lb) projectiles at a muzzle velocity of 825–830 m/s (2,707–2,723 ft/s); at 45° this provided a maximum range of 16,000 meters (17,000 yd), and they had a maximum ceiling of 10,000 meters (33,000 ft) at 75° elevation. Their effective rate of fire was 6 to 8 rounds per minute.[18][19] She had two Type 89 directors to control her 20 cm guns and two Type 91 manually powered anti-aircraft directors (Kōshaki) to control her 12 cm guns.[20]
Kaga's waterline armored belt was reduced from 280 to 152 mm (11.0 to 6.0 in) during her reconstruction and the upper part of her torpedo bulge was given 127 mm (5.0 in) of armor. Her deck armor was also reduced from 102 to 38 mm (4.0 to 1.5 in).[13]
Propulsion[]
When Kaga was being designed the problem of how to deal with exhaust gases in carrier operations had not been resolved. The swiveling funnels of Hōshō had not proved successful and wind-tunnel testing had not provided an answer. As a result, Akagi and Kaga were given different exhaust systems to evaluate in real-world conditions. Kaga's funnel gases were collected in a pair of long horizontal ducts which discharged at the rear of each side of the flight deck, in spite of predictions by a number of prominent naval architects that they would not keep the hot gases away from the flight deck. The predictions proved to be correct, not least because Kaga was slower than the Akagi which allowed the gases to rise and interfere with landing operations. Another drawback was that the heat of the gases made the crew's quarters located on the side of the ship by the funnels almost uninhabitable.[13]
Kaga was completed with four Kawasaki Brown-Curtis geared turbines with a total of 91,000 shaft horsepower (68,000 kW) on four shafts. As a battleship her expected speed had been 26.5 knots (49.1 km/h; 30.5 mph), but the reduction in displacement from 39,900 to 33,693 long tons (40,540 to 34,234 t) allowed this to increase to 27.5 knots (50.9 km/h; 31.6 mph), as demonstrated on her sea trials on 15 September 1928. She had twelve Kampon Type B (Ro) boilers with a working pressure of 20 kg/cm2 (2,000 kPa; 280 psi), although only eight were oil-fired. The other four used a mix of oil and coal. She carried 8,000 long tons (8,128 t) of fuel oil and 1,700 long tons (1,727 t) of coal to give her a range of 8,000 nautical miles (15,000 km; 9,200 mi) at 14 knots (26 km/h; 16 mph).[13]
Early service and development of carrier doctrine[]
See also: 28 January Incident
Kaga conducting air operations in 1930. On the upper deck are Mitsubishi B1M torpedo bombers preparing for takeoff. Nakajima A1N Type 3 fighters are parked on the lower deck forward.
On 1 December 1931 Kaga was assigned as the flagship of the First Carrier Division under the command of Rear Admiral Takayoshi Katō.[21] The First Carrier Division, along with Hōshō, departed for Chinese waters on 29 January 1932 to support Imperial Japanese Army troops during the Shanghai Incident as part of the IJN's 3rd Fleet.[22][Note 3] The B1M3s carried by Kaga and Hōshō were the main bombers used during the brief combat over Shanghai.[23]
Kaga's aircraft, operating from both the carrier and a temporary base at Kunda Airfield in Shanghai, flew missions in support of Japanese ground forces throughout February 1932. During one of these missions three of Kaga's Nakajima A1N2 fighters, including one piloted by future ace Toshio Kuroiwa, escorting three Mitsubishi B1M3 torpedo bombers, scored the IJN's first air-to-air combat victory on 22 February when they shot down a Boeing P-12 flown by an American volunteer pilot.[21][24][Note 4]Kaga returned to home waters upon the declaration of the cease-fire on 3 March and resumed fleet training with the rest of the Combined Fleet.[21]
At this time, the IJN's developing carrier doctrine was still in its earliest stages. Kaga and the IJN's other carriers were initially given roles as tactical force multipliers supporting the fleets's battleships in the IJN's "decisive battle" doctrine. In this role, Kaga's aircraft were to attack enemy battleships with bombs and torpedoes. Aerial strikes against enemy carriers were later, beginning around 1932–1933, deemed of equal importance in order to establish air superiority during the initial stages of battle. The essential component in this strategy was that the Japanese carrier aircraft must be able to strike first with a massed, preventive aerial attack. As a result, in fleet training exercises the carriers began to operate together in front of or with the main battle line. The new strategy emphasized maximum speed from both the carriers and the aircraft they carried as well as larger aircraft with greater range. Thus, longer flight decks on the carriers were required in order to handle the newer, heavier aircraft which were entering service.[25]
Kaga was soon judged inferior to Akagi because of her slower speed, smaller flight deck (64 feet (19.5 m) shorter), and problematic funnel arrangement. Because of Kaga's perceived limitations, she was given priority over Akagi for modernization.[26]Kaga was relegated to reserve status on 20 October 1933 to begin a second major reconstruction, with an official start date of 25 June 1934.[22]
Reconstruction[]
During her second reconstruction Kaga's two lower flight decks were converted into hangars and, along with the main flight deck, were extended to the bow. This increased the flight deck length to 248.55 meters (815 ft 5 in) and raised aircraft capacity to 90 (72 operational and 18 in storage).[27] A third elevator forward, 11.5 by 12 meters (37 ft 9 in × 39 ft 4 in), serviced the extended hangars.[6] Bomb and torpedo elevators were modified to deliver their munitions directly to the flight deck. Her arrester gear was replaced by a Japanese-designed Type 1 system. A small starboard island superstructure was also installed.[12]
Kaga after reconstruction showing the new, full-length flight deck above the wide battleship hull.
Her power plant was completely replaced as were her propellers. New Kampon multi-stage geared turbines were fitted that increased her power from 91,000 to 127,400 shp (67,859 to 95,002 kW) during trials. Each had a high-pressure, a low-pressure, and a cruising turbine coupled to a single shaft. Her boilers were replaced by eight improved oil-burning models of the Kampon Type B (Ro) with a working pressure of 22 kg/cm2 (2,157 kPa; 313 psi) at a temperature of 300 °C (572 °F). The hull was lengthened by 10.3 meters (33 ft 10 in) at the stern to reduce drag and she was given another torpedo bulge above the side armor abreast the upper part of the existing bulge to increase her beam and lower her center of gravity as a result of lessons learned from the Tomozuru Incident in early 1934. This raised her standard displacement significantly, from 26,900 to 38,200 long tons (27,332 to 38,813 t). The extra power and the extra displacement roughly offset each other and her speed increased by less than a knot, up to 28.34 knots (52.49 km/h; 32.61 mph) on trials. Her fuel storage was increased to 7,500 long tons (7,620 t) of fuel oil which increased her endurance to 10,000 nmi (18,520 km; 11,510 mi) at 16 knots (30 km/h; 18 mph). The lengthy funnel ducting was replaced by a single downturned starboard funnel modeled on that used by the Akagi with a water-cooling system for the exhaust gasses and a cover that could be raised to allow the exhaust gasses to escape if the ship developed a severe list and the mouth of the funnel touched the sea. The space freed up by the removal of the funnel ducts was divided into two decks and converted into living quarters for the expanded air group.[28] The carrier's complement increased to 1708 crewmembers.[29]
The two twin turrets on the middle flight deck were removed and four new 20 cm/50 3rd Year Type No. 1 guns in casemates were added forward. Her 12 cm anti-aircraft guns were replaced by eight 12.7-centimeter (5.0 in)/40 Type 89 guns in twin mounts. They fired 23.45-kilogram (51.7 lb) projectiles at a rate between 8 and 14 rounds per minute at a muzzle velocity of 700–725 m/s (2,300–2,380 ft/s); at 45°, this provided a maximum range of 14,800 meters (16,200 yd), and a maximum ceiling of 9,400 meters (30,800 ft).[30][31] Their sponsons were raised one deck to allow them some measure of cross-deck fire. Eleven twin 25 mm Type 96 gun mounts were added, also on sponsons. They fired .25-kilogram (0.55 lb) projectiles at a muzzle velocity of 900 m/s (3,000 ft/s); at 50°, this provided a maximum range of 7,500 meters (8,202 yd), and an effective ceiling of 5,500 meters (18,000 ft). The maximum effective rate of fire was only between 110 and 120 rounds per minute due to the frequent need to change the fifteen-round magazines.[32][33] Six 6.5-millimeter (0.26 in) Type 11 machine guns were also carried.[28] Six Type 95 directors were fitted to control the new 25 mm guns, but Kaga retained her outdated Type 91 anti-aircraft directors.[29]
Several major weaknesses in Kaga's design were not rectified. Kaga's aviation fuel tanks were incorporated directly into the structure of the carrier, meaning that shocks to the ship, such as those caused by bomb or shell hits, would be transmitted directly to the tanks, resulting in cracks or leaks. Also, the fully enclosed structure of the new hangar decks made fire suppression difficult, at least in part because fuel vapors could accumulate in the hangars. Adding to the danger was the requirement from the Japanese carrier doctrine that aircraft be serviced, fueled, and armed whenever possible on the hangar decks rather than on the flight deck. In addition, the carrier's hangar and flight decks carried little armor protection. Furthermore, there was no redundancy in the ship's fire-extinguishing systems. These weaknesses would later be crucial factors in the loss of the ship.[34]
Kaga returned to service in 1935 and was assigned to the Second Carrier Division. The carrier embarked a new set of aircraft, including 16 Nakajima A2N Type 90 fighters, 16 Aichi D1A Type 94 dive bombers, and 28 Mitsubishi B2M Type 89 torpedo bombers.[35]
Kaga conducts air operations in 1937. On deck are Nakajima A2N, Aichi D1A, and Mitsubishi B2M aircraft.
The renewal of hostilities with China at the Marco Polo Bridge in July 1937 found Kaga in home waters. The ship's fighter squadron completed training at Ōmura, Nagasaki then helped escort ships taking army reinforcements from Japan to China. On 15 August, along with Hōshō and Ryūjō, the ship took station in the East China Sea as part of the 3rd Fleet and began supporting Japanese military operations along the central China coast around Shanghai and further inland.[36][37]
Kaga aircraft fought their first battle on 16 August 1937 when six Type 90 fighters engaged four Chinese aircraft over Kiangwan, shooting down three without loss. Between 17 August and 7 September, Kaga's Type 90 and two Mitsubishi A5M Type 96 fighters, which joined the carrier on 22 August, engaged Chinese aircraft on several more occasions. Kaga's fighter pilots claimed to have shot down 10 Chinese aircraft in these encounters without loss.[38][Note 5] On 17 August twelve of the carrier's bombers attacked Hangchow without fighter escort and 11 of them were shot down by Chinese fighters.[39] Beginning on 15 September, six Type 90 and six Type 96 fighters, 18 dive bombers, and 18 torpedo bombers were temporarily deployed to Kunda Airfield from the ship to support land operations.[40]
On 26 September the carrier went to Sasebo for reprovisioning. At Sasebo, the carrier received new replacement aircraft including 32 Yokosuka B4Y Type 96 carrier attack planes (torpedo bombers), 16 Aichi D1A2 Type 96 carrier bombers (dive bombers), and 16 more Type 96 fighters. Several Nakajima A4N Type 95 fighter aircraft augmented the carrier's fighter group at an unspecified later date.[40]
Kaga returned to the front in early October 1937, and except for two brief trips to Sasebo, remained off China until December 1938. Using Taiwan (then part of the Empire of Japan) as its base, the carrier steamed 29,048 nautical miles (53,797 km; 33,428 mi) supporting military operations from the South and East China Seas. During that time, Kaga bombers supported army operations by attacking enemy railroad bridges, airfields, and transportation vehicles. The carrier's fighter pilots claimed to have destroyed at least 17 Chinese aircraft in aerial combat while losing five aircraft themselves. On 12 December 1937 Kaga aircraft participated in the Panay incident.[41][Note 6]
Kaga entered the shipyard on 15 December 1938, where her arrester gear was replaced by a Type 3 system and her bridge was modernized. The flight deck and hangar areas were enlarged, increasing the carrier's aircraft capacity. The ship was completely overhauled from 15 November 1939 to 15 November 1940 before returning to active service. In the meantime, a new generation of aircraft had entered service and Kaga embarked 12 Mitsubishi A5M fighters, 24 Aichi D1A dive bombers and 36 Yokosuka B4Y torpedo bombers. Another 18 aircraft were carried in crates as spares.[22][42][Note 7]
The Japanese carriers' experiences off China had helped further develop the IJN's carrier doctrine. One lesson learned in China was the importance of concentration and mass in projecting naval air power ashore. Therefore, in April 1941 the IJN formed the First Air Fleet to combine all of its fleet carriers under a single command. On 10 April 1941 Kaga was assigned to the First Carrier Division with Akagi as part of the new carrier fleet, which also included the Second and Fifth carrier divisions. The IJN centered its doctrine on air strikes that combined the air groups within carrier divisions, rather than each individual carrier. When more than one carrier division was operating together, the divisions' air groups were combined with each other. This doctrine of combined, massed, carrier air attack groups was the most advanced of its kind of all the world's navies. The IJN, however, remained concerned that concentrating all of its carriers together would render them vulnerable to being wiped out all at once by a massive enemy air or surface strike. Thus, the IJN developed a compromise solution in which the fleet carriers would operate closely together within their carrier divisions but the divisions themselves would operate in loose rectangular formations, with approximately 7,000 metres (7,700 yd) separating the carriers from each other.[43][Note 8]
Although the concentration of so many fleet carriers into a single unit was a new and revolutionary offensive strategic concept, the First Air Fleet suffered from several defensive deficiencies which gave it, in Mark Peattie's words, a "'glass jaw': it could throw a punch but couldn't take one."[44] Japanese carrier anti-aircraft guns and associated fire control systems had several design and configuration deficiencies which limited their effectiveness. The IJN's fleet combat air patrol (CAP) consisted of too few fighter aircraft and was hampered by an inadequate early warning system, including a lack of radar. Poor radio communications with the fighter aircraft inhibited effective command and control of the CAP. The carriers' escorting warships were deployed as visual scouts in a ring at long range, not as close anti-aircraft escorts, as they lacked training, doctrine, and sufficient anti-aircraft guns. These deficiencies would eventually doom Kaga and other First Air Fleet carriers.[45]
Kaga (foreground), with Zuikaku (background), heads towards Pearl Harbor sometime between 26 November and 7 December 1941.
In November 1941 the IJN's Combined Fleet, under Isoroku Yamamoto, prepared to participate in Japan's initiation of a formal war with the United States by conducting a preemptive strike against the United States Navy's Pacific Fleet base at Pearl Harbor, Hawaii. On 17 November Kaga, under the command of Captain Jisaku Okada,[Note 9] loaded 100 torpedoes at Saeki Bay, Hiroshima; these torpedoes were specially designed for use in the shallow waters of the Pearl Harbor anchorage. On 19 November, Kaga and the rest of the Combined Fleet's mobile strike force (Kido Butai), under Chuichi Nagumo and including six fleet carriers from the First, Second, and Fifth Carrier Divisions, assembled in Hitokappu Bay at Etorofu Island. The fleet departed Etorofu on 26 November and followed a course across the north-central Pacific to avoid commercial shipping lanes.[46][Note 10]
For the attack on Pearl Harbor, Kaga carried a total of 18 Mitsubishi A6M Zero fighters, 27 Nakajima B5N torpedo bombers and 27 Aichi D3A[Note 11] dive bombers, plus three crated aircraft of each type for the operation. During the morning of 7 December 1941 Kaga aircraft participated in both First Air Fleet strikes launched against Oahu from a position 230 nautical miles (430 km) north of the island. In the first strike of 213 total aircraft, 26 Kaga B5N carrier attack bombers attacked the American ships at anchor with bombs and torpedoes, escorted by nine Zeros. In the second strike of 170 aircraft, 26 Kaga D3A dive bombers targeted the airfield at Ford Island in the middle of the harbor while nine Zeros provided escort and attacked aircraft on the ground. A total of five B5N, four Zeros and six D3A from the ship were lost during the two strikes, along with their aircrews, a total of 31 personnel.[47]Kaga's bomber and torpedo crews claimed hits on the battleships Nevada, Oklahoma, Arizona, California, West Virginia, and Maryland.[48] The ship's fighter pilots claimed to have shot down one US aircraft and destroyed 20 on the ground.[49][Note 12] Upon completion of the attack, the First and Fifth Carrier divisions, including Kaga, returned immediately to Japan.[46][Note 13]
In January 1942, together with the rest of the First and Fifth Carrier Division carriers and staging out of Truk (now Chuuk) in Micronesia, Kaga supported the invasion of Rabaul in the Bismarck Islands. Kaga provided 27 bomb-carrying B5N and 9 Zeros for the initial airstrike on Rabaul on 20 January 1942, during which one B5N was shot down by anti-aircraft fire.[Note 14] The First Carrier Division attacked Allied positions at nearby Kavieng the following day, of which Kaga contributed nine Zeros and sixteen D3As. On the 22nd Kaga's D3As and Zeros again attacked Rabaul and two dive bombers had to make emergency landings, but the crews were rescued. Kaga returned to Truk on 25 January and Rabaul and Kavieng were successfully occupied by Japanese forces by February.[50]
On 9 February Kaga hit a reef at Palau after she had unsuccessfully sortied against American carrier forces attacking the Marshall Islands on 1 February. The damage reduced the carrier's speed to 18 knots.[46][Note 15] After temporary repairs, she continued to the Timor Sea, where on 19 February 1942 she, with the other carriers of the First and Second Carrier Divisions, launched air strikes against Darwin, Australia from a point 100 nautical miles (190 km) southeast of the easternmost tip of Timor. Kaga contributed 27 B5Ns (carrying bombs), 18 D3A, and 9 Zeros to the attack, which caught the defenders by surprise. Eight ships were sunk, including the destroyerPeary, and fourteen more were damaged, at a cost of only one of Kaga's B5Ns. In March 1942, Kaga, based out of Staring-baai, helped cover the invasion of Java, although her only contribution appears to have been aircraft for the 5 March 1942 airstrike on Tjilatjap. In that attack Kaga contributed 27 bomb-carrying B5N escorted by nine Zeros. The attacking aircraft bombed merchant ships in the harbor, sinking eight of them, and attacked anti-aircraft batteries and a warehouse without loss. Most of the Allied forces in the Dutch East Indies surrendered to the Japanese later in March. Kaga was unable to participate in the Indian Ocean raid in April because of the damage she had received in February. Instead, she sailed for Sasebo on 15 March for repairs, entering drydock on 27 March. The repairs were completed on 4 May.[51][Note 16]
Lieutenant Shōichi Ogawa led Kaga's dive bomber group in the attack on Midway Island. Ogawa was fatally wounded later the same day when Kaga was hit by American dive bombers.[52]
Concerned by the US carrier strikes in the Doolittle, Marshall Islands, and Lae-Salamaua raids, Yamamoto determined to force the US Navy into a showdown to eliminate the American carrier threat. Yamamoto decided to invade and occupy Midway Island, which he was sure would draw out the American carrier forces to battle. The Midway invasion was codenamed by the Japanese as Operation MI.[53]
In support of MI, on 27 May 1942, Kaga departed the Inland Sea with the Combined Fleet on her final mission, in the company of carriers Akagi, Hiryū, and Sōryū which constituted the First and Second Carrier Divisions. Her aircraft complement was 27 Zeros, 20 D3As, and 27 B5Ns.[54][Note 17] With the fleet positioned 250 nautical miles (460 km) northwest of Midway Island at dawn on 4 June 1942, Kaga contributed eighteen D3As, commanded by Lieutenant Shōichi Ogawa, escorted by nine Zeros to the strike against the island. The carrier's B5Ns were armed with torpedoes and kept ready in case enemy ships were discovered during the Midway raid. One each of the D3As and Zeros was shot down by AA fire over Midway, and another four D3As were damaged. Kaga's Zero pilots claimed to have shot down 12 US aircraft over Midway Island. One Kaga B5N was launched to augment the fleet's reconnaissance of the surrounding ocean.[Note 18] The carrier also put up two Zeros on CAP.[49][55] Another five Zeros reinforced her CAP at 07:00 and the seven fighters helped to defend the Kido Butai from the first US air attackers from Midway Island at 07:10. Unknown to the Japanese, the US Navy had divined the Japanese MI plan from signals intelligence and had prepared an ambush using its three available carriers, positioned northeast of Midway.[56]
At 07:15 Admiral Nagumo ordered the B5Ns still on Kaga and Akagi rearmed with bombs for another attack on Midway itself. This process was limited by the number of ordnance carts used to handle the bombs and torpedoes and the limited number of ordnance elevators. Thus, the torpedoes could not be struck below until after all the bombs were moved up from their magazine, assembled and mounted on the aircraft. This process normally took about an hour and a half; more time would be required to bring the aircraft up to the flight deck and warm up and launch the strike group. Around 07:40 Nagumo reversed his order when he received a message that American carriers had been spotted.[57] At 07:30 Kaga recovered three of her CAP.[58]
Sinking[]
Kaga's four remaining CAP fighters were in the process of landing when 16 MarineSBD Dauntless dive-bombers from Midway, led by Lofton R. Henderson, attacked Hiryu around 07:55 without result.[59] Five Zeros were launched at 08:15 and three intercepted a dozen Midway-based United States ArmyB-17 Flying Fortresses attempting to bomb the three other carriers from 20,000 feet (6,100 m), but only limited damage was inflicted on the heavy bombers, although their attacks all missed. Five D3As also joined the CAP around this time. Another trio of Zeros were launched at 08:30. Kaga began landing her returning Midway strike force aboard around 08:35 and was finished by 08:50; one Zero pilot died after crash-landing his aircraft.[60][Note 19]
The five Zeros launched at 08:15 were recovered aboard at 09:10 and replaced by six more Zeros launched at 09:20. They intercepted the first US carrier aircraft to attack, TBD Devastator torpedo-bombers of VT-8 from the US carrier Hornet at 09:22, and shot down all 15, leaving only a single survivor, George H. Gay, Jr., treading water. Shortly thereafter, 14 Devastators from VT-6 from the US carrier Enterprise, led by Eugene E. Lindsey, were spotted. They tried to sandwich Kaga, but the CAP, reinforced by another six Zeros launched by Kaga at 10:00, shot down all but four of the Devastators, and the carrier dodged the torpedoes.[61]
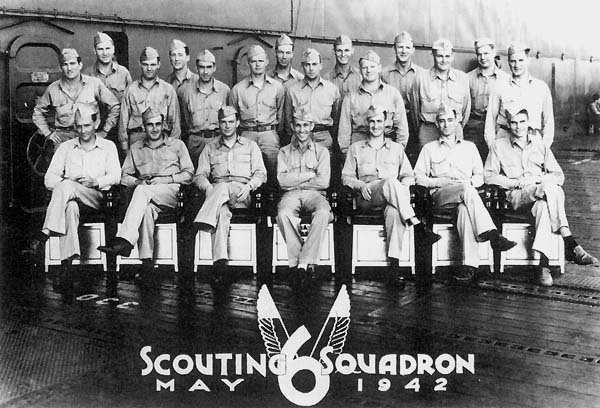
Dive bomber pilots from Enterprise who helped fatally damage Kaga on 4 June. Ensign John Q. Roberts, who was shot down and killed by Kaga's anti-aircraft guns, is standing at the far left of the photo. The bomb that killed Kaga's senior officers on the bridge may have been dropped by Ensign James C. Dexter, standing third from the right.[62]
Soon after the torpedo plane attacks, American carrier dive bombers arrived over the Japanese carriers almost undetected and began their dives. At 10:22, 25 SBD Dauntless dive-bombers from Enterprise, led by C. Wade McClusky, hit Kaga with one 1,000-pound (450 kg) bomb and at least three 500-pound (230 kg) bombs. The first landed near her rear elevator and set the berthing compartments on fire, and the next bomb hit the forward elevator and penetrated the upper hangar, setting off explosions and fires among the armed and fueled planes on her hangar deck. Captain Okada and most of the ship's senior officers were killed by the third bomb, which hit the bridge.[Note 20] The 1000-pound bomb hit amidships and penetrated the flight deck to explode on the upper hangar. The explosions ruptured the ship's avgas lines, damaged both her port and starboard fire mains and the emergency generator powering her fire pumps, as well as knocking out the carbon dioxide fire suppression system.[63] Fueled by the avgas pouring onto the hangar deck, the fires detonated the 80,000 pounds (36,000 kg) of bombs and torpedoes strewn across the hangar deck in a series of catastrophic multiple fuel-air explosions that blew out the hangar sides.[64] At nearly the same time, dive bombers hit and fatally damaged Akagi and Sōryū.[65][Note 21]
Unable to contain her fires, Kaga's survivors were taken off by the destroyers Hagikaze and Maikaze between 14:00 and 17:00.[Note 22] Around 19:25 she was scuttled by two torpedoes from Hagikaze and sank stern-first at position 30°20′N179°17′W / 30.333°N 179.283°W / 30.333; -179.283.[66]Ensign Takeshi Maeda, an injured Kaga B5N aircrew member rescued by Hagikaze, described the scene: "My comrade carried me up to the deck so I could see the last moments of our beloved carrier, which was nearby. Even though I was in pain tears started to run down my cheeks, and everyone around me was crying; it was a very sad sight."[67]
The carrier's crew suffered 811 fatalities, mainly among the aircraft mechanics and armorers stationed on the hangar decks and the ship's engineers, many of whom were trapped below in the boiler and engine rooms by uncontrolled fires raging on the decks above them. Twenty-one of the ship's aviators were killed.[68][Note 23] The loss of Kaga and the three other IJN carriers at Midway (Hiryū was also sunk during the battle), with their aircraft and veteran pilots, was a crucial strategic defeat for Japan and contributed significantly to Japan's ultimate defeat in the war.[69]
Wreck survey[]
In May 1999, the Nauticos Corporation, in partnership with the US Navy, discovered some wreckage from Kaga.[70] They employed the research vessel Melville during a survey of a fleet exercise area with the US Navy's recently modified SEAMAP acoustic imaging system. A follow-on search by the USNS Sumner in September 1999 located the wreckage and took photos of it.[71] The wreckage included a 50-foot (15 m) long section of hangar bulkhead, two 25 mm anti-aircraft gun tubs, and a landing light array. The artifacts were at a depth of 17,000 feet (5,200 m).[72]
Notes[]
↑Hata, p. 24, gives the carrier's initial aircraft complement as 12 Type 3 fighters (plus three crated spares), six reconnaissance aircraft (with two spares), and 18 torpedo bombers (six spares).
↑The United States Navy did much the same with the provision of four twin 8-inch (203 mm) gun turrets on their Lexington-class carriers. See Gardiner and Grey, p. 110.
↑The 3rd Fleet at this time was commanded by Vice Admiral Kichisaburō Nomura (Hata, p. 299). Fighter pilot and future ace Isamu Mochizuki served in the carrier's fighter group sometime between 1929 and 1932 (Hata, p. 342).
Ikuta, Kuroiwa, and Takeo pose in front of a Nakajima A1N2 Type 3 fighter aircraft.
In addition to Petty Officer 3rd Class Kuroiwa, the Kaga fighter pilots involved in the shootdown were Lieutenant Nokiji Ikuta and Seaman 1st Class Kazuo Takeo (see photo). Lieutenant Kotani, the leader of the flight of three torpedo bombers, was killed in the engagement. The American pilot was Robert Short. Sakaida, p. 97, states that Short was killed in the engagement. The Kaga aircrews received a special commendation from the 3rd Fleet commander, Vice Admiral Kichisaburō Nomura, for their actions. (Peattie, pp. 50–51; Hata, pp. 24, 299) Future ace Mitsugu Mori served in Kaga's fighter unit during this time. (Hata, p. 347)
↑Lieutenant Chikamasa Igarashi led the six fighters in the 16 August engagement. Also participating in that engagement was future ace Akio Matsuba. The other engagements included: 17 August, when four Type 90s under Warrant Officer Toyoda shot down two Chinese aircraft over Kiangwan; 4 September, two Type 96 fighters under Lieutenant Tadashi Nakajima shot down three Curtiss Hawks; 7 September, three Type 90s under Igarashi shot down five aircraft over T'ai Hu, with Igarashi claiming three of that number. (Hata, pp. 25–26, 263)
↑Six Kaga fighters were assigned to land bases near Shanghai and Nanking between 9 December 1937 and 15 January 1938. Nine fighters were temporarily based out of Nanking from 3 March through 4 April 1938. Kaga's fighter group at this time included future aces Jirō Chōno, Osamu Kudō, Yoshio Fukui, Watari Handa, Masaichi Kondō, Hatsuo Hidaka, Kiichi Oda, Satoru Ono, and Chitoshi Isozaki. (Hata, pp. 28, 322, 346, 353, 361, 366, 368) The US Navy decrypted an IJN message which reportedly indicated that the attack on the Panay and other neutral ships in the Yangtze River had been knowingly and deliberately planned by an air officer on Kaga. (Toland, p. 49)
↑Hata, p. 27, gives Kaga's aircraft complement after overhaul as 12 fighters with four spares, 18 dive bombers with six spares, and 48 torpedo bombers with 16 spares.
↑According to Parshall and Tully, pp. 86–87, the Japanese would not usually launch their entire carrier air groups into a single massed attack. Instead, each carrier would launch a "deckload strike" of all its aircraft that could be spotted at one time on each flight deck. Subsequent attack waves consisted of the next deckload of aircraft. Thus, 1st Air Fleet air attacks would often consist of at least two, massed waves of aircraft. Peattie (p. 152) and Jisaburō Ozawa (Goldstein, pp. 78–80) emphasize that the First Air Fleet was not the IJN's primary strategic striking force. The IJN still considered the First Air Fleet an integral component in the Combined Fleet's decisive battle task force centered on battleships.
↑Okada was born in Ishikawa Prefecture in 1893. He entered the IJN in 1911 and joined the air service in 1922. (Goldstein; Masataka Chihaya, p. 295)
↑The voyage to Hawaii encountered heavy seas, peaking in intensity on 3 December. On this day Kaga suffered its first war casualty when a crewmember was swept away by a wave and lost. (Werneth, p. 107)
↑The Allied reporting name for these aircraft were "Zeke", "Kate" and "Val" respectively.
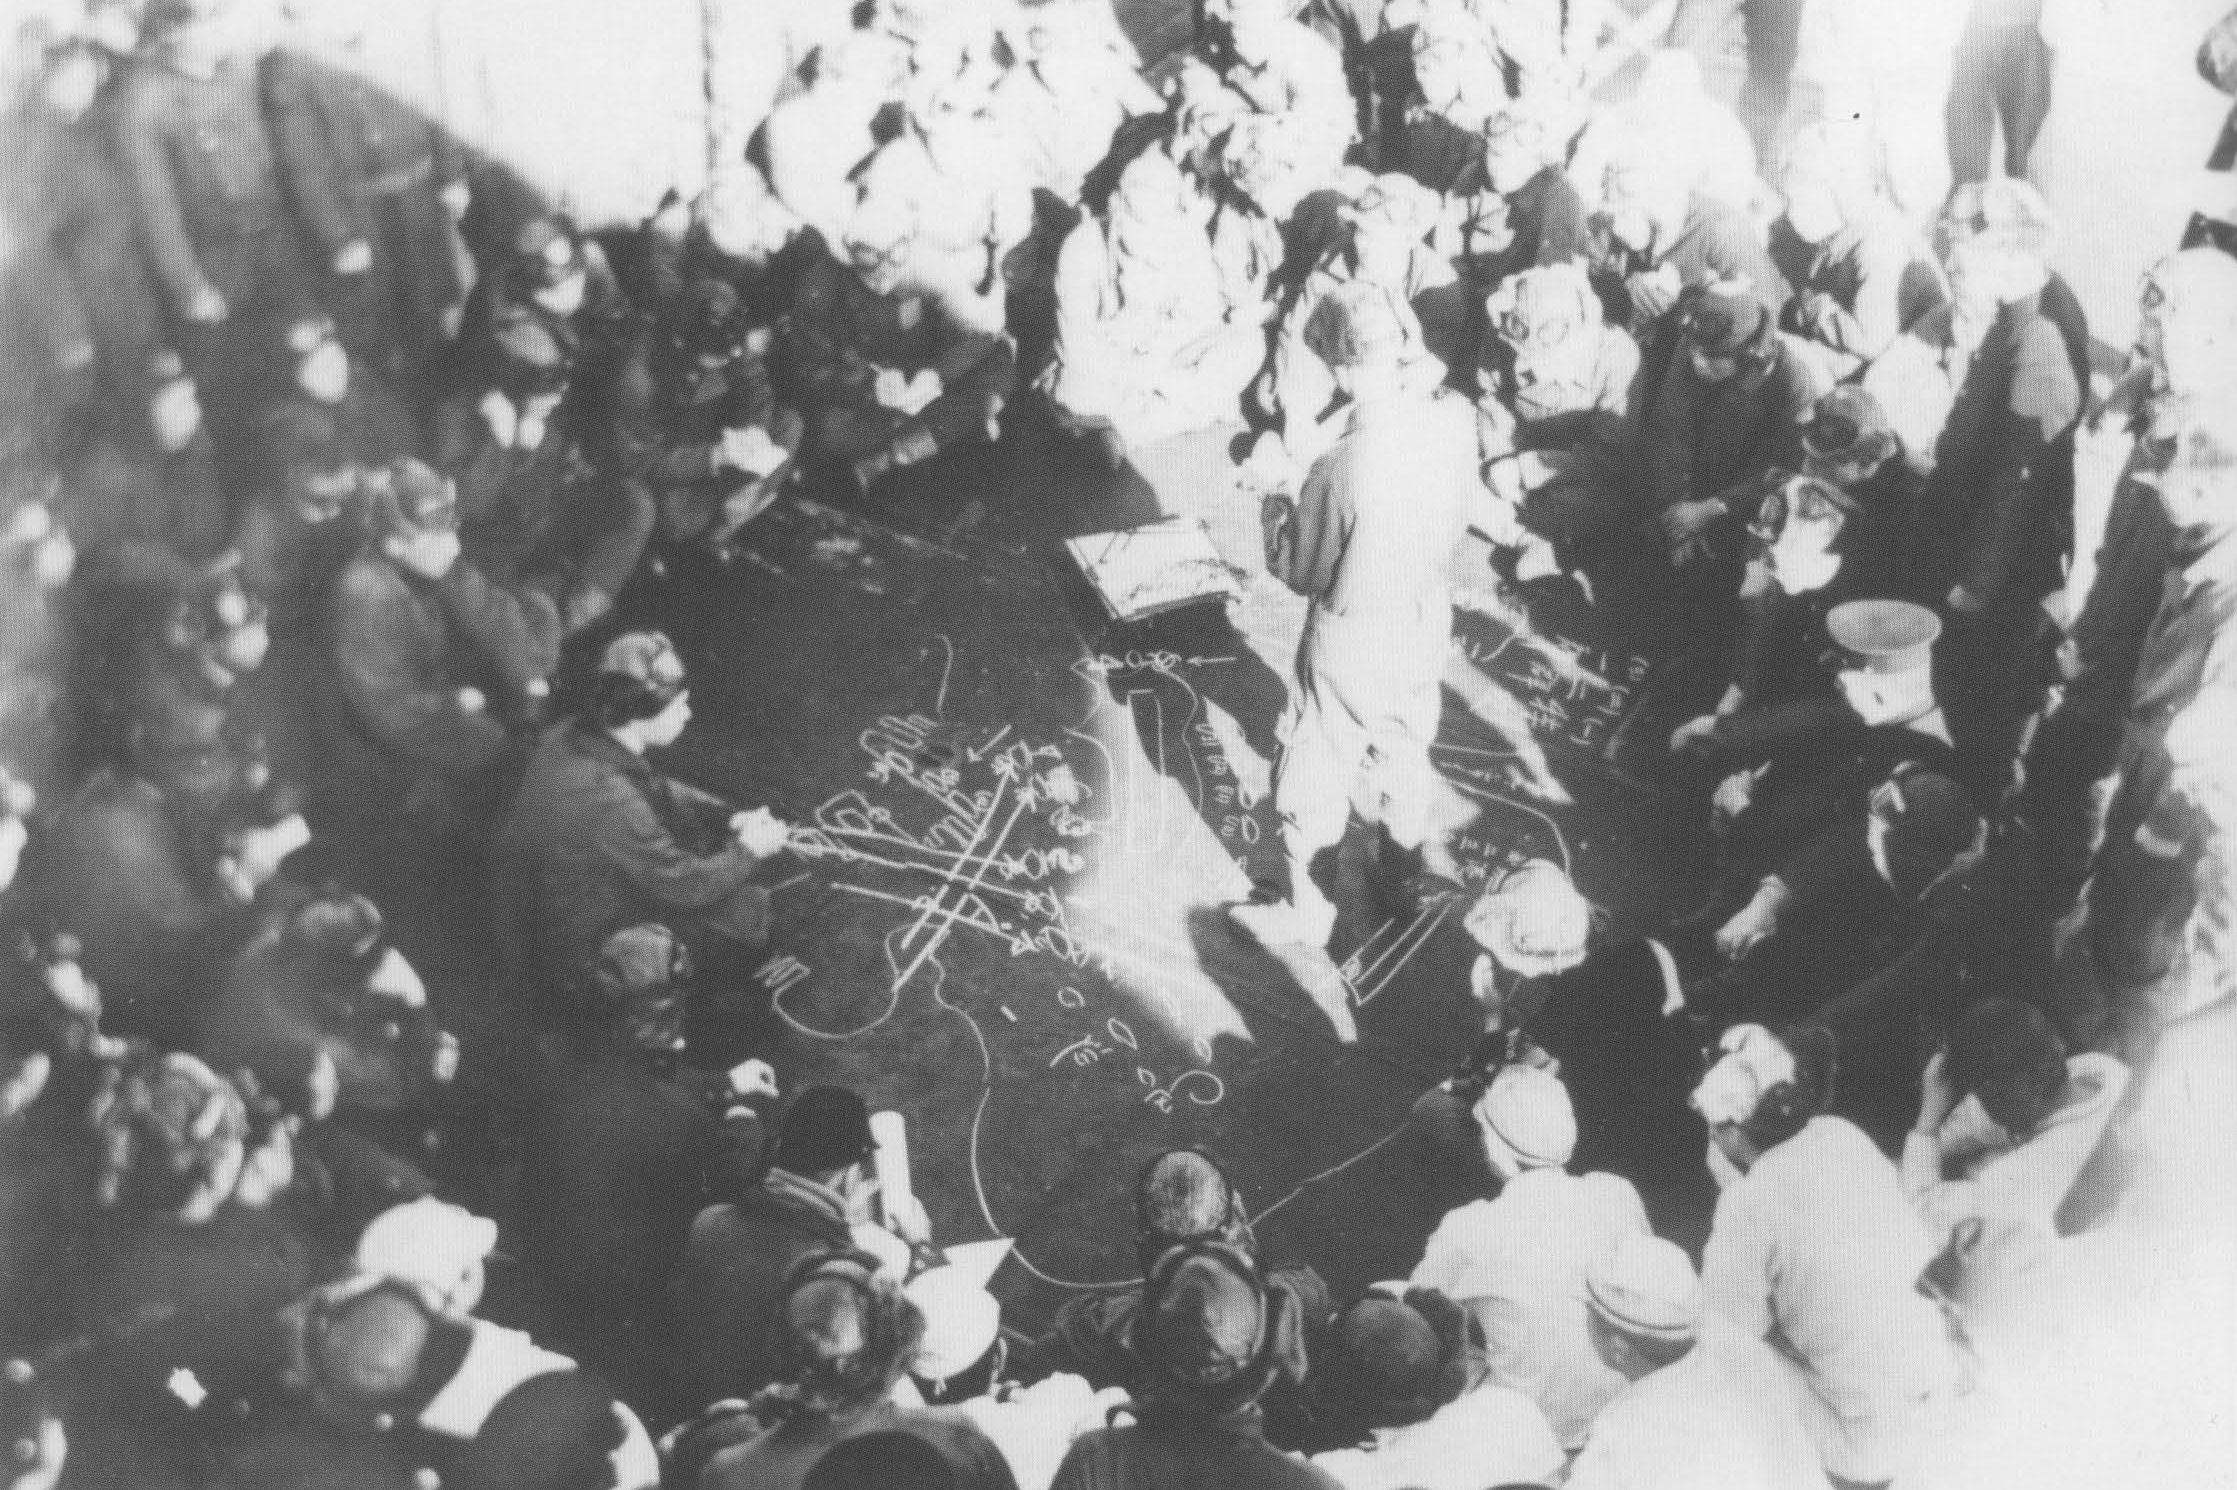
Lieutenant Ichirō Kitajima briefs his B5N crews on the carrier deck about the attack plan the day before the raid on Pearl Harbor.
Fourteen of the B5N in the first wave carried bombs and the other 12 torpedoes. A 15th bomb-carrying B5N aborted due to engine trouble. The bomb-carrying B5Ns were commanded by Lieutenant Commander Takahashi Hashiguchi and the torpedo-armed planes by Lieutenant Ichirō Kitajima (see photo). One B5N crewmember, Yasuji Inoue, was seriously injured by a bullet which shattered his chin. (Werneth, pp. 109, 138, 276) Five torpedo planes and two Zeros were lost in the first wave and two Zeros and the six dive bombers in the second wave (Werneth, p. 111). Future fighter ace Akira Yamamoto participated in the first strike wave and claimed to have shot down a small civilian aircraft over Oahu and destroyed six aircraft on the ground. Yamamoto was a member of Kaga's CAP at Midway and survived the battle. Future ace Kiyonobu Suzuki participated in the second strike. Suzuki was also at Midway and survived. (Hata, pp. 295, 345) Kaga's fighter group was led by Yoshio Shiga who unsuccessfully tried to be the first airborne in the first strike but was beaten by Akagi's fighter group leader. (Toland, p. 205)
↑The Second Carrier Division with Hiryū and Soryū was diverted to support the invasion of Wake Island.
↑The B5N lost in the raid was crewed by Tatsuyasu Sugihara, Katsuo Yamamoto, and Yoichi Tanaka, who were killed. They were the first Japanese casualties in the invasion of Rabaul. (Werneth, pp. 115, 140)
↑Takeshi Maeda, a B5N crewmember on Kaga, states that the carrier grounded at Staring Bay in March, not at Palau in February. The discrepancy is not explained in the sources. (Werneth, p. 116)
↑While Kaga was in drydock on 18 April, 12 Zeros from the carrier's air group based at Kisarazu Air Field participated in the failed counterattack against the US carrier forces which had launched the Doolittle raid bombers. The attack group, including 29 land bombers and 12 Zeros from the 26th Air Flotilla in addition to the Kaga fighters, flew east for 600 nautical miles (1,110 km) before turning back after being unable to locate the American carriers, which had already departed the area (Hata, p. 148). Fighter ace Masaaki Shimakawa joined the carrier's fighter unit around this time (Sakaida, p. 130). After the Indian Ocean raid, Kaga was used for limited air operations training by all the First Air Fleet air units in May as the other carriers were in the shipyard for refitting. (Parshall and Tully, p. 88)
↑Nine of the Zeros were intended to be stationed on Midway after the invasion and belonged to the 6th Air Group. Two of the D3As were in crates and were either replacements for Sōryū or also members of the 6th Air Group. (Parshall and Tully, p. 451)
↑Twenty-five total US aircraft were lost over Midway during the air raid. (Willmott, p. 380) The reconnaissance B5N was commanded by Ensign Haruo Yoshino and covered the search leg south-southeast from the Kido Butai to the west of Midway and over Kure Atoll. The aircraft did not sight any enemy ships and landed back on Kaga minutes before the ship was hit by dive bombers. (Werneth, p. 140)
↑The Zero pilot who died upon landing was Yukuo Tanaka. (Parshall and Tully, p. 196)
↑In addition to Okada, the hit on the bridge likely killed executive officer Captain Masao Kawaguchi, chief gunnery officer Lieutenant Commander Toyosaburō Miyano, navigator Commander Ichiji Monden, and communications officer Lieutenant Commander Hidekazu Takahashi. (Parshall and Tully, p. 235) The ship's maintenance officer, Commander Torao Yamazaki, was killed by the first bomb to hit. (Parshall and Tully, p. 234) At the time of McClusky's attack, Kaga likely had two or three Zeros on the flight deck preparing to take off for CAP duty. (Parshall and Tully, p. 231) Kaga anti-aircraft gunners shot down one of the dive bombers, piloted by J. Q. Roberts and the sixth to attack. This was the only dive bomber shot down by any of the Japanese carriers' anti-aircraft gunners this day (Parshall and Tully, p. 234). McClusky's bombers totalled 28 aircraft, but three split off to attack Akagi. (Lundstrom, pp. 360–361)
↑USS Nautilus fired four torpedoes at the carrier; one misfired, two others missed, and one hit the burning Kaga around 14:05, but it was a dud. (Parshall and Tully, pp. 302–03) The torpedo that hit broke in two and the warhead portion sank. The remaining, floating half was later used as a life preserver by several Kaga survivors. (Willmott, p. 427)
↑Parshall and Tully (p. 337) state that the two destroyers rescued over 700 of the carrier's crew. Since the carrier reportedly had a complement of 1708 (Parshall and Tully, p. 467), there should have been around 900 survivors, but the discrepancy in the numbers is not explained by the sources.
↑Peattie, p. 338, states that eight Kaga airmen were killed in the air and 13 died aboard the ship. Of the 15 Kaga CAP Zeros airborne at the time the carrier was hit, five were destroyed in aerial combat and the remainder were recovered by Hiryū. Two subsequently participated in the second Hiryū airstrike on Yorktown while four others augmented the remaining carrier's CAP. All 10 pilots survived (Parshall and Tully, pp. 502–503; Lundstrom, pp. 351, 414). The two Kaga fighter pilots who joined the attack on Yorktown were Akira Yamamoto and Makoto Bandō. (Parshall and Tully, p. 290) Four of the five pilots in the downed Kaga CAP Zeros were killed. (Lundstrom, p. 363) Kaga's surviving crewmembers were restricted incommunicado to an airbase in Kyūshū for one to two months after returning to Japan, to help conceal word of the Midway defeat from the Japanese public. (Werneth, p. 156) Many of the survivors were then transferred back to frontline units without being allowed to contact family. Some of the injured were quarantined in hospitals for almost a year. (Parshall and Tully, pp. 386–87)
Brown, David (1977). Aircraft Carriers. New York: Arco Publishing Company. ISBN 0-668-04164-1.
Campbell, John (1985). Naval Weapons of World War Two. Annapolis, Maryland: Naval Institute Press. ISBN 0-87021-459-4.
Cressman, Robert J.; Steve Ewing, Barrett Tillman, Mark Horan, Clark G. Reynolds, and Stan Cohen (1990). A Glorious Page in our History: The Battle of Midway 4–6 June 1942. Missoula, Montana: Pictorial Histories Publishing Company, Inc.. ISBN 978-0-929521-40-4.
Evans, David C. (Editor); Mitsuo Fuchida (1986 (2nd Edition)). The Japanese Navy in World War II: In the Words of Former Japanese Naval Officers. Annapolis, Maryland: Naval Institute Press. ISBN 0-87021-316-4.
Fuchida, Mitsuo; Masatake Okumiya (1955). Midway: The Battle That Doomed Japan, The Japanese Navy's Story. Annapolis, Maryland: United States Naval Institute. OCLC 607018642.
Gardiner, Robert; Gray, Randal, eds (1984). Conway's All the World's Fighting Ships: 1906–1922. Annapolis, Maryland: Naval Institute Press. ISBN 0-85177-245-5.
Goldstein, Donald M.; Katherine V. Dillon (editors) (2004). The Pacific War Papers: Japanese Documents of World War II. Dulles, Virginia: Potomac Books. ISBN 1-57488-632-0.
Hata, Ikuhiko; Yasuho Izawa, Don Cyril Gorham (translator) (1975 (original) 1989 (translation)). Japanese Naval Aces and Fighter Units in World War II. Annapolis, Maryland: Naval Institute Press. ISBN 0-87021-315-6.
Howarth, Stephen (1983). The Fighting Ships of the Rising Sun: The Drama of the Imperial Japanese Navy 1895–1945. Fairfield, Pennsylvania: Fairfield Graphics. ISBN 0-689-11402-8.
Ireland, Bernard (2007). Aircraft Carriers of the World. London: Southwater. ISBN 978-1-84476-363-4.
Jentschura, Hansgeorg; Dieter Jung and Peter Mickel (1977). Warships of the Imperial Japanese Navy, 1869–1945. Annapolis, Maryland: United States Naval Institute. ISBN 0-87021-893-X.
Lengerer, Hans (1982). "Akagi & Kaga". In Roberts, John. Warship VI. London: Conway Maritime Press. ISBN 0-87021-981-2.
Lundstrom, John B. (2005 (New edition)). The First Team: Pacific Naval Air Combat from Pearl Harbor to Midway. Annapolis, Maryland: Naval Institute Press. ISBN 0-87021-189-7.
Parshall, Jonathan; Tully, Anthony (2005). Shattered Sword: The Untold Story of the Battle of Midway. Dulles, Virginia: Potomac Books. ISBN 1-57488-923-0.
Peattie, Mark (2001). Sunburst: The Rise of Japanese Naval Air Power 1909–1941. Annapolis, Maryland: Naval Institute Press. ISBN 1-55750-432-6.
Sakaida, Henry (2002). Aces of the Rising Sun, 1937–1945. Oxford: Osprey Publishing. ISBN 1-84176-618-6.
Stille, Mark (2007). USN Carriers vs IJN Carriers: The Pacific 1942. Oxford: Osprey Publishing. ISBN 978-1-84603-248-6.
Toland, John (2003 (1970)). The Rising Sun: The Decline and Fall of the Japanese Empire, 1936–1945. New York: The Modern Library. ISBN 0-8129-6858-1.
Werneth, Ron (2008). Beyond Pearl Harbor: The Untold Stories of Japan's Naval Airmen. Atglen, Pennsylvania: Schiffer Military History. ISBN 978-0-7643-2932-6.
Willmott, H. P. (1983). The Barrier and the Javelin: Japanese and Allied Pacific Strategies, February to June 1942. Annapolis, Maryland: Naval Institute Press. ISBN 978-1-59114-949-1.


