| Trafalgar campaign | |||||||
|---|---|---|---|---|---|---|---|
| Part of the War of the Third Coalition | |||||||
 Click image to load the battle. The Battle of Trafalgar, by Clarkson Frederick Stanfield | |||||||
| |||||||
| Belligerents | |||||||
|
|
| ||||||
| Commanders and leaders | |||||||
|
|
| ||||||
| Strength | |||||||
| 70 ships of the line[a] | 56 ships of the line[a] | ||||||
The Trafalgar campaign was a long and complicated series of fleet manoeuvres carried out by the combined French and Spanish fleets; and the opposing moves of the Royal Navy during much of 1805. These were the culmination of French plans to force a passage through the English Channel, and so achieve a successful invasion of the United Kingdom. The plans were extremely complicated and proved to be impractical. Much of the detail was due to the personal intervention of Napoleon, who as a soldier rather than a sailor failed to consider the effects of weather, difficulties in communication, and the Royal Navy. Despite limited successes in achieving some elements of the plan the French commanders were unable to follow the main objective through to execution. The campaign, which took place over thousands of miles of ocean, was marked by several naval engagements, most significantly at the Battle of Trafalgar on 21 October, where the combined fleet was decisively defeated, and from which the campaign takes its name. A final mopping up action at the Battle of Cape Ortegal on 4 November completed the destruction of the combined fleet, and secured the supremacy of the Royal Navy at sea.
French and British aims[]
Napoleon had been planning an invasion of England for some time, with the first Army of England gathering on the Channel coast in 1798. Napoleon's concentration on campaigns in Egypt and Austria, and the Peace of Amiens caused these plans to be shelved in 1802. The resumption of hostilities in 1803 led to their revival, and forces were gathered outside Boulogne in large military camps in preparation for the assembling of the invasion flotilla.[1] The Royal Navy was the main obstacle to a successful invasion, but Napoleon declared that his fleet need only be masters of the Channel for six hours and the crossing could be effected.[2] Though the intended departure points were known and were being closely blockaded by the Royal Navy, First Lord of the Admiralty Lord Melville was short of ships.[3] If a combined Franco-Spanish fleet were to force the Navy from its station for even a short while, the French invasion force might succeed in crossing unmolested. The French aimed to achieve at least temporary control of the Channel, while the British aimed to prevent this at all costs.[4]
Changing French plans[]


Vice-Admiral Horatio Lord Nelson, by Lemuel Francis Abbott
Napoleon proposed a total of four different strategies between July 1804 and March 1805, each with the object of collecting a large force of ships and moving up the Channel. Common elements included the decoying of some or all of the blockading Royal Navy fleets away from the Channel, the combining of the French fleets to lift the blockade of any ships that remained trapped in port, and the advancing of the fleet up the Channel to Boulogne, where they would escort the invasion force across.[5][6]
Plan I: July – September 1804[]


Pierre-Charles-Jean-Baptiste-Silvestre de Villeneuve, commander of the French forces that broke out of Toulon
Napoleon's first plan, put forward in May 1804 for execution between July and September envisaged the break-out from Toulon of 10 ships of the line and 11 frigates under Admiral Latouche Tréville.[7] They would evade the patrolling British fleet under Vice-Admiral Horatio Nelson and sail into the Atlantic, slipping past Alexander Cochrane's fleet off Ferrol and entering the Bay of Biscay. They would then make for Rochefort where they would be joined by another six ships of the line.[7] While this was taking place Vice-Admiral Ganteaume would sail from Brest with 23 ships of the line and head out into the Atlantic, hopefully drawing the main British Channel Fleet under Admiral William Cornwallis after them.[7] Latouche Tréville would then have a clear run into the Channel and up to Boulogne, where he would escort the invasion fleet safely across.[7] The plan was complicated and depended on the unlikely events of favourable weather, the avoidance of Cochrane's and Nelson's fleets and the decoying away of Cornwallis.[7] The plan was never put into operation. Latouche Tréville remained at Toulon rather than risk an encounter with Nelson, and died suddenly on 19 August, putting an end to the scheme.[7]
Plan II: October 1804 – early 1805[]
The revised invasion plan after the death of Latouche Tréville was considerably more ambitious, and consisted of three distinct operations. Latouche Tréville's successor at Toulon, Vice-Admiral Villeneuve, would board 5,600 troops and sail his 10 ships of the line into the Mediterranean on 21 October.[8] Having evaded Nelson he would collect the Aigle from Cádiz and pass through the Strait of Gibraltar, after which he would detach two ships carrying 1,800 troops.[8] He would then head to the West Indies with the rest of his force, while the two detached ships were assigned to fulfil one of the three operations included in the plan.[8] They would sail to Saint Helena and capture the island from the British, before returning northwards to land at Senegal and stir up trouble in West Africa.[8] Meanwhile, Rear-Admiral Missiessy was to sail from Rochefort on 1 November with six ships of the line and 3,500 troops. Having evaded the British blockade he would sail to the West Indies, reinforce the French garrisons at Martinique and Guadeloupe and capture the British colonies of Dominica and St Lucia.[8] Having achieved this Villeneuve and Missiessy would unite and combine forces, giving the French a fleet of 15 ships of the line and 5,000 men.[8] With this force they would capture Surinam and raid other Dutch and British possessions, before sailing back across the Atlantic.[8]
While this was taking place Ganteaume and his 21 ships of the line carrying 18,000 troops were to have sailed from Brest on 23 November, passed through the English Channel and into the North Sea, and then sailed around the coast of Scotland.[8] They would arrive at Lough Swilly on the north coast of Ireland and land the troops. While a full-scale invasion of Ireland was under way Ganteaume would sail around the west coast of Ireland, arriving in the Western Approaches in time to meet Villeneuve and Missiessy's forces returning from the West Indies.[8] With a combined force of nearly 40 ships of the line, the French would sweep up the Channel to Boulogne and effect the third and final part of the plan, the invasion of England.[8] This plan, dependent on the weather, the non-interference of the British and subject to the vagaries of communication over thousands of miles of ocean verged on the impossible. The plan was never attempted, as the British intercepted the orders sent to Ganteaume, and the project was called off.[8]
Plan III: January 1805[]
The strategic situation in Europe had altered considerably by January 1805. The Spanish had allied with France, but Napoleon was concerned about Austria and Russia, who appeared to be in negotiations with Britain. The danger of committing most of his forces across the Channel, from where they could not easily be recalled, had become clear to him. Should a combined Russian and Austrian force open a second front to the east, Napoleon would be hard pressed to deal with it.[8] He decided to temporarily put his plans for invasion on hold, and developed a new strategy whereby his largely idle fleet could cause trouble for Britain.[8] Villeneuve and Missiessy were ordered to embark troops and take their fleets to sea, where they would sail to the West Indies and attack the British possessions there. This would force the British to reallocate resources to defend them.[8] Missiessy duly sailed from Rochefort on 11 January with five ships of the line, evaded Vice-Admiral Thomas Graves's blockading force and escaped into the Atlantic. Rear-Admiral Alexander Cochrane took his forces in pursuit, and both fleets sailed to the West Indies.[8]


Napoleon inspecting the Troops at Boulogne, 15 August 1804
Villeneuve finally sailed from Toulon on 18 January, heading into the teeth of a gale.[8] Their departure was noted by the patrolling British frigates HMS Seahorse and HMS Active, who rushed to report the news to Nelson, anchored at La Maddalena.[9][10] Nelson immediately rushed his fleet to sea, determining that considering the weather and the fact the French had embarked troops, that Villeneuve was heading east, perhaps to attack locations on the Italian coast, or the islands of Malta or Sardinia, or maybe even Greece or Egypt.[9][11] He rushed south, hoping to intercept them south of Sardinia, but when they had not appeared by 25 January, he worried that he had missed them, and pressed further east, calling at Greece and then Alexandria on 7 February.[12] Finding no news of the French he turned westward, calling at Malta on 19 February, where he received news that the French were back in Toulon.[9] Villeneuve had in fact turned to port just two days after setting out, forced back by the weather and the inability of his ships and sailors to cope with it.[8][13] The error of the frigates leaving the fleet unobserved when they had rushed to report to Nelson meant that he had spent nearly six weeks sailing back and forth across the Mediterranean through heavy seas while the French remained in port. A frustrated Nelson returned to resume the blockade.[12][14]
Strategic situation in March 1805[]
The French Navy was largely confined to port, blockaded by various fleets and commands of the Royal Navy, while the main invasion force of 93,000 men in four Army corps waited in Boulogne. A combined French and Dutch squadron of nine ships of the line were quartered in the Netherlands, covered by Admiral Lord Keith's Downs squadron of 11 ships of the line. Neither squadron took part in the campaign.[15] The main Channel Fleet, patrolling between Ushant and the Irish coast under Admiral William Cornwallis and his deputy Vice-Admiral Charles Cotton, consisted of 15 ships of the line, with detached squadrons of five ships of the line under Rear-Admiral Thomas Graves blockading Rochefort, and eight ships of the line under Vice-Admiral Robert Calder blockading Ferrol.[15] They were maintaining a tight blockade over the French Atlantic forces, consisting of 21 ships of the line at Brest under Vice-Admiral Ganteaume, three or four ships of the line at Rochefort, and four French ships of the line under Rear-Admiral Gourdon and eight Spanish ships of the line under Admiral Grandallana at Ferrol.[15] Six Spanish ships of the line and one French one were in port at Cádiz, under the watchful eyes of Rear-Admiral John Orde and his five ships of the line, with another six Spanish ships of line located at Cartagena under Admiral Salcedo.[15] The French naval base at Toulon was home to 11 French ships of the line under Vice-Admiral Villeneuve, who was being kept bottled up by the 12 ships of the line of the Mediterranean Fleet under Vice-Admiral Horatio Nelson.[15] Each commander had a number of frigates, sloops and brigs at their disposal. Further afield, Missiessy, pursued by Cochrane, sailed around the West Indies, but without making contact with each other. Napoleon recalled Missiessy once it became clear the Villeneuve had remained trapped in Toulon, and Missiessey began to voyage back to France on 28 March. March 1805 brought a significant development for Napoleon, an assurance from the Austrians that they did not plan to make war on France.[12] Napoleon resolved to return to his scheme for the invasion of Britain, and drew up a new plan.[16]
The Trafalgar Campaign: The French plan[]
The fleet at Brest under Ganteaume was to embark 3,000 troops and sail to Ferrol, where he would chase away Calder's blockading squadron and unite with the French and Spanish forces in the port under Gourdon and Grandallana.[12] Having amassed a force of 33 ships of the line, six frigates and two storeships, they would sail to Martinique. Meanwhile, Villeneuve was to have embarked 3000 troops and sailed from Toulon. He would break out into the Atlantic, and having collected another seven ships of the line from Cádiz, he would sail to the rendezvous in the West Indies.[12][17] The three fleets—Ganteaume's 33 ships of the line; Missiessy's five ships of the line, if they were still in the area; and Villeneuve's 11 ships of the line—would unite and sail back across the Atlantic.[18] Sweeping away any resistance, they would then cover the invasion flotilla.[12]
Ganteaume blockaded[]
Ganteaume had got his fleet ready for sea by 24 March, but Brest was being closely blockaded by Vice-Admiral Cotton's 17 ships of the line.[19] Ganteaume had orders to avoid battle, and waited until conditions seemed favourable on 26 March, when a fog came down that would help him to slip past the British. But as he made his way out the weather changed suddenly, blowing away the fog and making it difficult to return to the anchorage. Temporarily trapped outside the port Ganteaume reluctantly prepared for battle as Cotton's force approached.[19] Cotton did not however risk an engagement with night closing, many shoals and with the enemy fleet under the guns of French shore batteries, and chose to merely observe and blockade Ganteaume. The following day the wind changed, allowing Ganteaume to return to port, where he spent the rest of the campaign.[19]
Villeneuve escapes[]
Villeneuve and his second in command, Rear-Admiral Pierre Dumanoir le Pelley, hurried to ready the Toulon-based fleet for departure. Nelson had been spotted near Barcelona and Villeneuve hoped that by sailing due south from Toulon and passing east of the Balearic Islands, he might avoid the patrolling British.[20] In reality Nelson was preparing a trap, and having allowed himself to be observed off the Spanish coast, had withdrawn to a position south of Sardinia, hoping that in attempting to avoid the supposed location of the British fleet, Villeneuve would sail straight into them.[21] Villeneuve put to sea on 30 March, observed by the British frigates Active and Phoebe, and as Nelson hoped, set course to sail between the Balearic Islands and Sardinia.[18][20] The frigates lost sight of the French fleet on 1 April, the same day that Villeneuve came across a Spanish merchant, and learnt that Nelson had been sighted off Sardinia.[21] Realising that he was sailing into an ambush, Villeneuve turned west, passing to the west of the Balearics.[21] With no visual contact with the French, Nelson was left in the dark as to their intentions.[20] Villeneuve pressed on to Cartagena, but did not dare wait for the Spanish ships there after they declined to join him until orders from Madrid arrived.[18] Instead he hurried on, passing through the Strait of Gibraltar on 8 April, observed by the British squadron under Sir John Orde.[20] From Cádiz Villeneuve collected the French 74-gun Aigle and set off across the Atlantic to the West Indies, followed by six Spanish ships of the line and a frigate under Federico Gravina.[18][20][21]
Nelson meanwhile had been alerted of the French departure, but having failed to make contact with them off Sardinia, was reduced to combing the area with his frigates for any news of them. After having finally determined that the entire force must have left the Mediterranean he himself beat through the straits, where he received confirmation on 8 May from one of Orde's ships that the French had sailed through the straits a month earlier, and had not headed north.[22] Convinced that Villeneuve was headed for the West Indies Nelson set off in pursuit.[22][23]
Villeneuve in the West Indies[]
Villeneuve arrived at Fort de France, Martinique on 14 May, and was joined over the next two days by the Spanish under Gravina.[22] Having resupplied, he settled in to await the arrival of Ganteaume, who unbeknownst to him was still sitting blockaded in Brest. Initially reluctant to undertake any large scale assaults on the British possessions in the Caribbean without orders, he was finally persuaded by the Governor of Martinique to attack the British held Diamond Rock after two weeks of sitting idle at anchor.[24] The small garrison surrendered on 2 June, by which time the frigate Didon had arrived with orders. Villeneuve was instructed to await the arrival of two extra ships under Rear-Admiral René Magon, and then spend a month attacking and capturing the British colonies in the West Indies.[b] He was then to sail his entire force back to Europe, join Ganteaume at Brest and cover the invasion flotilla.[24] The orders also noted that Nelson had sailed to Egypt in search of him. In fact Nelson was by now only two days away from Barbados, where he would anchor on 4 June.[24] Villeneuve gathered his forces and pressed northwards towards Antigua, but on 7 June he came across a lightly defended convoy of British merchants, and captured several of them the following day. From them he discovered that Nelson had arrived at Barbados. A shocked Villeneuve decided to break off operations and head north and east again, back to Europe.[24][25] The fleet got underway on 11 June, causing one of the army officers attached to the fleet, General Honoré Charles Reille to note
We have been masters of the sea for three weeks with a landing force of 7000 to 8000 men and have not been able to attack a single island.[24]
Nelson in the West Indies[]
Nelson had arrived at Barbados on 4 June, where he received fragmentary reports that the French had been seen a week earlier, sailing southwards.[23][26] Nelson set off in pursuit, but the information was wrong, Villeneuve and his fleet were north of Barbados and heading farther north with each day. A series of mistaken sightings, deliberate misinformation, and sheer coincidence kept Nelson heading south until 8 June, when more concrete information reached him that Villeneuve was north of his position, and heading towards Antigua.[25][26] He finally reached Antigua on 12 June, and learnt that Villeneuve had passed by the day before, headed for Europe.[27] Nelson left in pursuit on 13 June, anticipating that his quarry would make either for Cádiz, or would attempt to re-enter the Mediterranean. Villeneuve was in fact heading for Ferrol, and by hoping to catch them at sea before they could make port, Nelson set his course too far to the south and missed them.[26] He eventually arrived at Gibraltar on 19 July, after which he sailed his fleet to join the Channel Fleet under Cornwallis, before taking the Victory into [Portsmouth].[28][29]
Villeneuve intercepted[]
Nelson had sent despatches back to the Admiralty aboard the brig HMS Curieux. While sailing across the Atlantic Curieux had, on 19 June, spotted the combined Franco-Spanish fleet, sailing northwards from Antigua.[28] Curieux shadowed them, and determined that they were not heading for the Straits as Nelson had predicted, but were instead likely to arrive in the Bay of Biscay. The despatches and news of the latest sighting were rushed to Lord Barham at the Admiralty, who instructed a reinforced fleet under Vice-Admiral Robert Calder to attempt to intercept the combined fleet as it arrived off Cape Finisterre.[28] Calder duly received an extra five ships of the line under Rear-Admiral Charles Stirling and on 22 July the enemy fleet was sighted heading westwards towards Ferrol.[28]
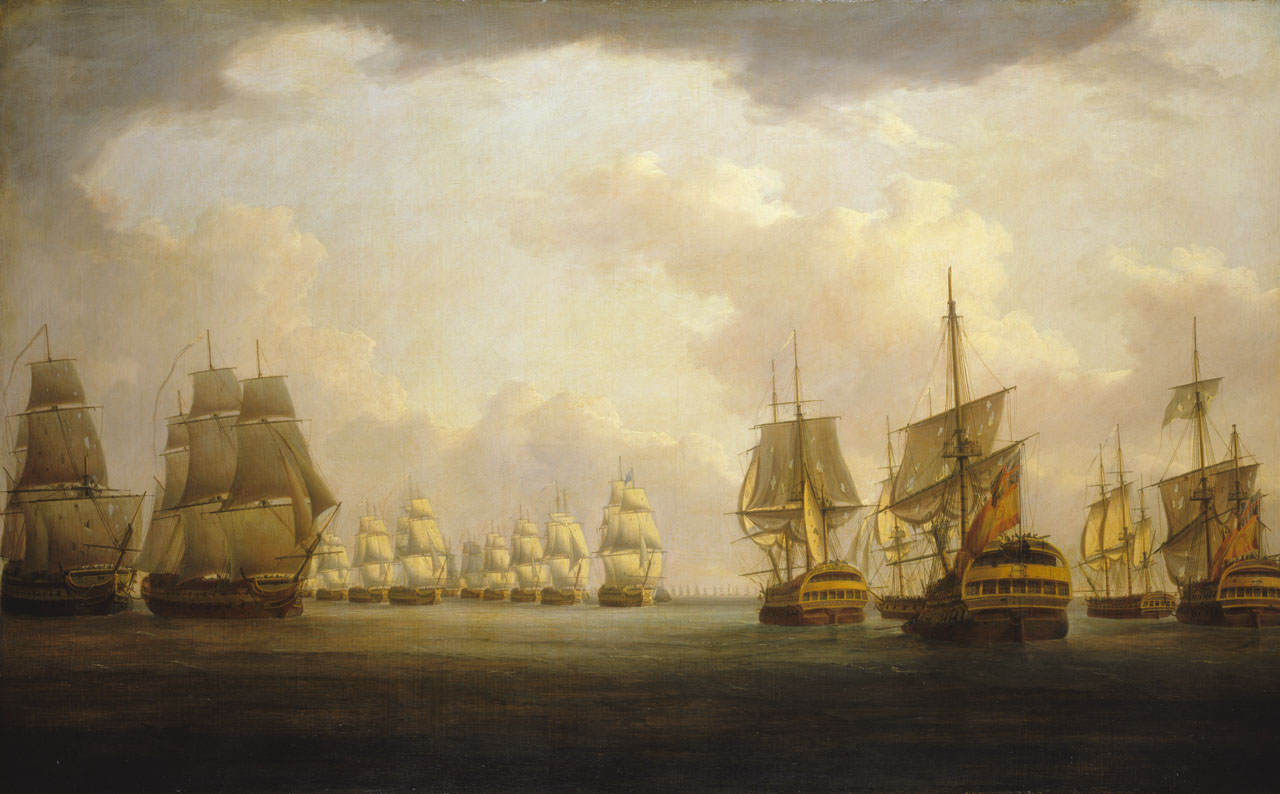

Admiral Sir Robert Calder's action off Cape Finisterre, 23 July 1805, by William Anderson
Calder then moved south to intercept, while Villeneuve assembled his force into the line of battle and began moving north. The two fleets moved slowly past each other, before Calder came about by tacking in succession and began to close on the enemy's rear.[30] The action eventually began when the frigate HMS Sirius, in the van of the British fleet, attempted to attack the French frigate Siréne, trailing in the rear. Fearing the British were attempting to cut off his rear, Villeneuve brought his fleet about and the Spanish van opened fire on the leading British ships at about 5.30 pm.[30] The action quickly became general, but in the failing light, mist and gunsmoke both fleets soon became scattered. By the time the action broke off at 9.30 pm, two Spanish ships had been isolated and captured.[c][31] Both fleets were still scattered the following day. They continued to observe each other, but neither made an attempt to resume the action, and despite more favourable winds on 24 July, Calder declined to give battle.[32] By 25 July the fleets had drifted out of sight of each other, at which point Villeneuve sailed south to Vigo, while Calder headed east.[d][33][34] Both admirals claimed a victory, with Villeneuve assuring Napoleon that he intended to sail north to rendezvous with Allemand's force from Rochefort, before heading to the Channel.[33]
On 10 August off Cape Finesterre HMS Phoenix under Captain Thomas Baker captured the French 40 gun frigate Didon. Didon was carrying despatches instructing Rear-Admiral Allemand's five ships of the line to unite with the combined Franco-Spanish fleet under Villeneuve.[35]
While sailing to Gibraltar with his prize in tow, Baker fell in with the 74-gun HMS Dragon on 14 August.[36] The following day the combined fleet under Villeneuve, heading for Brest and then on to Boulogne to escort the French invasion forces across the Channel sighted the three British ships. Villeneuve mistook the British ships for scouts from the Channel Fleet and fled south to Cadiz to avoid an action.[37] A furious Napoleon raged 'What a Navy! What an admiral! All those sacrifices for nought!'[33] Finisterre and Villeneuve's retreat became the decisive action of the campaign as far as the invasion of England went, for abandoning all hope of fulfilling his plans to secure control of the Channel Napoleon gathered the Armée d'Angleterre, now renamed the Grande Armée, and headed east to attack the Austrians in the Ulm Campaign.[33][38]
Battle of Trafalgar[]
Villeneuve's fleet underwent repairs in Cádiz, covered by a hastily assembled blockade of British warships, initially commanded by Rear-Admiral Cuthbert Collingwood, and from 27 September by Vice-Admiral Nelson, who had arrived from England to take command.[39][40] He spent the following weeks preparing and refining his tactics for the anticipated battle and dining with his captains to ensure they understood his intentions.[41] Nelson had devised a plan of attack that anticipated the allied fleet would form up in a traditional line of battle. Drawing on his own experience from the Nile and Copenhagen, and the examples of Duncan at Camperdown and Rodney at the Saintes, Nelson decided to split his fleet into squadrons rather than forming it into a similar line parallel to the enemy.[42] These squadrons would then cut the enemy's line in a number of places, allowing a pell-mell battle to develop in which the British ships could overwhelm and destroy parts of their opponents' formation, before the unengaged enemy ships could come to their aid.[42]
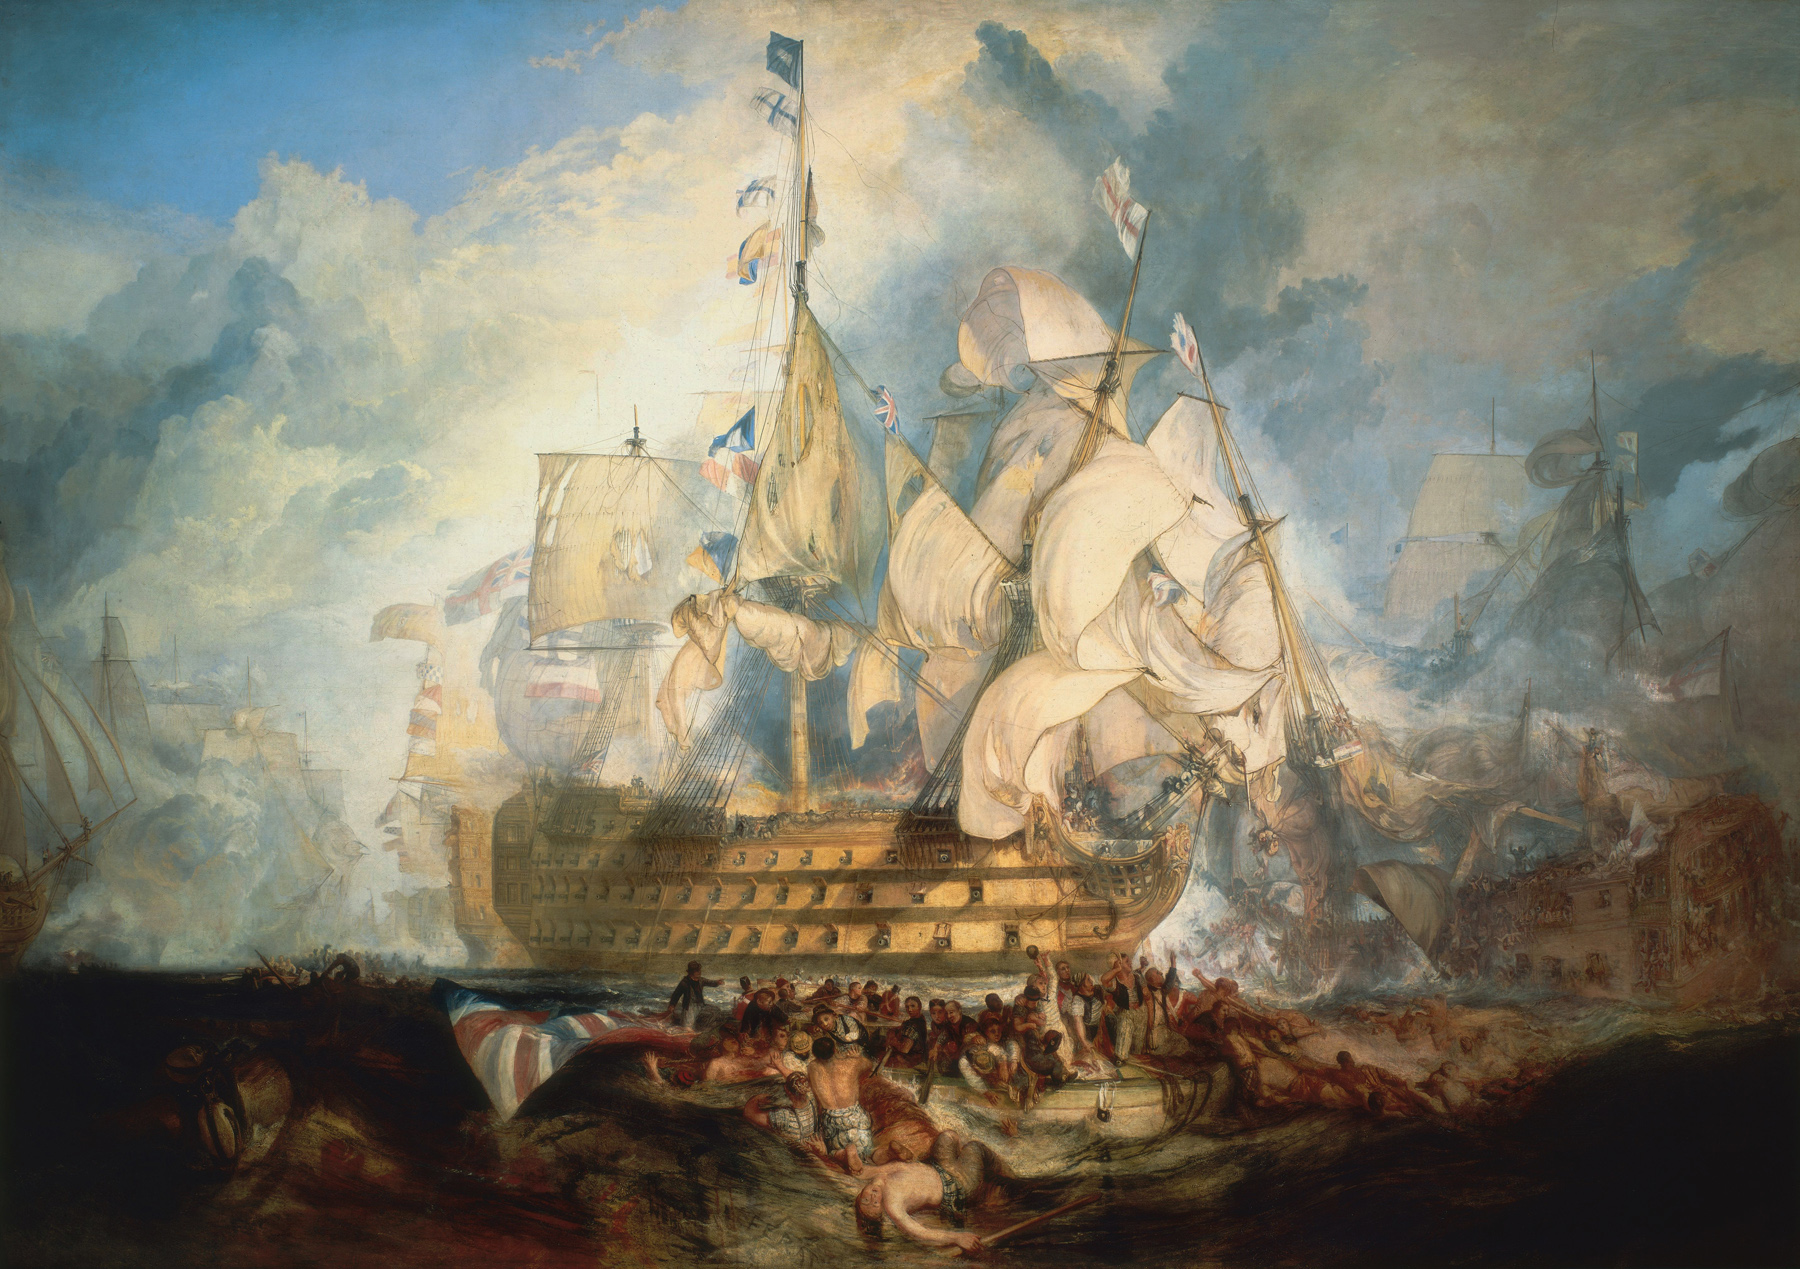

.jpg)
The Battle of Trafalgar by J. M. W. Turner (oil on canvas, 1822–1824) combines events from several moments during the battle
Napoleon, increasingly dissatisfied with Villeneuve's performance, ordered Vice-Admiral François Rosily to go to Cádiz and take command of the fleet, sail it into the Mediterranean to land troops at Naples, before making port at Toulon.[39] Villeneuve decided to sail the fleet out before his successor arrived.[39] On 20 October the fleet was sighted making its way out of harbour by patrolling British frigates, and Nelson was informed that they appeared to be headed to the west.[43] Nelson led his column of ships into battle aboard HMS Victory, and succeeded in cutting the line and causing the pell-mell battle he desired to break out. After several hours of fighting 17 French and Spanish ships had been captured and another destroyed, without the loss of a single British ship. Nelson was among the 449 British dead, having been mortally wounded by a French sharpshooter during the battle. Nine of the prizes were later scuttled or sunk in a storm that blew up the following day. A sortie led by some of the ships that managed to escape under Julien Cosmao managed to recapture the Spanish Santa Ana, but in doing so he lost three more of his ships, wrecked in the gale, while a fourth was captured by the British, but later wrecked.[e][44] The British fleet and the surviving French prizes put into Gibraltar over the next few days.
Cape Ortegal[]
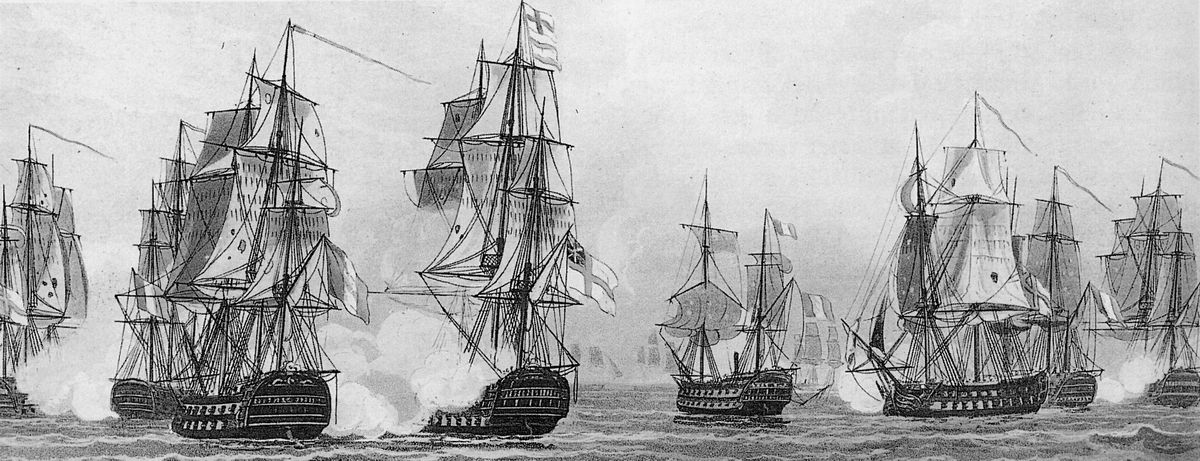

The Battle of Cape Ortegal by Thomas Whitcombe
Though the combined fleet had been decisively crushed at Trafalgar, the final action of the campaign was fought nearly a fortnight later, on 4 November.[45] Four French ships under Rear-Admiral Pierre Dumanoir le Pelley had escaped Trafalgar and headed north, hoping to reach Rochefort. On 2 November they came across the 36-gun frigate HMS Phoenix, some forty miles of Cape Ortegal.[46] They gave chase, but the Phoenix lured them towards a squadron of five ships of the line under Captain Sir Richard Strachan.[46] Strachan led his ships in pursuit, coming in range and opening the attack on 4 November, despite one of his ships of the line not being with the squadron.[47] Using his frigates to harass and wear down the enemy while avoiding their broadsides, Strachan used his larger ships to attack the enemy's rear and centre. He was eventually able to surround the French ships, and after four hours of close fighting all of the French ships were forced to surrender.[48]
Outcome and significance[]
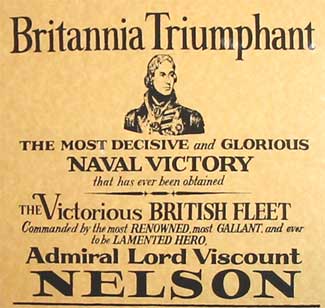

Detail from a modern reproduction of an 1805 poster commemorating the battle
By early November the combined fleet had been practically destroyed. Two ships of the line had been lost at Finisterre, twenty-one at Trafalgar and in the ensuing storm, and four at Cape Ortegal. No British ships had been lost in these engagements. Many of those that had survived in French or Spanish hands were badly damaged and would not be ready for service for some time. The British victory gave them unchallenged supremacy of the seas, securing British trade and sustaining the Empire.[49] The continued failure of Napoleon to marshal his navies as he did his armies meant that the invasion of England never occurred. Already postponed several times, Villeneuve's defeat at Finisterre and his final failure to link up with the Rochefort and Brest fleets caused Napoleon to abandon his plans in favour of a march eastward.[33] Trafalgar, with its 74 ships, became the last clash of its scale of the Napoleonic Wars; from then on the largest engagements were fought between no more than a dozen ships.[50] After 1805 the morale of the French navy was destroyed, while its continued blockade in port robbed it of efficiency and will.[51] While Napoleon returned to the possibility of an invasion some years later, it was never with the same focus or determination. The failure of his navy to fulfil its objectives left him disillusioned, while the timidity of its commanders and the determination of the British to resist them, both factors clearly expressed at various stages throughout the Trafalgar campaign, left the navy with a lack of purpose and direction.[51]
Notes[]
a. ^ Not of all of the ships saw action at any one time, or at all, but represent the strength of the main fleets positioned in European waters. Frigates and smaller vessels are not included.
b. ^ The ships arriving with Magon were the 74-gun Algésiras and Achille, carrying 850 soldiers between them.[24]
c. ^ Both were Spanish vessels, the 80-gun San Rafael and the 74-gun Firme.[30]
d. ^ Calder was court-martialled for his failure to 'do his utmost' to renew the engagement. He missed Trafalgar to attend, was found guilty and severely reprimanded. He never received another active command.[33]
e. ^ See Trafalgar order of battle and casualties for more details.
Citations[]
- ↑ Best. Trafalgar. p. 15.
- ↑ Best. Trafalgar. p. 35.
- ↑ Best. Trafalgar. p. 43.
- ↑ Best. Trafalgar. pp. 55–7.
- ↑ Coleman. Nelson: The Man and the Legend. p. 308.
- ↑ Oman. Nelson. p. 485.
- ↑ 7.0 7.1 7.2 7.3 7.4 7.5 Adkin. The Trafalgar Companion. p. 39.
- ↑ 8.00 8.01 8.02 8.03 8.04 8.05 8.06 8.07 8.08 8.09 8.10 8.11 8.12 8.13 8.14 8.15 8.16 Adkin. The Trafalgar Companion. p. 40.
- ↑ 9.0 9.1 9.2 Adkin. The Trafalgar Companion. p. 43.
- ↑ Mostert. The Line Upon the Wind. p. 455.
- ↑ Oman. Nelson. p. 487.
- ↑ 12.0 12.1 12.2 12.3 12.4 12.5 Adkin. The Trafalgar Companion. p. 44.
- ↑ Hibbert. Nelson, A Personal History. p. 336.
- ↑ Mostert. The Line Upon the Wind. p. 457.
- ↑ 15.0 15.1 15.2 15.3 15.4 Adkin. The Trafalgar Companion. p. 31.
- ↑ Lambert. Nelson: Britannia's God of War. p. 263.
- ↑ Bradford. Nelson: The Essential Hero. p. 316.
- ↑ 18.0 18.1 18.2 18.3 Mostert. The Line Upon the Wind. p. 458.
- ↑ 19.0 19.1 19.2 Adkin. The Trafalgar Companion. p. 45.
- ↑ 20.0 20.1 20.2 20.3 20.4 Adkin. The Trafalgar Companion. p. 47.
- ↑ 21.0 21.1 21.2 21.3 Lambert. Nelson: Britannia's God of War. p. 265.
- ↑ 22.0 22.1 22.2 Adkin. The Trafalgar Companion. p. 48.
- ↑ 23.0 23.1 Mostert. The Line Upon the Wind. p. 462.
- ↑ 24.0 24.1 24.2 24.3 24.4 24.5 Adkin. The Trafalgar Companion. p. 51.
- ↑ 25.0 25.1 Mostert. The Line Upon the Wind. p. 463.
- ↑ 26.0 26.1 26.2 Adkin. The Trafalgar Companion. p. 52.
- ↑ Coleman. Nelson: The Man and the Legend. p. 309.
- ↑ 28.0 28.1 28.2 28.3 Adkin. The Trafalgar Companion. p. 54.
- ↑ Mostert. The Line Upon the Wind. p. 468.
- ↑ 30.0 30.1 30.2 Adkin. The Trafalgar Companion. p. 55.
- ↑ Adkin. The Trafalgar Companion. p. 56.
- ↑ Mostert. The Line Upon the Wind. p. 466.
- ↑ 33.0 33.1 33.2 33.3 33.4 33.5 Adkin. The Trafalgar Companion. p. 57.
- ↑ Mostert. The Line Upon the Wind. p. 467.
- ↑ James. The Naval History of Great Britain. pp. 170.
- ↑ Tracy (2006), 20
- ↑ Mostert. The Line Upon the Wind. p. 470.
- ↑ Mostert. The Line Upon the Wind. p. 471.
- ↑ 39.0 39.1 39.2 Hibbert. Nelson, A Personal History. p. 362.
- ↑ Mostert. The Line Upon the Wind. p. 472.
- ↑ Hibbert. Nelson, A Personal History. p. 360.
- ↑ 42.0 42.1 Adkin. The Trafalgar Companion. p. 411.
- ↑ Hibbert. Nelson, A Personal History. p. 363.
- ↑ Adkin. The Trafalgar Companion. p. 528.
- ↑ Mostert. The Line Upon the Wind. p. 502.
- ↑ 46.0 46.1 Adkin. The Trafalgar Companion. p. 530.
- ↑ Adkin. The Trafalgar Companion. p. 531.
- ↑ Adkin. The Trafalgar Companion. p. 532.
- ↑ Clayton & Craig. Trafalgar. p. 372.
- ↑ Adkins. The War For All the Oceans. p. 171.
- ↑ 51.0 51.1 Mostert. The Line Upon the Wind. p. 515.
References[]
- Adkin, Mark (2007). The Trafalgar Companion: A Guide to History's Most Famous Sea Battle and the Life of Admiral Lord Nelson. London: Aurum Press. ISBN 978-1-84513-018-3. https://archive.org/details/trafalgarcompani0000adki.
- Best, Nicholas (2005). Trafalgar: The Untold Story of the Greatest Sea Battle in History. London: Phoenix. ISBN 0-7538-2095-1.
- Bradford, Ernle (2005). Nelson: The Essential Hero. Wordsworth Military Library. ISBN 1-84022-202-6.
- Clayton, Tim; Craig, Phil (2004). Trafalgar: The Men, The Battle, The Storm. London: Hodder. ISBN 0-340-83028-X. https://archive.org/details/trafalgarmenbatt0000clay.
- Coleman, Terry (2001). Nelson: The man and the legend. Bloomsbury. ISBN 0-7475-5900-7.
- Hibbert, Christopher (1994). Nelson A Personal History.. Basic Books. ISBN 0-201-40800-7.
- Lambert, Andrew (2004). Nelson – Britannia's God of War. London: Faber and Faber. ISBN 0-571-21222-0.
- Mostert, Noel (2008). The Line Upon a Wind: The Greatest War Fought At Sea Under Sail: 1793–1815. London: Vintage Books. ISBN 978-0-7126-0927-2.
- Oman, Carola (1987). Nelson. London: Hodder & Stoughton. ISBN 0-340-40672-0.
| Wikimedia Commons has media related to Trafalgar campaign. |
The original article can be found at Trafalgar campaign and the edit history here.